Thursday, September 17, 2009

Iterations and binding techniques

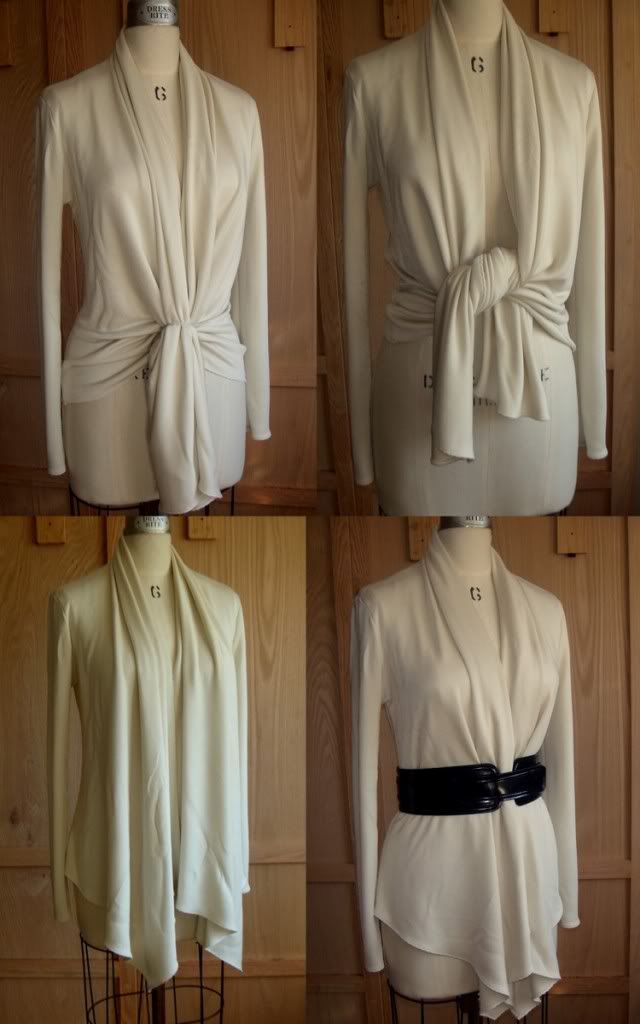
I made another DVF Julian a few weeks ago and already wore it to work, I was making this pattern for a friend of mine and while I had it out decided to cut one for myself. This fabric is a rayon/lycra print from Emma One Sock, my favorite fabric dealer, er, I mean supplier. :-)

Rayon/lycra 'leafy stalks' print in blue, black, and brown on cream


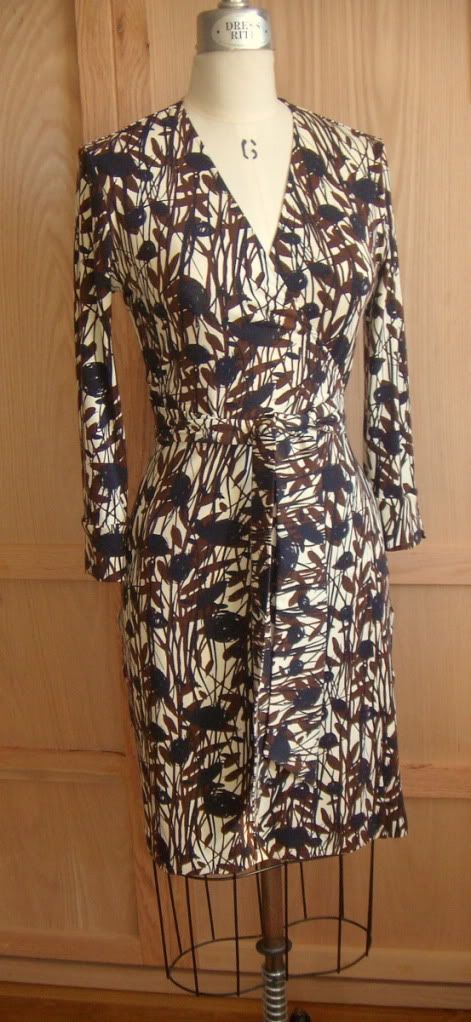
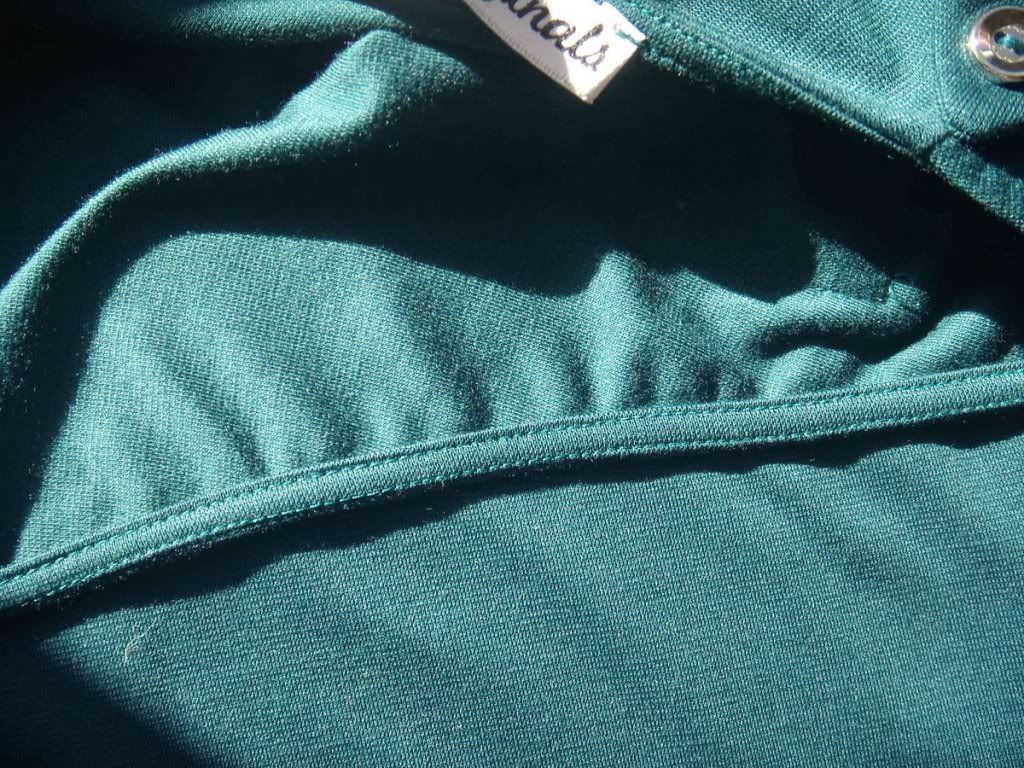
For this fabric I chose to finish the edges by serging 1/4" clear elastic to the neckline and front edges in one pass, then turning to the inside and topstitching. I use a special elasticator foot for my serger, which helps guide the elastic exactly on the seamline and has a tension screw to set how much I want the elastic stretched while it's being serged. Around the neckline I want enough stretch so the fabric puckers a bit when laying flat, when worn wrapped and tied it flattens out and prevents any gaping. When I get to the front edges of the skirt, I undo the tension on the elastic so it doesn't pucker.


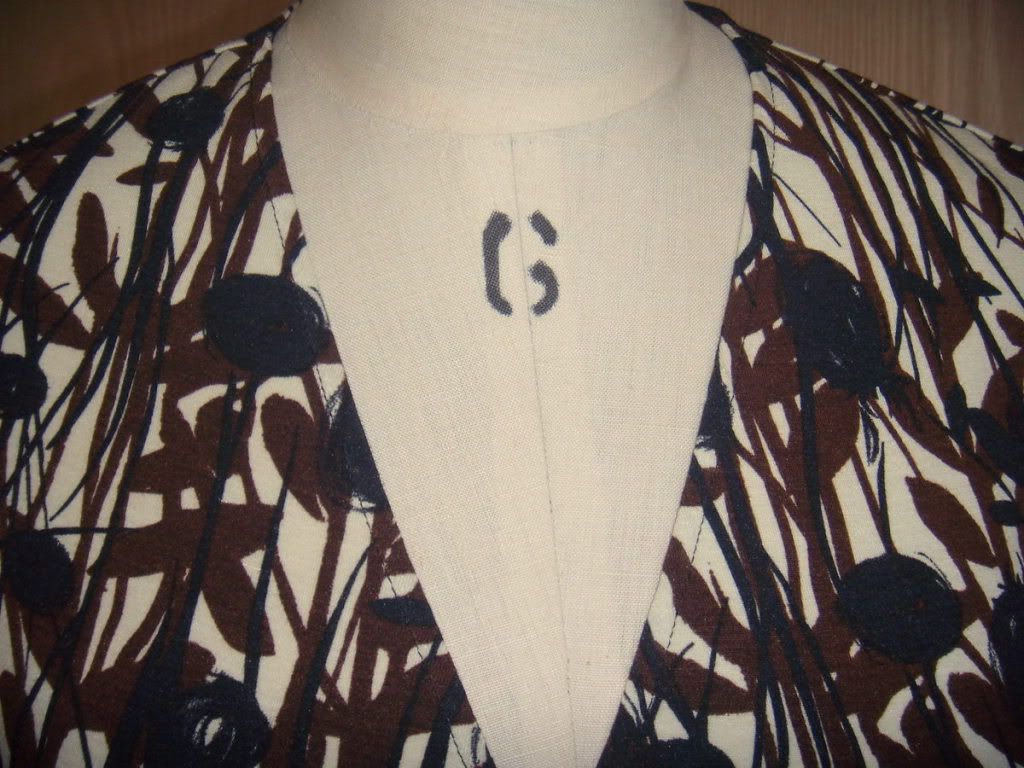
The serged elastic provides a nice edge for turning under, it's super easy to get a 1/4" fold.


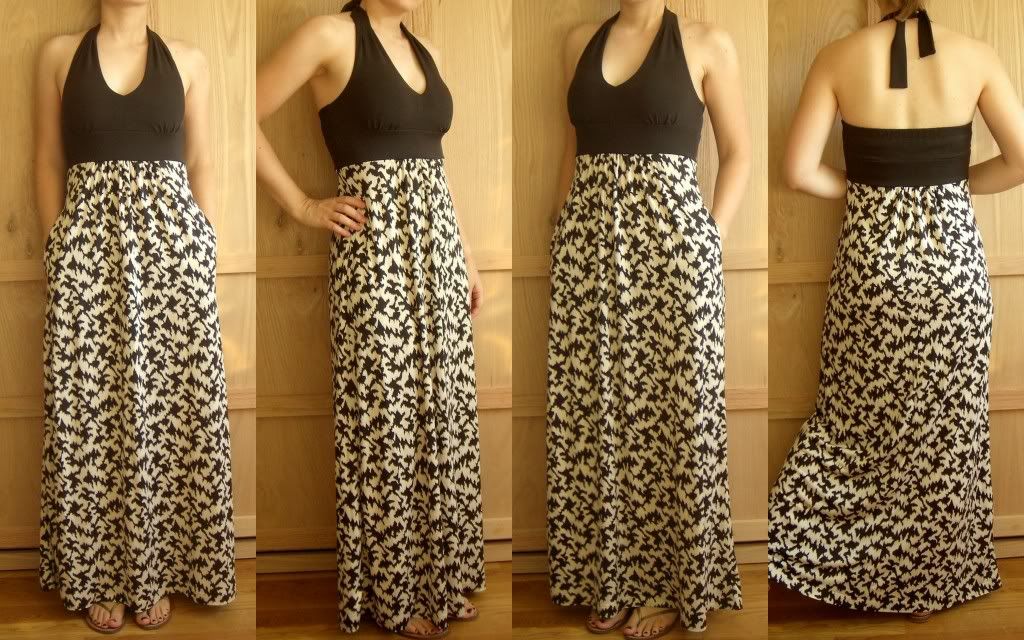
The dress I made for my friend is the same pattern, but I added some fun details: fake pockets, shoulder tabs, and buttons. Look familiar? She liked it so much I found some poly/rayon/lycra doubleknit that would look similar to the wool. She chose silver-tone metal buttons for hers.


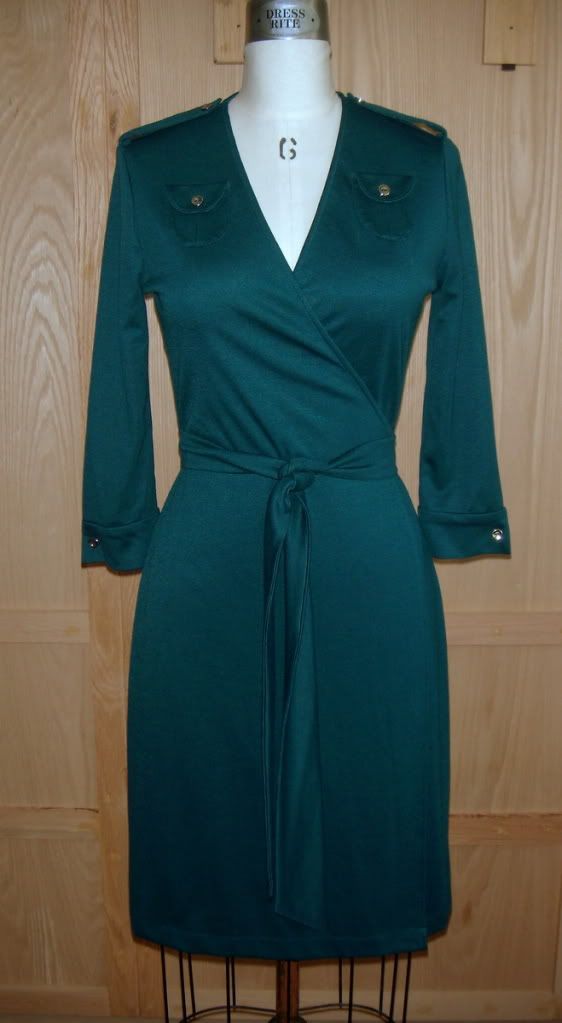
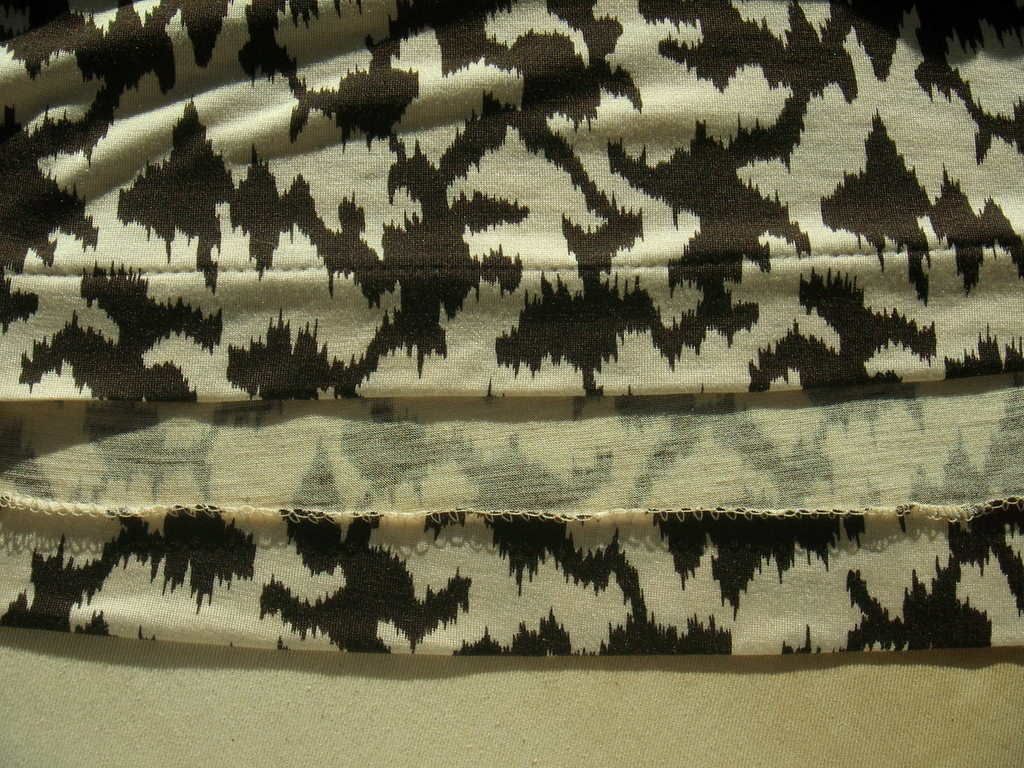
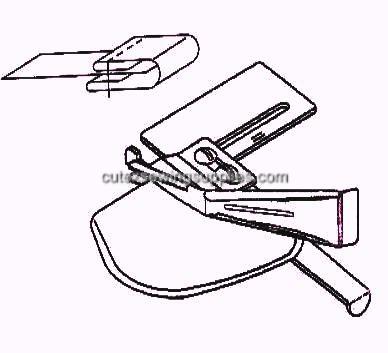
For this fabric, I chose to use double fold binding, as far as I can tell it's exactly what DVF uses to finish the edges of her dresses. It's the same thing as bias binding, except it's done with a clean finish double fold binder for an industrial machine, and you don't preform the fabric. The binder I have takes a 1" strip of fabric, and forms a 1/4" binding. It's designed for light-medium weight fabrics, so when this doubleknit passes through it stretches it a bit, which accomplishes the same thing as stretching the elastic. I use crossgrain strips of fabric, and on the first pass bind the raw edge. Then I turn the whole thing, so the binding is completely on the inside, and topstitch. This edge is very stable and durable.

Industrial binder, it wraps a strip of fabric around a raw edge, making a clean finish.


Lying flat, the front also looks slightly puckered, which is a good thing.


This binding also provides a nice edge for turning under, and I usually topstitch from the inside to make sure I'm catching the binding. Make sure your stitch looks nice from the wrong side though, you may have to loosen up the top tension to be sure the thread is pulled into the fabric.

Wednesday, September 16, 2009

Simplicity maxi dress

I'm still trying to get caught up with recent projects, this last weekend was quite productive so I'm starting there. :-) I've been wanting a maxi dress for at least 2 years now but never got around to buying/making one. After seeing Cidell's version of this Simplicity pattern (3503) I knew I had to make it up. I recently cleaned and reorganized my sewing room (need to take some pics of that too!) and went through all my fabric, and found a small piece of brown silk jersey, and a larger cut of a DVF brown/cream silk jersey print I bought at Britex in San Francisco with my sister that would be perfect for it.


I made the halter neck, long version, mostly in a size 8 but I had to make a lot of adjustments. I made a muslin first, and from that made the following:

-Narrowed the top back piece by 1/2" on each side (making it less than a size 6!)
-Narrowed the back band by the same amount
-Removed 3/4" from the bottom of the top back piece at the CB, tapering to nothing at the side seams
-Removed 1/2" from the back skirt at each side seam
-Narrowed the neckline and armholes by 1/8" on the lining pieces
-Added a top back lining, used wider elastic in the back and sewed a seam between the fabric and lining for a casing
-Raised the pockets by 1" (they were oddly low)
-Added bra cups inside the lining
-Darted the lining instead of gathering like the outer fabric
-Interfaced all the solid top pieces of brown silk jersey with pro-sheer elegance from Sew Exciting

I wasn't planning on fully interfacing the top, but after fusing a test piece I was loving the way it looked. It just made it look expensive. LOL

I made some changes to the construction order, in general I sewed all the front pieces together, then all the back pieces, and finally joined them at the side seams. This made it easier to adjust the side seams in one go if I needed to. Once I was happy with the top, I serged the skirt on following the instructions. I understitched the lining around the neckline and armholes to keep it from peeking out.


I didn't have enough brown silk jersey to do a self lining, and I also didn't have any thin foam bra cups in my stash. I solved both these problems by buying a clearance dress at Ross for $11, it was made of a decent quality poly and had bra cups in it. I cut it apart, and got almost a couple yards of fabric from the skirt, and some great bra cups. Sometimes the fabric store is not the only place to get supplies!

And finally, I have to thank DH for pinning the hem for me. I was having a hard time getting it just above the floor, so I talked him into helping me. I had to stand there for close to a half an hour, but boy is it even! He did a good job. :-) I did my usual not-so-blind hem finish on the serger.

Tuesday, September 15, 2009

Can you handle another Simplicity cardiwrap?

Jumping on the bandwagon, I decided to make a cardiwrap from some Carolina Herrera heavyweight viscose sweater knit I got from Emma One Sock. I bought this fabric back in February, with some type of wrap in mind so after seeing all the great versions lately (love Christina's!) I decided it was time to cut into it. This fabric is super drapey, medium-heavyweight, with a distinct knit stitch to it, and a nice sheen to the ivory color. I made a muslin from some thin rayon jersey first, and decided it would work with the weight of this fabric. What I didn't think about was the slippery-ness of it! It is so fluid and smooth when I throw it over my shoulder it falls right off. LOL Fortunately it will hold a knot, so I can tie it in the front or tie the two corners together and put it behind my neck (forgot to take a pic of that one). But my favorites for this fabric are definitely loose as is and with a belt.


I think this pattern (Simplicity 2603) is great for the overall stylelines, the shape of the front pieces and the gathered neckline are fantastic. However when I was comparing the sleeve and armhole shapes to my TNT self drafted patterns for my knit wrap dresses, the Simplicity pieces were terrible. The sleeve cap was way too short and had way too much ease. I prefer a higher cap with stable knits, I think it lays better. I used a size XS here because, surprise, Simplicity had an inch or so of ease in the bust for a KNIT pattern. I usually use negative ease for knits, and I wanted it to fit snugly, so I sized down. I completely scrapped their sleeve pattern, and traced my own armhole onto the Simplicity pieces. I had to add to the back neckline seam to get all the seamlines to match up, but the shoulder seams were already pretty close to the right length so it wasn't too hard. I also made a full-length sleeve, it hangs to about the top of my thumb. It's so much easier to take pics on the dressform, but my shoulders are actually a tad wider and it looks better with the arm filled out. This is view C, the shorter length front.


I had a hard time trying to figure out how to finish the raw edges, most people have been making this from jerseys that can be left raw as they don't fray. This fabric doesn't necessarily fray, but it does get a bit fuzzy looking, especially after being tied and stretched. I experimented with a bunch of finishes, including several on my serger. All of them were giving me a lettuce edge effect which I didn't want for this. Finally I tried a shell stitch on my sewing machine, and it looked great and had the elasticity and recovery I needed. I was practicing on scraps first, and was a little worried that it would look old-fashioned on the actual garment, but I just love how it looks.


I think it adds something very special to an amazing fabric and a great style. It was easy to do as well, I used my blind hem foot to help me turn under an accurate 1/4" of fabric as I went, no pressing involved. I did all the edges before putting it together, I would definitely recommend this as it's much easier to do before you construct the neckline. The hems can be done after you serge the side seams. I also set the sleeves in flat, and stitched in the ditch at the neckline to secure the neck piece and cover the elastic.


Oh and want a tip for using a decorative stitch, or any stitch really, on a hem? Before you try to stitch over those side seams, trim off a little bit of the seam allowance, fold it under and press with your iron, then take a hammer and pound it flat. Yes a hammer. I believe they sell 'sewing hammers' made of plastic, but I use a regular old hammer and it works just fine. You want to get the bulky side seam as flat as possible to make it easier for your machine to pass over the area, and believe me a hammer does a much better job than your iron. Try it. But watch your fingers. Not that I've ever whacked mine while trying to hold the fabric in place. :-) I forget where I heard this tip, but it was probably at Fashion Incubator. Thanks Kathleen.