Tuesday, June 23, 2009

An almost unfinished project and swayback

I started this dress last October, from some DVF wool doubleknit I purchased at Stonemountain and Daughter fabrics. I had just made a rayon knit version with fabric purchased during the same trip, and was fresh off a discussion on patternreview about swayback adjustments. One of the suggestions in the thread was this, and as I was quite excited about it at the time I modified my pattern and cut out my nice DVF fabric without even testing it in muslin.

This fix did not work for me. In the back of my mind I was wondering about forming diagonal wrinkles from the shoulder with this alteration but it seemed to work for the other ladies so I forged ahead. I still got fabric pooling in the small of my back, but I ended up with those wrinkles too. And on top of that, the original pattern I used was very plain, which looks great with print fabrics but was downright boring with a solid. I threw it into a pile for at least 3 months, tried it on again and decided it wasn't too bad to wear, and embellished it with some flap pockets, shoulder tabs, longer sleeves, and french cuffs. I wore it quite a bit during the last part of winter, and got a lot of compliments on it. 2 lessons here: always test out pattern alterations before cutting into your good fabric!; and don't be too hard on your 'wadders'. They are probably still better than RTW.

I really like the dress from the front, the pockets/tabs and cuffs help to wake up an otherwise plain dress, and the buttons were from a stash Cidell sent me. (Thank you!!) I didn't have patterns for these, I just constructed them from paper until I was happy with the sizes.


Here's what I don't like. The back of the print dress was pretty good, but there was definitely fabric pooling in the small of my back. The problem is too much length in the CB, not at the side seams. But with no CB or waistline seam, your options for removing it are kind of limited. The fix I tried above attempts to pull it up from the neckline, but as you can see it created diagonal wrinkles from the bottom of my armhole, in addition to not fixing the pool of fabric. I think I will go back to my old standby of darting the CB, laying it on the fold as best as you can, and taking a little out of the side seam. (Like what Marji was talking about in that thread on PR.)


But there's nothing wrong with using that belt to tuck some of the extra fabric under and wearing the heck out of it, right? :-)

Thursday, June 11, 2009

DVF surgery

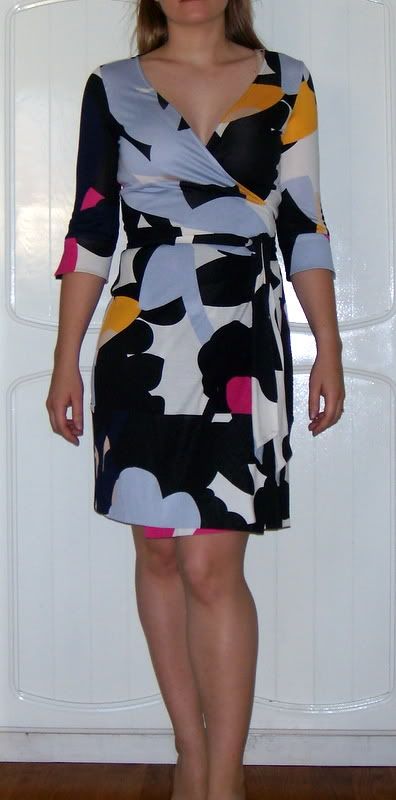
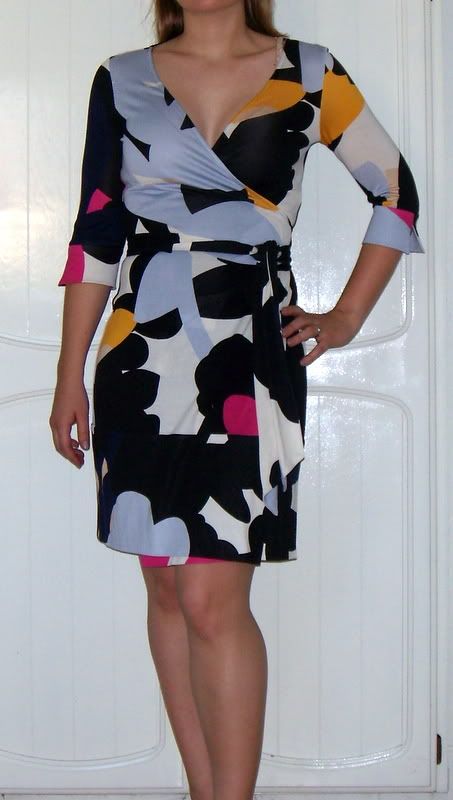
A friend of mine picked up this dress for me (thank you!!!) at the DVF sample sale last week in NYC, I've been dying to get a dress in this print but kept missing it when one would pop up on ebay, I think it's from Spring 08. I hadn't seen it made up into this style before, I think it was unique to the sample sale. I'm not crazy about bell sleeves, so I decided to turn them into a more traditional DVF style, 3/4 sleeves with a vented cuff.

I already had a pattern for the cuff from my other knockoffs, so it was just a matter of cutting off the bell, narrowing the end of the sleeve, making the cuff, and attaching it.


Before, DVF Greer in Spring Shadows print

After!


In taking apart the bell sleeve, I did discover the method used to attach it, so I thought I'd share that in case it's helpful. The bell is faced on the inside as well, up to where it attaches to the sleeve. The very end of the sleeve is understitched, and there is a 1" section along the vertical seam on the inside that is handstitched closed. They also used 1/4" clear elastic in both horizontal seams, the end of the sleeve and the top.

Here are the pieces:

Outer bell piece (roughly in a trapezoid shape, long edge is the bottom of the bell)
Inner bell piece (same)
clear elastic for top and bottom seams

Steps: (Sleeve is already attached to the dress and vertical seam serged)

  • Stitch vertical seam of outer bell piece
  • Stitch vertical seam of inner bell piece, leaving 1" in the middle open
  • Baste clear elastic to one of the pieces at the top and the bottom of the bell (I definitely saw basting stitches in addition to the serging, but I'm not sure which piece it was on, I don't think it matters)
  • Stitch the inner and outer pieces together at the bottom of the bell, right sides together
  • Understitch
  • Baste the outer bell piece to the sleeve, right sides together
  • Turn the sleeve right side out, it should look almost done except the inside bell piece hasn't been attached to the bottom of the sleeve.
  • Now reach through the 1" opening you left in the vertical seam of the inner piece, and pull out the sleeve/outer bell piece (basted together), and the top of the inner bell piece that is unattached.
  • You need to stitch the inner bell piece to the sleeve/outer bell seam, but you'll have to sew in a circle and readjust the piece as you work, you can't expose the whole seam at once. For a really good tutorial/pictures on how to line this up see Kathleen Fasanella's blog post. This is the same thing you do when bagging the lining in a jacket.
  • Stuff the seam back through the hole, and press.
  • Slipstich the 1" opening closed and you're done!