Wednesday, December 14, 2011

A gown for a Vegas wedding

My husband and I were lucky enough (or unlucky, you choose) to be invited to 4 weddings this year, and every dress I wore was made by me, although that wasn't my intention.  Vegas in November was the last of them, and I was all set to go store bought for this one.  The only request was that it be floor-length.  I ordered a great dress online (navy one-shoulder with beading and a slit), it came and fit perfectly except for the length.  And the value.  

It was polyester jersey with a poly lining, no inner structure at all except for clear elastic applied to the neckline.  And $270.  No no no no no.  I just couldn't do it.  I had about 3 weeks to either hem it or come up with plan B.  So I ordered fabric swatches from Emma One Sock of this high-tech stretch matte crepe that was touted as a cross between 4-ply silk crepe and matte jersey.  They of course arrived in about 2 days, and I loved the color of the navy.  I could tell even from the swatch that it wasn't as drapey as the poly jersey, or even true matte jersey, but decided to work with it anyways.  More on that later.

I made a copy of the original dress, using a combination of laying the pieces flat over butcher paper and tracing, and measuring seam lengths and hem/strap width.  Since the dress is gathered along one side, it's pretty tricky, but I think I was able to get really close.  Paying attention to the grain will tell you how much you need to spread the pattern on the side to get the same amount of gathering.  It was the same front and back, if you can believe that.  I know, I tried it on both ways and it fit the same.

Yes I returned the dress.  Within a week's time, and it was no worse for the wear.  If you have a problem with this stop reading, obviously my moral compass is not the same as yours.  I don't plan to make a habit of this, or do anything else with the pattern.

The fabric was very substantial on it's own, so even though the original dress had a full poly lining (it seemed really flimsy to me, but actually did the job under the nicer poly jersey), I only used a partial lining to the waist.  For the beading, I found this gorgeous trim at Shine Trim's website.  I actually much prefer this to the one color seed beads sewn to the original dress, and I made mine go down all the way to the top of the slit.  Having it stop at the hip looked off to me.

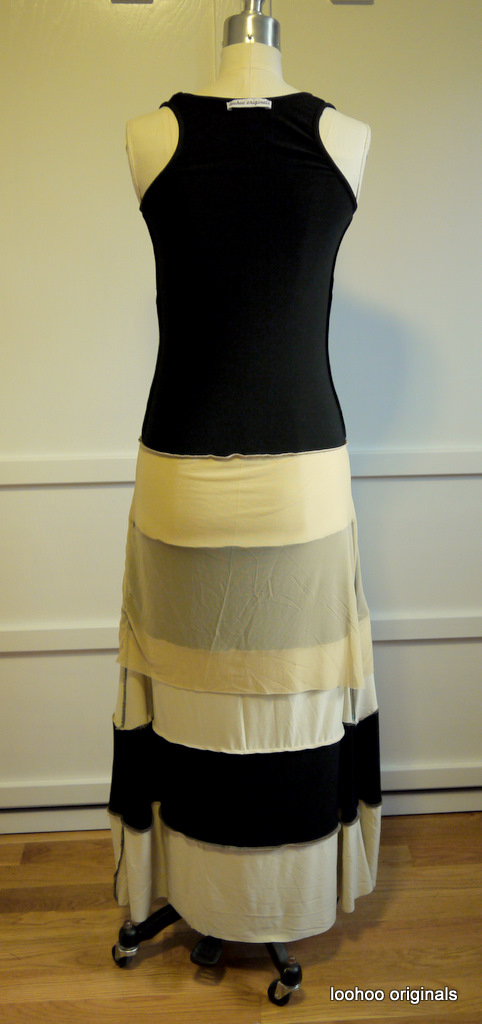
My copy, and the original

When the fabric arrived from EOS, I was able to give it a better stretch test, and it had much less than the jersey.  Gathers also lay very different with drapey vs firm-bodied fabric.  Not necessarily a bad thing, but any time you change out one fabric for another with the same pattern, even just the color, the results can be unpredictable.  I think I added 2-3 inches to the pattern around the body to account for the decrease in stretch, and an inch in the bodice for the lack of drape.  I was in a time crunch so I did not make a muslin.  (GASP!  THE HORROR!) (I never do this, especially not with a brand new pattern).

Either my skills have increased or I got really lucky (probably both), because the fit was really good right off the bat.  I couldn't even try it on until I had most of it together anyways.  I ended up taking it in around the hip level and below, although the pattern of the jersey dress was straight down from the hip, on the body it curves in more due to the fabric drape.  Since mine didn't have the same drape (not that it was stiff at all, it just wasn't drapey jersey), I had to create that look by taking in the side seams.
Inside of dress showing neckline and lining
 

Inside of dress showing lining and armhole
 
My invisible zip came out great the first try, although I did make sure to interface the opening, and there's not much that isn't easier on an industrial machine with the right foot.  ( You haven't lived until you've inserted a zip with a real metal invisible zip foot instead of those flimsy plastic ones they usually sell for this purpose). 

Closeup of beading, and seam with invisible zipper

I applied the beading last, handstitching it down over the gathered side seam.  I finished the seams on my serger, and also serged a blind-stitched hem.  The fabric behaved beautifully on both the industrial straight stitch and the serger.

 Hem


I got a lot of compliments on the dress, and spent about $130 total on the materials.  The fabric is so much nicer than the original dress, it feels substantial and has a lot less sheen.  The gathers don't lay as flat as the jersey though, and if the fabric were any stiffer I don't think they would have worked at all.  But I'm happy I was able to anticipate the differences and make allowances for them.

Original dress


My Copy


Monday, May 16, 2011

Karina Grimaldi maxi dress knockoff

I've been drooling over this Karina Grimaldi maxi dress on shopbop for awhile now, and finally decided to do something about it over the weekend.   Here is the description from shopbop.com's website.
This scoop-neck jersey maxi dress features a racer back and a striped skirt. Unfinished hem. 1.5" straps.

* 56" long, measured from shoulder.
* Fabrication: Jersey.
* 100% modal.
* Hand wash or dry clean.
* Made in the USA.


I started with my favorite tank top pattern, and changed the back to more of a racerback style.  I lowered the neckline as well.  For the skirt part I cut wide crosswise strips, then serged them together to make panels for the front and back.  The only tricky part was figuring out how wide to make them, I really liked the proportions on the model but seeing as I'm not 5'10" I wasn't sure it would work.  I tried to guess how long the skirt portion would be, divided that by 5, and came up with 7.2" based on my height.  I cut the strips 8" wide (including seam allowances), making them wider at the bottom.  I measured another maxi dress of mine to see how wide the bottom needed to be (~35"), and just made the strips narrower as I went up until it matched my hip measurement.   Once I had the front and back skirt panels, I pinned them together and serged straight a-line side seams, cutting off all the excess.  Even with good planning, I still had to make adjustments as I went along so it would hang parallel to the floor, pinning it to the tank top until I liked how it looked.
8" wide strips serged together
 I used 11oz rayon/lycra jersey from Emma One Sock.  Whenever I need a good quality knit I head straight for Linda's website.  I know her fabrics are always excellent quality and when I spend the time to sew something I don't want to run into pilly knits or poor recovery.  Not to mention the time saved not having to look all over the place for the right fabric.  I got a yard of the almond and 1.5 yards of the black, and had enough leftover for probably a tank top from each.  ~$50 in fabric, versus $196 for the RTW dress.  In addition I added a power mesh lining to the top part of the skirt, the 11oz weight isn't see through but in a light color it needs something.


Inside out: power mesh half lining

I did my usual neckline/armhole finishing using my right angle binder, I took some photos right after binding this time so you can see what it looks like before being turning to the inside and topstitched.  Depending on how much the strips get stretched when applying the binding, the fabric may look pretty puckered, but it usually turns out okay once it's on the body.  I always do a test run to see if the fabric will behave in the binder, some fabrics are just too thick or stretchy for it.


Top:  after binding  Bottom:  after topstitching binding to inside


 This is what the top of the dress looks like laying down, not too hot, right?  But when worn everything stretches out flat and those openings are nice and stable.


I spent about 8 hrs total on this, which would have been way faster with a full pattern but I do like the flexibility of the tweaking process.   Having a dressform to work on is a huge help when trying to picture proportions and lengths. 


Posted by Picasa

Monday, May 9, 2011

Yes I am a silk snob

I tried on this henley tank in Target the other day and loved the shape, but not the fabric.  It was polyester and already clinging to me in the dressing room.  Fortunately I've got a nice stash of silk prints, including this Cynthia Steffe print from Emma One Sock a few years ago.

I used some old poly to drape the shape on my dressform, cutting and pinning until I was happy with the neckline, armholes, and width.  Then I took it apart, traced the pieces onto butcher paper with my tracing wheel, and balanced the pattern so both sides would match.  I added seam and hem allowances and the pattern was ready to go.


I used my favorite neckline/armhole binding technique, applied with my industrial right angle double-fold clean finish binder, then turned to the inside and topstitched.  I chose not to staystitch the armholes, but ended up handling the fabric more than I usually do so I got some stretching in that area.  It's not horrible but usually this binding technique lies perfectly flat or even hugs the body, and it's standing away a bit in the armholes.   Lesson #1:  Always stabilize bias areas shortly after cutting to preserve the shape.

I used this method to make the neckline placket, I had used it before on the sleeves of one of DH's shirts and found it simple.  Not quite as accurate as I'd like, and I had issues with the dimensions given for the strip.  (I used a 2 inch strip to begin with).  One of these days I need to try two-piece plackets.  Also, I only used interfacing on 1/2 the strip, I was worried about making the placket too stiff in this lightweight silk.  However this wasn't enough stabilization, the buttonholes distorted the strip a bit.  I used the lightest weight interfacing I had, and it probably would have been fine interfacing the whole strip.  Lesson #2:  Always stabilize openings.


I used an industrial wire hemmer attachment to turn the 3/16" hem, I haven't perfected my technique with it yet but it's passable and so much faster than any other method that I just keep trying to do better each time.   

  Even with the issues listed, I still love the tank and will get a lot of use out of it this summer.  It's a great shape and length to go with skinny pants and jeans.

Here is the construction order (all done on Juki industrial straight stitch):
  1. French seam one shoulder seam.
  2. Bind sewn armhole and neckline. (right angle binder)
  3. French seam other shoulder seam. (on Janome machine to avoid taking binder off Juki)
  4. Bind other armhole
  5. French seam side seams.
  6. Hem (3/6" wire hemmer)
  7. Turn in and press neckline/armhole binding, topstitch.
  8. Mark and cut slit for placket
  9. Sew placket strip to opening, press into shape and topstich.
  10. Buttonholes (Janome)
  11. Buttons (Janome)