This project was starting to turn into the 'coat that didn't want to be finished'. I spent weeks looking for buttons, and when I finally tried to put them on 2 weeks ago my machine wouldn't make the buttonhole on the pocket flaps. It kept getting hung up on all the fabric where the flap attaches to the coat. I must have ripped out 15 tries between the two sides. Yes I did make a lot of samples, even trying to duplicate the layers, but the only time it wouldn't work was on the actual coat. I'm lucky I didn't wreck them in the process, this is some tough fabric!
After scouring the internet for help, I decided to bid on a vintage singer buttonholer on ebay. This one comes with 20 templates for making regular, keyhole, and bound buttonholes, plus an eyelet. It uses the zig zag stitch on your machine but moves the fabric around for you, and it had no problem with the pocket buttonhole. It doesn't look quite as nice as my Janome's keyholes, but it worked the first time. It might be an adjustment issue, but I couldn't seem to make the stitch length short enough to get a dense stitch and going around the template 3 times didn't give the same look. There's a lot of settings to play with, so I'm looking forward to seeing what other styles I can make. I used the eyelet template already on the belt buckle.
You can see my previous work on the trench coat here. I didn't make any fitting changes in the real thing, although I made a few style decisions. I added another row of buttons at the bottom, after wearing it around for a week I thought it needed them. However I must have forgotton to sew on one of the bottom buttons, I had placed it with wonder tape to get the position right and it seems to have fallen off before my photo shoot! I added some more topstitching in places, and I didn't care for the button flap that closes the collar stand. On real Burberry coats there is a metal hook, I may do that.
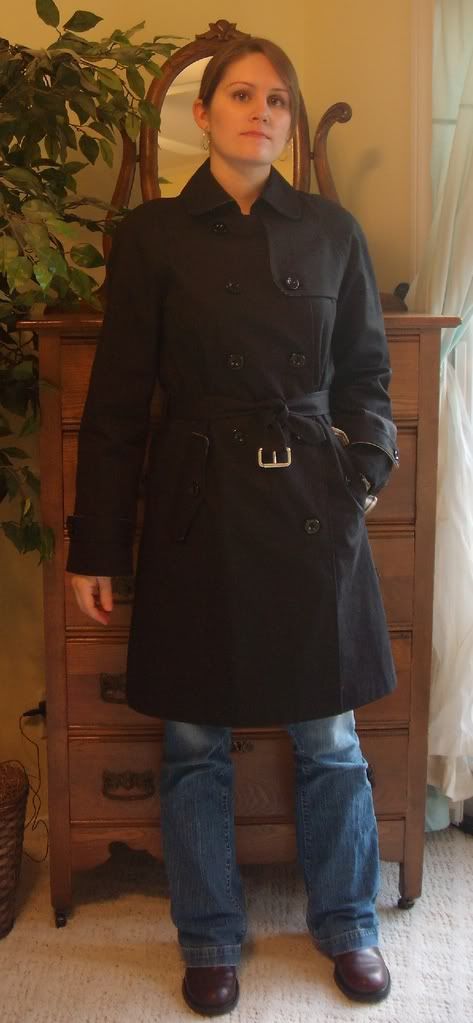
I've got the belt tied right now, I need to add eyelets and I can't decide if I want silver metal or black stitched.
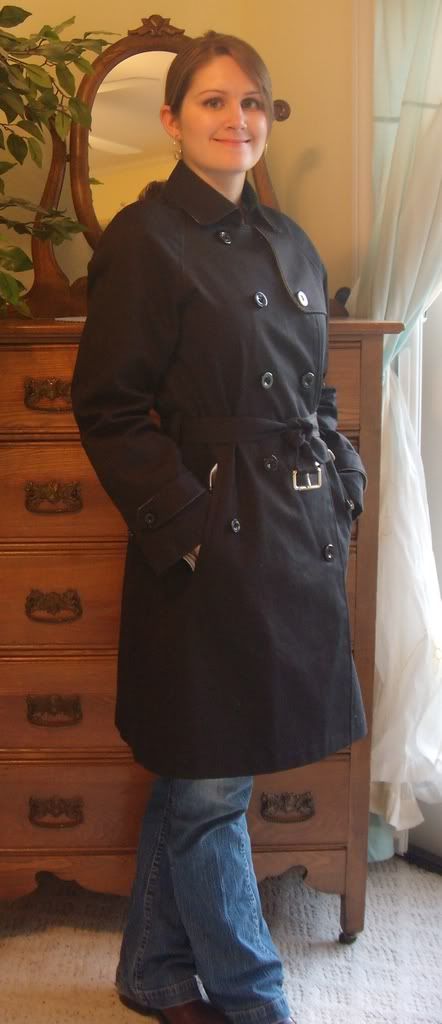
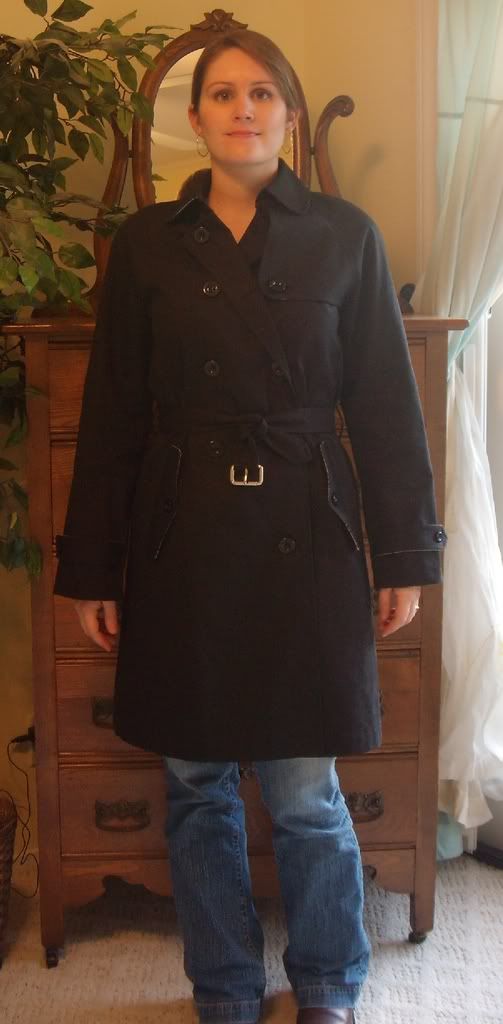


This was a looooong project but I love the results. I know I will have this coat for years and I'm glad I spent the time on all the little details. This was wonderful fabric to work with and now I'm wishing I had some in tan!
0 comments:
Post a Comment