Monday, March 23, 2009

Weekend sewing update

I'm getting a little behind on posting finished projects, my sewing space has officially moved out of the kitchen and into the spare bedroom. The ability to leave my mess untouched during the week when I'm away has improved my ability to jump right back in again on the weekend, leaving less time for blogging! I have a long table now with my sewing machine and serger, the iron/board right next to that, and my dear husband has a cutting table in the works for me. I think he really just wants exclusive use of the dining table for food-related purposes. Either way, yay for dedicated sewing infrastructure!

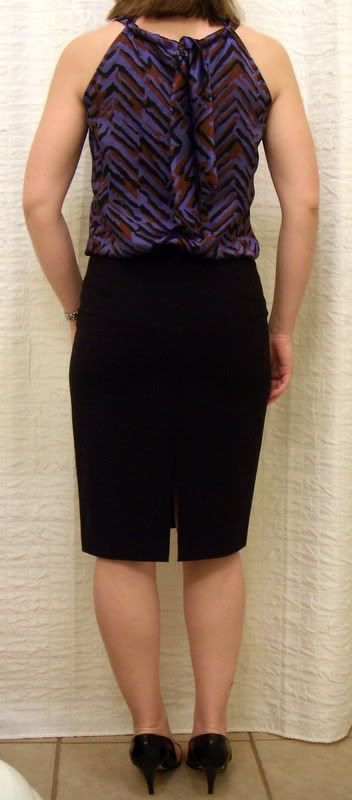
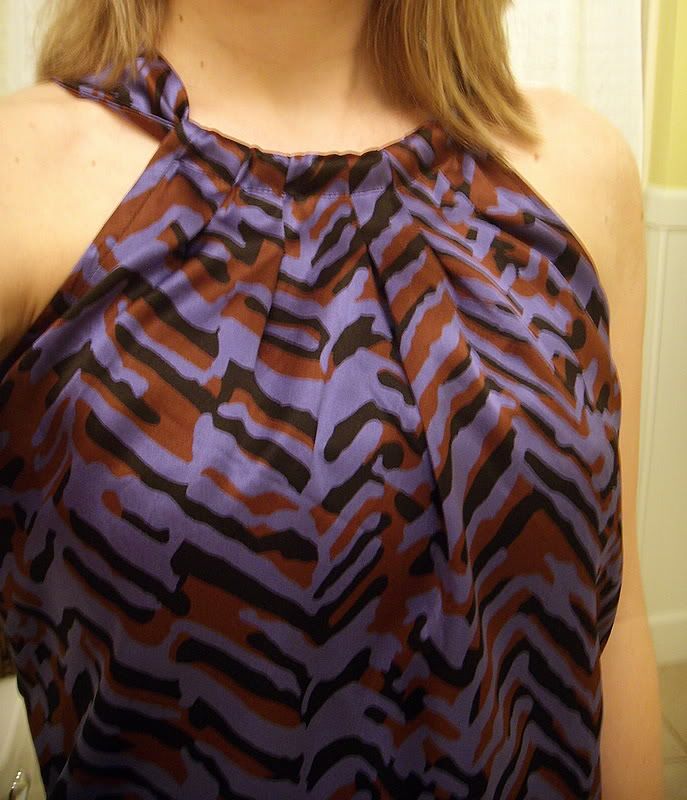
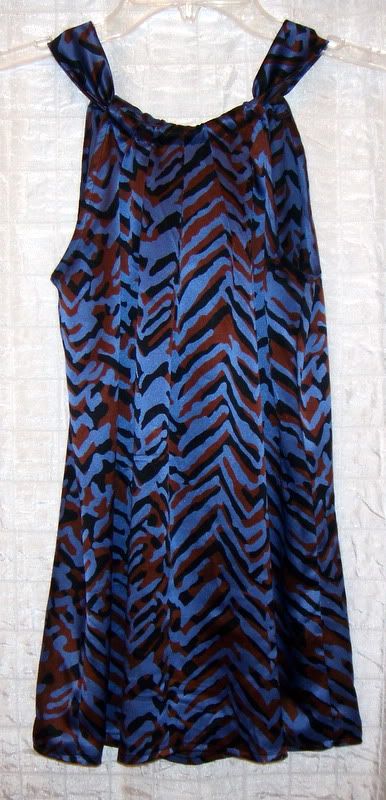
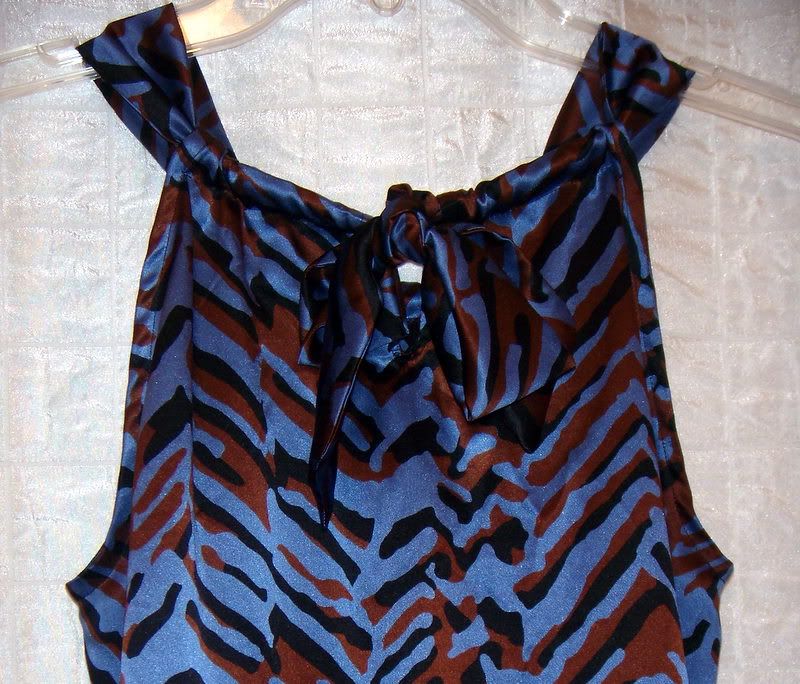
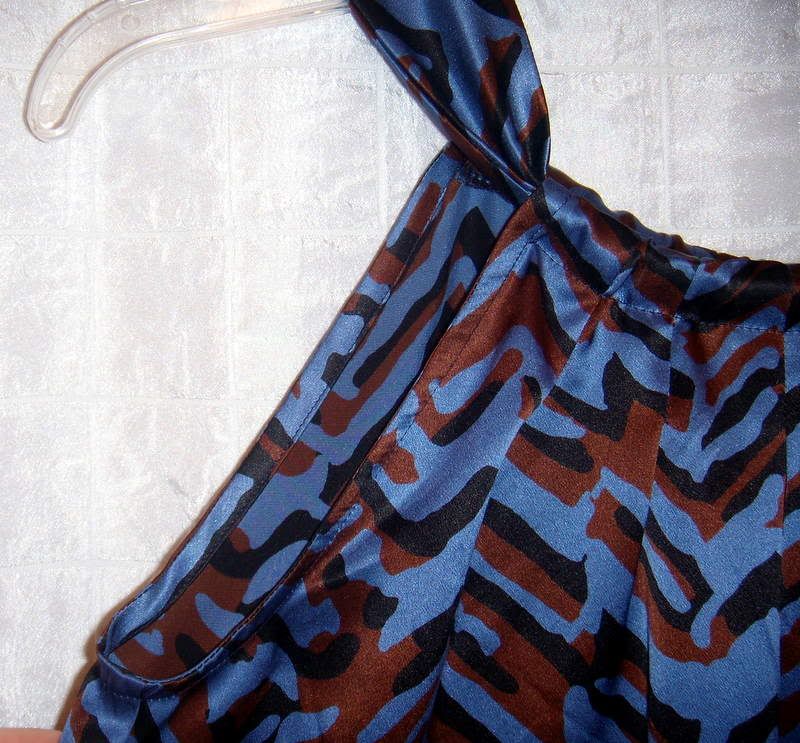
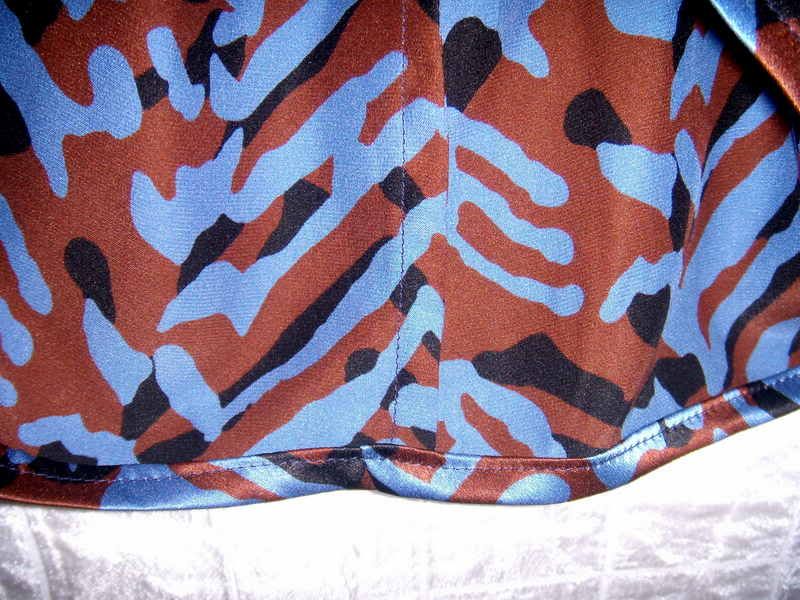
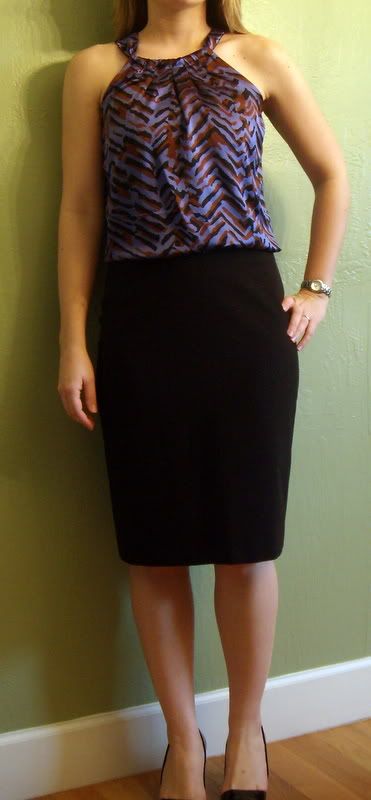
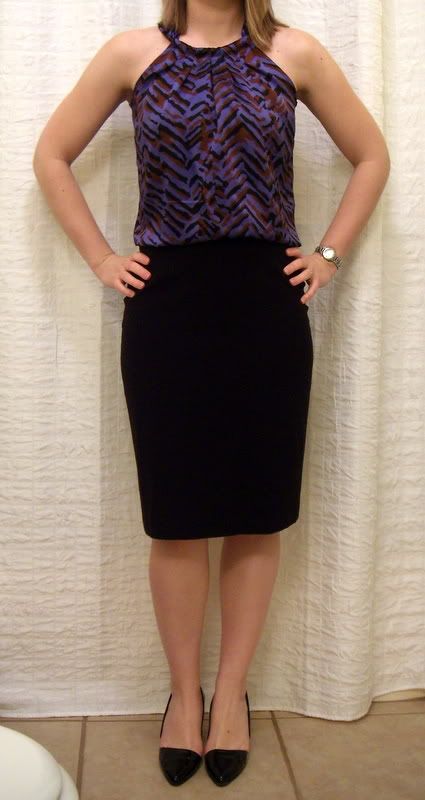
I bought some of this silk charmeuse a few weeks ago without a pattern in mind, but when I saw this J.Crew halter top I knew I had to knock it off. I used this kwik sew pattern as a quick jumping-off point, and one muslin later it was ready. I already want more of these, and potentially a dress length too.


It's a halter style with a pleated front and a keyhole back, long ties form the straps and knot/tie in the back. You can adjust the neckline with the ties, or place the knot to the side if you want. Used french seams for the side seams, and self-fabric narrow bias binding turned to the inside for the armholes. The neckline is just turned and stitched down to form a casing for the tie. I made this one kind of long for tucking into low rise pants and jeans, but it would work in a shorter length untucked or much longer for a dress even.


I'm thinking of making one of these in a dress length from that Milly silk I found at Hancock's! What do you think?

Tuesday, March 10, 2009

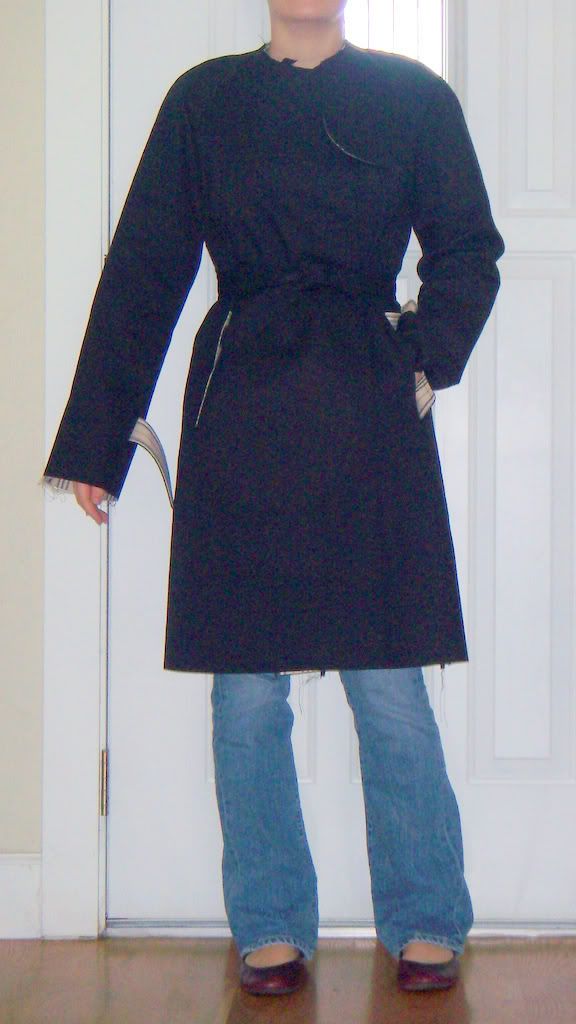
Trench coat DONE

This project was starting to turn into the 'coat that didn't want to be finished'. I spent weeks looking for buttons, and when I finally tried to put them on 2 weeks ago my machine wouldn't make the buttonhole on the pocket flaps. It kept getting hung up on all the fabric where the flap attaches to the coat. I must have ripped out 15 tries between the two sides. Yes I did make a lot of samples, even trying to duplicate the layers, but the only time it wouldn't work was on the actual coat. I'm lucky I didn't wreck them in the process, this is some tough fabric!

After scouring the internet for help, I decided to bid on a vintage singer buttonholer on ebay. This one comes with 20 templates for making regular, keyhole, and bound buttonholes, plus an eyelet. It uses the zig zag stitch on your machine but moves the fabric around for you, and it had no problem with the pocket buttonhole. It doesn't look quite as nice as my Janome's keyholes, but it worked the first time. It might be an adjustment issue, but I couldn't seem to make the stitch length short enough to get a dense stitch and going around the template 3 times didn't give the same look. There's a lot of settings to play with, so I'm looking forward to seeing what other styles I can make. I used the eyelet template already on the belt buckle.

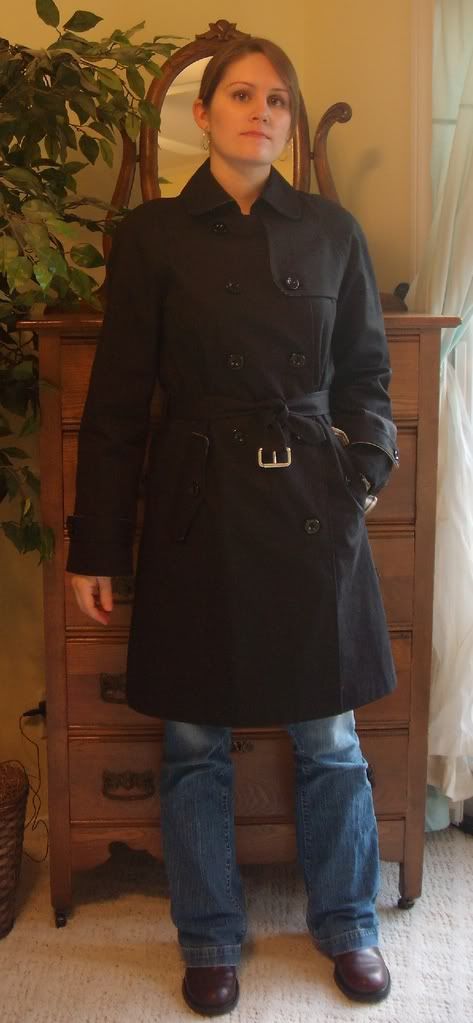
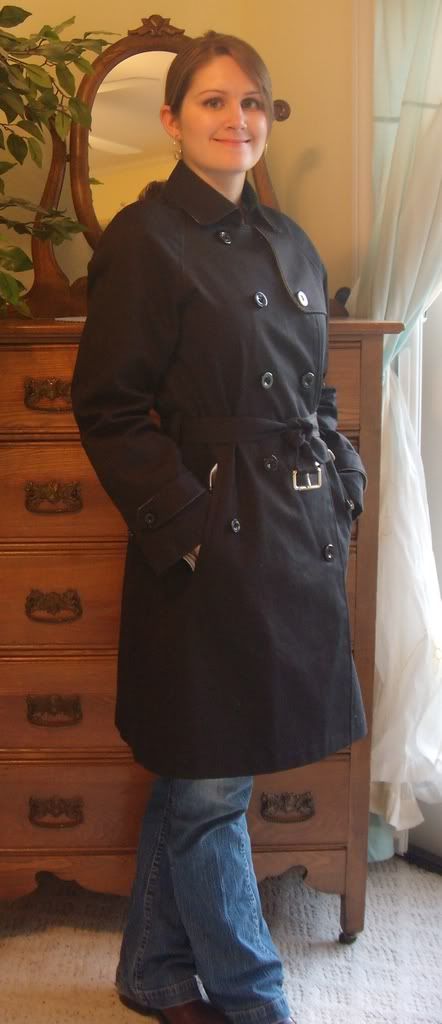
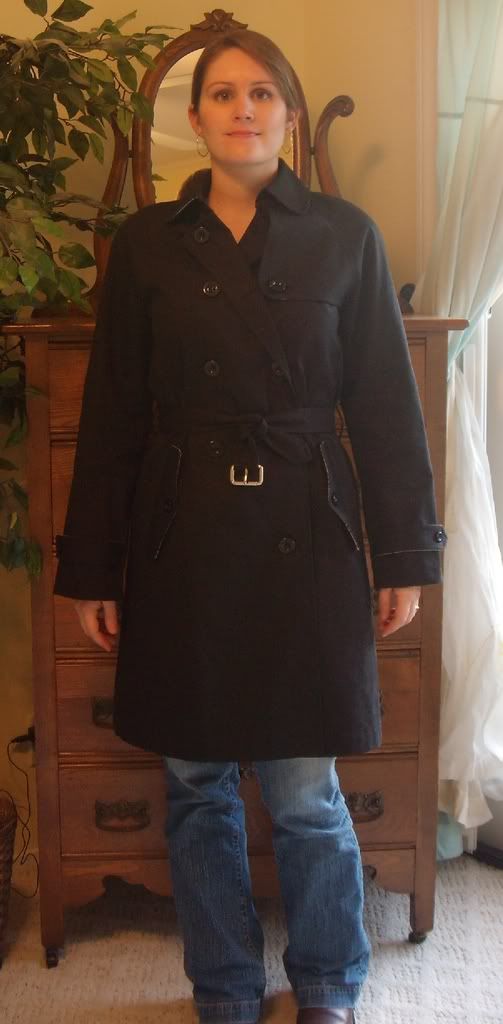
You can see my previous work on the trench coat here. I didn't make any fitting changes in the real thing, although I made a few style decisions. I added another row of buttons at the bottom, after wearing it around for a week I thought it needed them. However I must have forgotton to sew on one of the bottom buttons, I had placed it with wonder tape to get the position right and it seems to have fallen off before my photo shoot! I added some more topstitching in places, and I didn't care for the button flap that closes the collar stand. On real Burberry coats there is a metal hook, I may do that.


All buttoned up, I placed a flatter button under the chest flap on top instead of making another buttonhole through the flap. There are 2 buttons on the inside facing.


I've got the belt tied right now, I need to add eyelets and I can't decide if I want silver metal or black stitched.


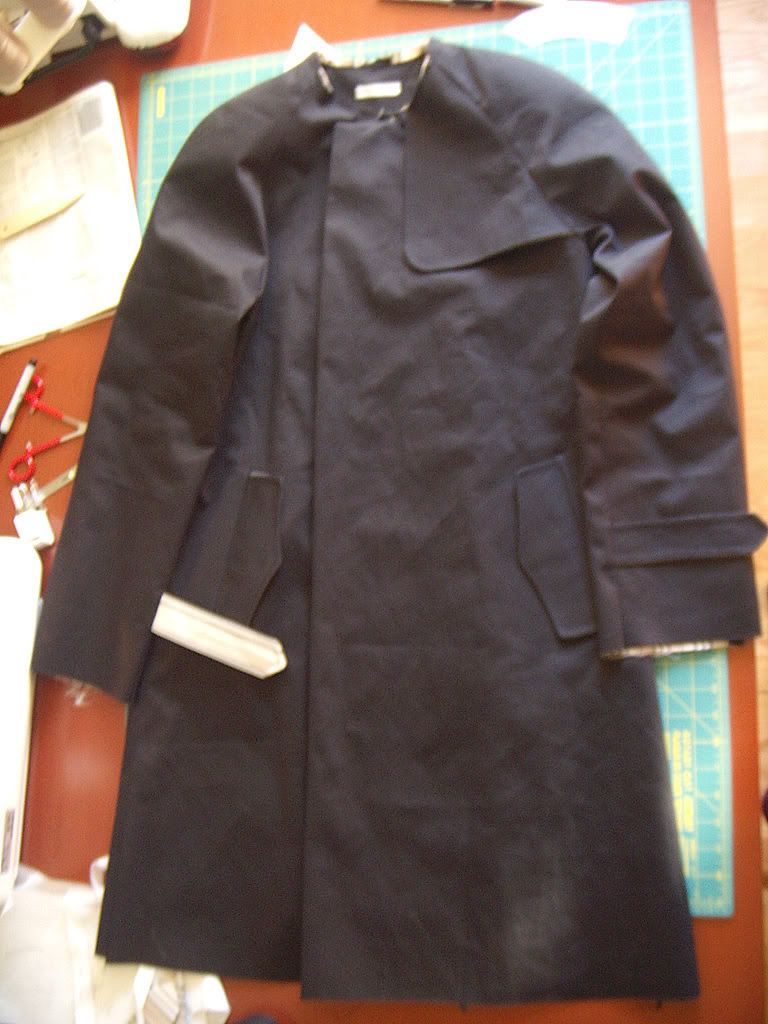
The top buttons also work nicely to hold the flaps back.

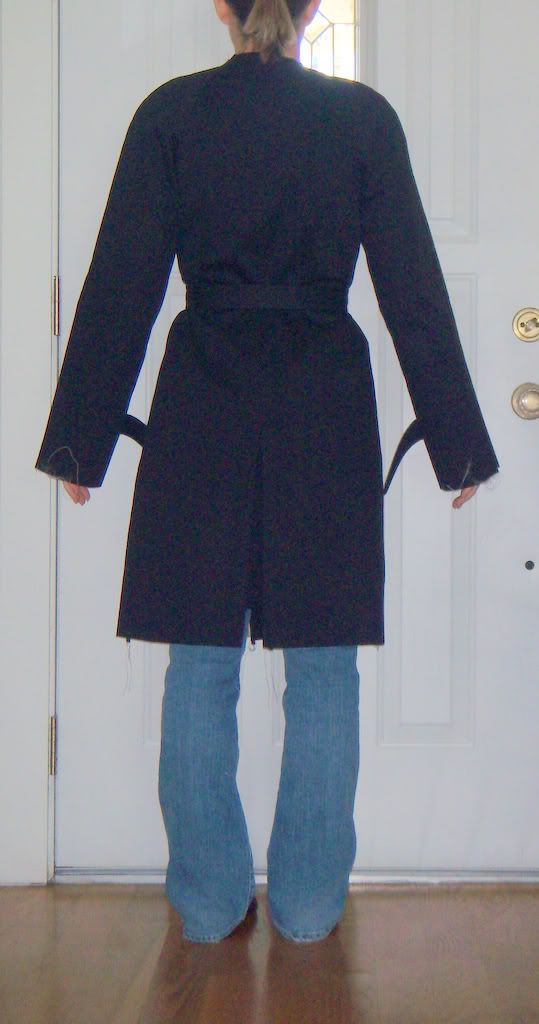
I love the back vent on this one, it's not a slit so there's no drafts!

My 'flasher' pic.


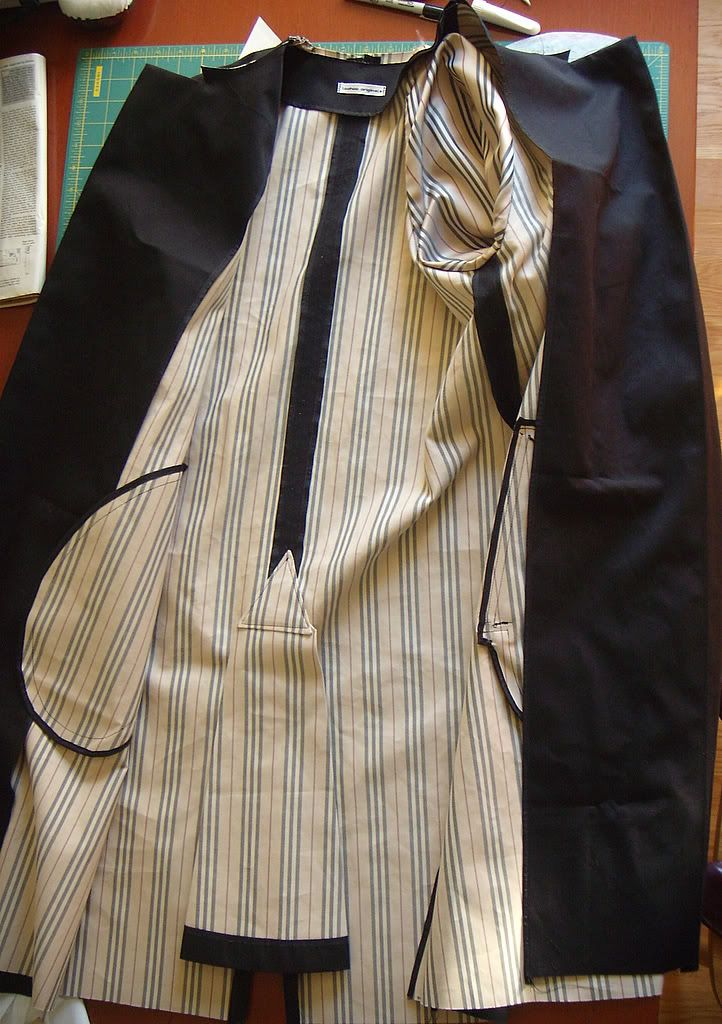
I put a hanging chain in the back, sewn on with black grosgrain ribbon in the collar seam. There are raglan shoulder pads, covered by acetate lining in the sleeves only, set by hand. (Twice! I forgot to topstich the sleeves the first time.) All the seams and hems are bound with rayon seam binding. I also bar tacked the pocket bags to the facing, now they stay put instead of flopping around.


I added 1/4" topstitching to the facings, but I wasn't sure how to end it at the neckline until I looked at some photos. All the real Burberry coats turn 90 degrees where the collar joins the collar stand so that's what I did.


I wore it around for a week already, pardon the wrinkles! I added topstiching to the facing in between the armhole seams. This holds it well enough even though the facing is free in the armhole area.

I used the striped side on the underside of the pocket flaps, the collar, the chest flap, and the sleeve tabs. I didn't think of it until afterwards, but I may have preferred ivory thread in the bobbin.


This was a looooong project but I love the results. I know I will have this coat for years and I'm glad I spent the time on all the little details. This was wonderful fabric to work with and now I'm wishing I had some in tan!

Thursday, March 5, 2009

The last seam ripper you'll ever buy

Maybe Gingher doesn't know how many seam rippers I go through because that's a pretty tall claim. I'm not sure if this is a new product or not but I hadn't run across it before. It's 6 inches long and has a retractable blade.

From Gingher's website:

Gingher's seam ripper features a razor edged cutting blade that safely retracts when not in use. The handle is ergonomically balanced to provide the user with fine cutting control in numerous positions. This tool is beautifully finished with chrome over nickel and comes in its own storage box. With proper use and care, the blade should last a lifetime and is covered by Gingher's guarantee.


It runs about $25 from several stores online and there are a few on ebay too. I've probably spent at least that much on cheapy plastic ones, and I toss them pretty regularly because there's not much I hate more than a dull seam ripper.

Monday, February 16, 2009

Kreativ Blogger

It's a good thing this award is called 'Kreativ' and not 'Frequent' or I'd never get it. Thanks to Ann Smith and Sewuptight for nominating me, sorry it took so long for me to acknowledge the honor!

**************************

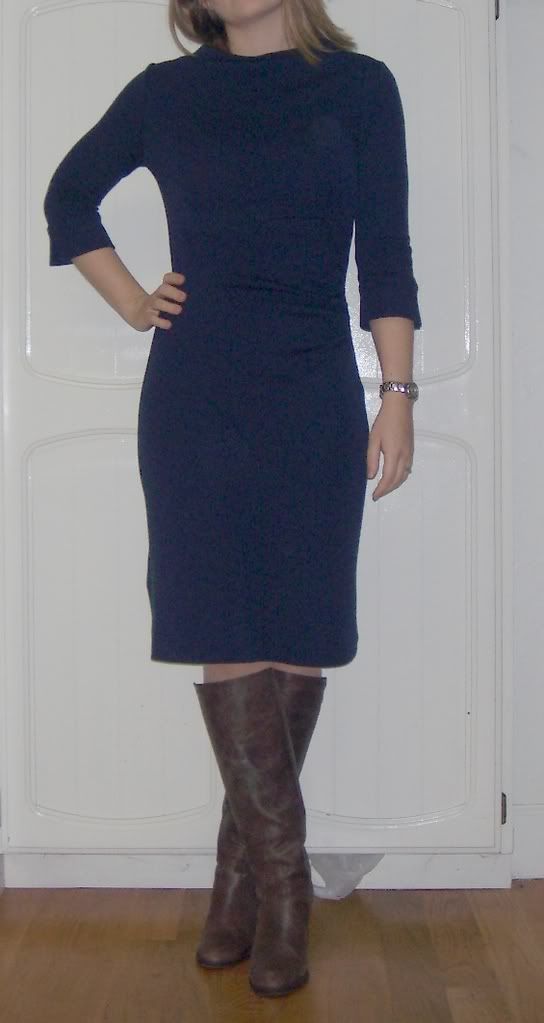
I finally finished up my sewing for hire projects a couple weeks ago and breathed a huge sigh of relief. I made 17 dresses in January, and 5 more in November/December from the same design, in 4 different sizes and 4 colors. I ended up customizing almost all of them, either different hem lengths or morphed sizes. Everyone has been thrilled with them so far, but I'm a little sewed out and my shoulder/elbow is still recovering from all the pressing! But I somehow managed to eek out one for myself after I finished all of them, this is the navy color. The fabric is organic merino interlock from Near Sea Naturals.


The dress has a stand up collar, split cuffs, and side waist ruching. Pretty simple to put together, but the effect is flattering, even if I do say so myself. :-)

********************************

I have been searching for buttons for my Burberry trench coat for weeks, and finally lucked out at Joann's (!) yesterday. On Saturday I made a trip to Stonemountain Fabrics in Berkeley CA, and didn't like anything they had, even from an entire wall of buttons. There were some packaged Dill buttons I liked, but they didn't have enough of them. The Joann's I stopped at had just restocked, and I found these thick, shiny, glossy 4 hole La Modes in 3 sizes and bought them right away. I managed to get the collar attached, with hanging chain, and start on the hems.


I made some practice buttonholes, and decided I like the keyhole style on my machine. I'm having a hard time figuring out where the buttons go though, I thought trenches were supposed to button right over left or left over right? The BWOF instructions only call for buttonholes on the right side, not the left. And it calls for 2 'inside buttons', whatever that means. I'm going to have to take a look at a real trench to figure it out. I'm still looking for a belt buckle, but I think I found some nice leather ones here. My local cobbler can put eyelets in for me.

Tuesday, January 6, 2009

Trench coat in progress

I've been putting off attempting a coat, just thinking about the time and effort required was too daunting. However I own exactly one 'nice' coat, a 3/4 length J. Crew wool one, and my closet has been crying out for another one. Not that it gets too chilly here, but I do prefer the longer length in the winter time. The Burberry fabric I bought from Michael's fabrics about a year ago has been calling to me from my stash ever since, and with the almost two weeks I had off around Christmas and New Years I managed to choose a trench pattern, make a muslin, adjust it for fit, and construct most of the coat.

I was looking at two Patrones patterns, and this BWOF from 1/2008. I decided to go with the BWOF due to the raglan sleeves, the fabric is a thick two-sided cotton, and I didn't think set-in sleeves would ease very well.


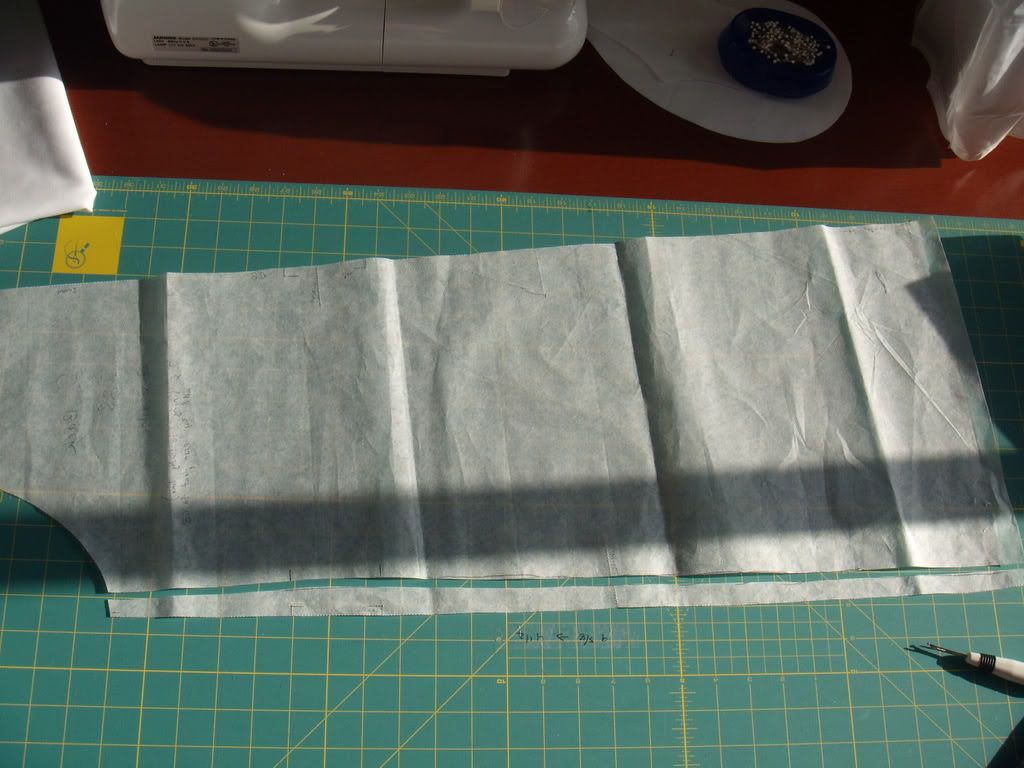
The line drawing is accurate in my opinion, it is very a-line without the belt and was too voluminous for my liking. With the belt it bunched up too much around my waist even in muslin, so I decided some of the width had to go. However everything else seemed to fit perfectly, the shoulders, bust, collar, and lengths. I thought the arms were a bit wide so I decreased there as well, but overall this was not much tweaking by my usual standards. And there was no gaping or seams not matching up like I usually deal with when using the Big 4. Very refreshing. I traced a 38, without adding seam allowances. I marked the seams on my fabric with chalk and added allowances before cutting. This made it easy to mark the seams at corners and other areas that tend to get mixed up.


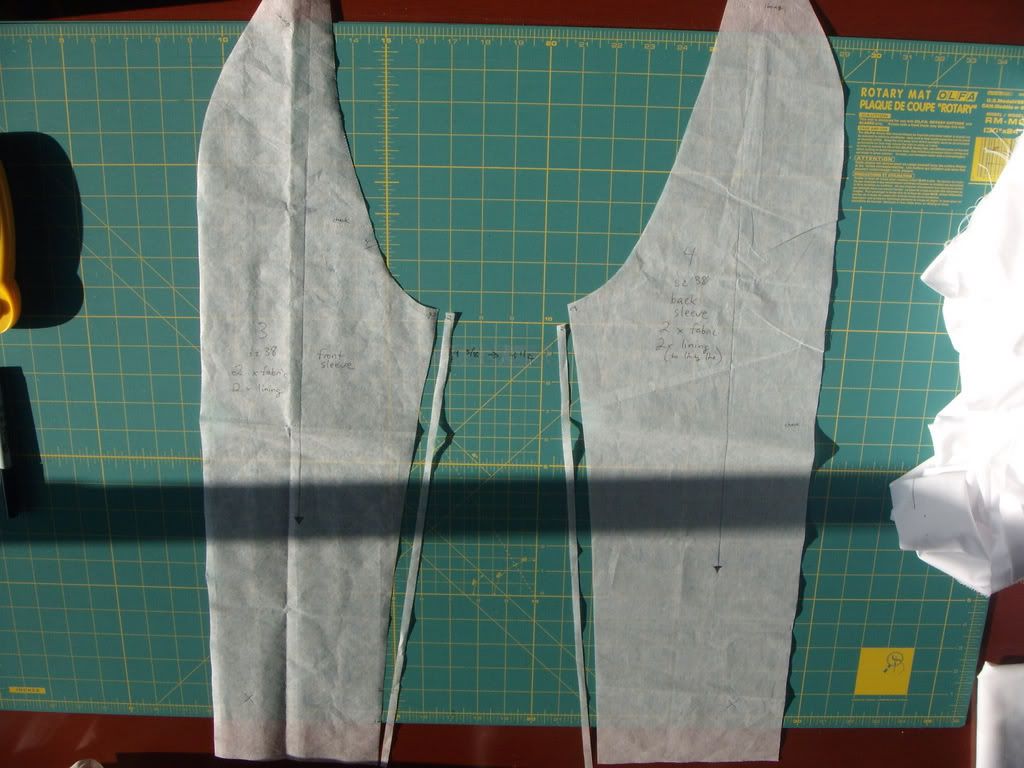
About 1/4" removed from the bottom seam of both sleeve pieces. (1/2" total removed) This also decreases the armhole seam length, so I took the same amount from the body armhole seams too.

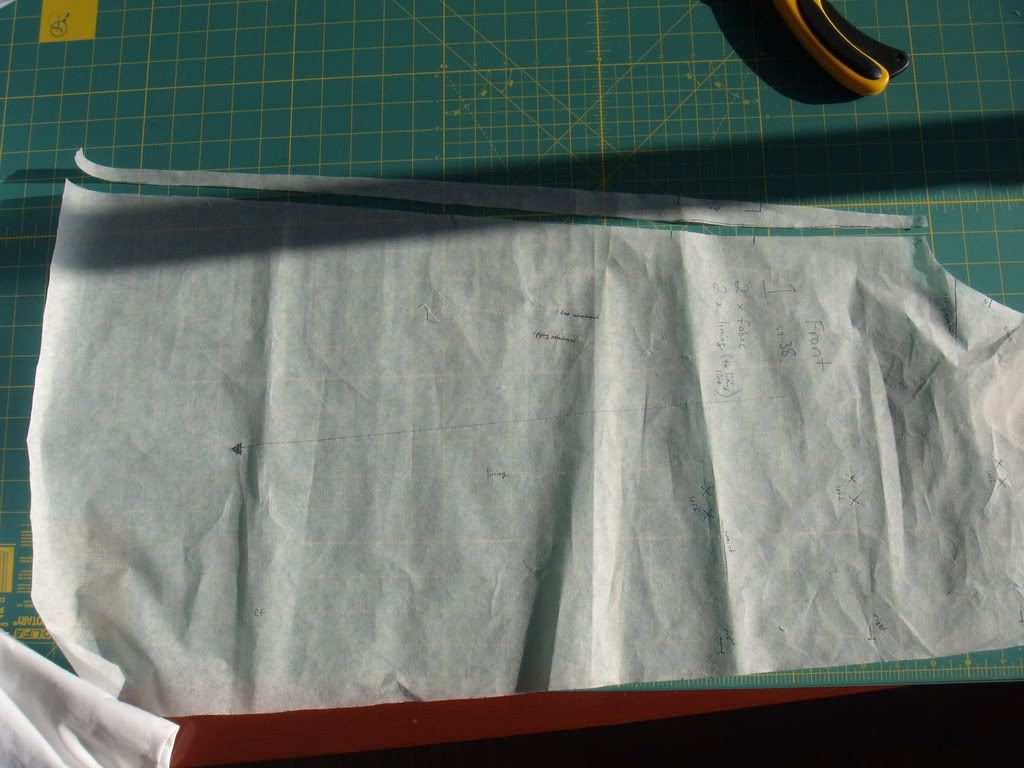
Almost an inch taken out from the side front seam, most of it at the waist and tapering elsewhere. (2" total taken from the front)

Similar adjustment done to the back pieces, most of the width coming from the waist to give it some shaping there.


For my first coat, I'm thrilled with how it looks so far. I chose to line only the sleeves, and I'm really pleased with the overall weight. The fabric was a dream to sew, it didn't slip hardly at all, even on the long seams, and the seams pressed nicely. It shines from the iron, so be sure to use a press cloth. It looks fabulous with topstiching, and even the single welt pockets under the flaps came out nicely.

I used the stripe side for the undercollar, underside of the front flap, underside of the sleeve tabs, and underside of the pocket flaps. It still needs buttons, hems, a buckle, attach the collar, belt loops, and some more topstiching. I got as far as handsewing the sleeve linings to the armholes, then realized I forgot to topstitch the armhole seams. Grrrrrr!! I couldn't face ripping out the linings, so I set it aside for now. This fabric is way too dense for hand topstiching, my fingers would be bleeding by the time I was done. I used a microtex 90/14 needle for all the construction, I got skipped stiches with a microtex 70/10. An 80/12 probably would have worked too but I didn't have any in my stash. As it was I'm already on my 2nd needle, it needs to be sharp to get through this fabric.

Front, with the belt tied around my waist. Where to find a nice shiny black buckle and buttons?? LindsayT?

Back, what a difference raglan shoulder pads make! When trying it on before putting those in the shoulders had a lot more wrinkles.


Inside, CB seam, side seams, facing edges, and pocket bags are bound with rayon seam binding.


Since I haven't made a coat before, I'm not sure if the pattern would be considered a good one or not. The lining pieces are exactly the same as the body pieces, only with lines marked to stop at the neckline facing. If I hadn't read about adjusting the lining at the armholes (less height needed when not going over the shoulder pad, and adding fabric at the underarm), it wouldn't lay as nicely as it does. There is no separate undercollar piece. If I hadn't had experience with shirtmaking my collar would look terrible. I cut the undercollar smaller, and used the shaping techniques I've used before on the collar and collar band. I also made adjustments to the facings, to account for the turn-of-the-cloth when understiching. None of these things were mentioned in the BWOF instructions, but then again they are pretty brief anyways.

I have some sewing for hire to finish before I can pick up this coat again, but I hope it won't be too long before I can post the finished product!
Thursday, December 25, 2008

Merry Christmas!!!

Here's wishing everyone in blogland a happy holiday, whatever or whenever that may be. :-) Here at Loohoo Manor we celebrated Christmas this morning with a few gifts, having spent too much money recently (ahem serger) to justify any more extravagance.

I bought this fabric at Stonemountain and Daughter during my Thanksgiving trip with Christina to make DH a shirt, and have been stealthily working on it ever since. Discreet sewing takes a different skill than speed sewing, but they both have their difficulties. I am terrible about cleaning up my floor when sewing, and will often leave fabric scraps on the ground for weeks. Ask my husband how much he likes that. Anyways, I didn't want to leave scraps from the shirt on the floor for him to see, but I also didn't want to clean up everything or he'd be suspicious of that too. So I painstakingly picked out the shirt bits from the rest and mostly left the mess. I think I should just start cleaning up after myself.

Thanks to Cidell, I was able to finish the shirt yesterday afternoon and have it under the tree before DH got home from work. He wasn't expecting anything so it was a nice surprise. He agreed to model it for you all only if he could pose with his newish gun. *sigh*


The fabric is a 100% cotton, but it's got a unique feel to it, not quite a seersucker but it doesn't hold a sharp press. DH gave the thumbs up.


This was a TNT pattern I had made back in June for his birthday, by copying his favorite short sleeve shirt. All the construction methods are straight from David Page Coffin's Shirtmaking book, which sadly was checked out of the library the other day when I went to get it. I had remembered how to do everything except for the collar band and attaching the collar, but a quick email to Cidell fixed that. I owe that woman a gift basket.

We had plans to go to Idaho to visit DH's family for Christmas, but the storms have dumped so much snow the roads are practically impassible. So we decided to stay home and just relax. I hope to finish up some UFOs and mending, and catch up on a few blog posts. Hope everyone is able to find some time to relax as well!

Hugs and Stitches,
Leslie

Tuesday, December 16, 2008

Vogue 2981 Pants

I finally got around to finishing my first pair of pants, this Vogue pattern that Adriana nailed recently. If mine look half as good as hers then I owe partial credit to her for all the help she gave me. Thank you Adriana! The other half of the credit goes to luckylibbet, who kindly invited me over to her home to help fit the muslin and take measurements. It was like talking to a library's worth of fitting books! Thank you H. I guess I'm out of halves, but I also got help from other bloggers and patternreview, you know who you are and thank you!!

Here are the adjustments I made to the stock pattern after all my tweaking:

-Straightened hip curve to a straight line from waist to hip
-Redrafted my own waistband from a piece of 2 1/2" bias canvas
-Added 1/2" darts over the back pockets
-Took in 3/4" from each side seam in the back
-Narrowed legs by 1/8" on inseam and outseam
-Changed slant pockets to double welt pockets

Fabrics and notions:

-An amazing black/white/green plaid stretch wool from Michael's fabrics. It was a dream to press, sew, and wear.
-Black silk underlining
-Cotton/poly pocketing from Charles Zarit Sewing Supply, which I really like since it doesn't tend to wrinkle.
-Black 7" YKK zipper, also from Charles Zarit
-Black rayon seam binding for the inside waistband and hem raw edges

I LOVE these pants. The underlining is far superior to lining, especially for pants. It moves as one unit instead of pants-within-pants. And the hem is handstitched to the underlining, so it's completely invisible. The fit is better than anything I've ever bought, it was worth all the tweaking to get here. And amazingly, I made no adjustments to the CB, CF, or crotch curve. I think I found a pattern that works for me.

This was my first project completed with the help of my new serger, and it was tempting to use it on everything I could! I restrained myself and used it only to serge the underlining to the fashion fabric, finish the fly and fly facing edges, and finish the pocket edges. All places I didn't want extra bulk, and I'm very happy with the look from the outside (no pressing cloth or padding required!), but my inner couture seamstress still prefers the look of a hong-kong or bound finish.

This was also my first attempt at double welt pockets, so naturally I decided to put in FOUR of them. Now to be fair, I did spend several hours just practicing different methods, so I felt pretty good about my technique before I tried them on my real pants. Out of the Vogue instructions, Debbie Cook's tutorial, and Kathleen's, I decided I like Kathleen's the best. It is slightly less bulky and quicker, however it is absolutely essential to make the pressing jig, and to sew incredibly accurate seam allowances. After trying the Vogue instructions, which involved seperate welt pieces, I decided I didn't like any of the methods that have you deal with welt pieces. Both Debbie's and Kathleen's are what I'll call 'integrated' methods, the welts are formed through the sewing and folding steps. It's hard to visualize, even with their great pictures, so I recommend trying them out for yourself.


Yes I matched up the plaid on the waistband and fly too. I didn't know you didn't have to so I was very very careful with the cutting.


I accidentally sewed the waistband facing in the wrong way, however in this case the only thing that happened is the CB seam is now offset, but it does reduce the bulk a little there. I forgot about this when sewing on my label. Oops!