Saturday, July 25, 2009

Back from vacation!

Just a quick update in case you were wondering where I was. First was the wedding we went to in Burlingame, CA at the Kohl Mansion, which was beautiful, gorgeous, and amazing. I was even able to snap some photos of my husband wearing his wool trousers I made for him. The cleaners did a fantastic job on my dress, the water stain came out and the pressing was amazing. However, I managed to get another stain on it at this wedding, so it's back at the cleaners now, hopefully they can work their magic again.


Kwik Sew 3267, in lightweight wool fully underlined in silk charmeuse. He hates back pockets, so I made single welts then sewed them shut and left off the pocket bags, and sewed on some buttons.


Then we left for a week long camping trip in northern Idaho with my husband's family. We camped in a tent trailer, rode quads, went tubing down the river, and just relaxed for a week. Minus the 30 or so mosquito bites, it was fantastic. Bonnie, our german shepherd, thoroughly enjoyed herself.


********************************
And finally, Vogue put a bunch of patterns on clearance for $5, including this pants pattern. Look familiar?

Tuesday, July 7, 2009

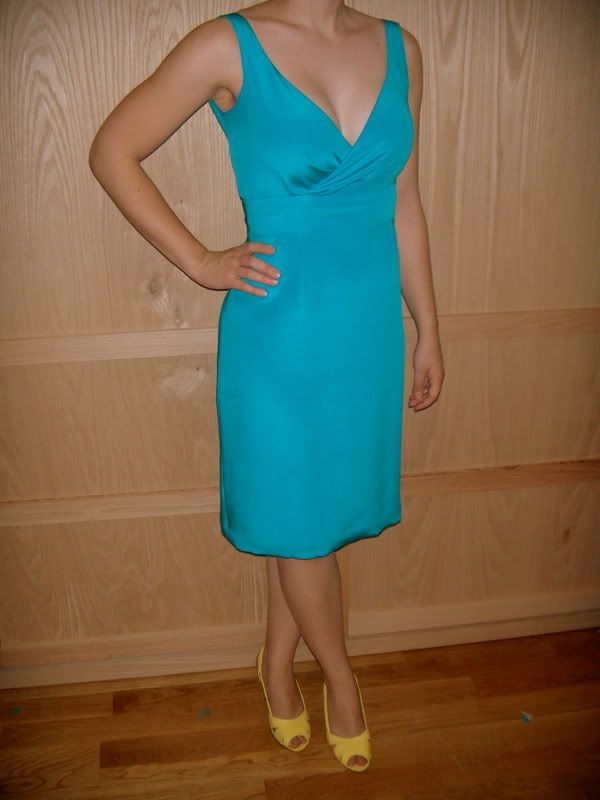
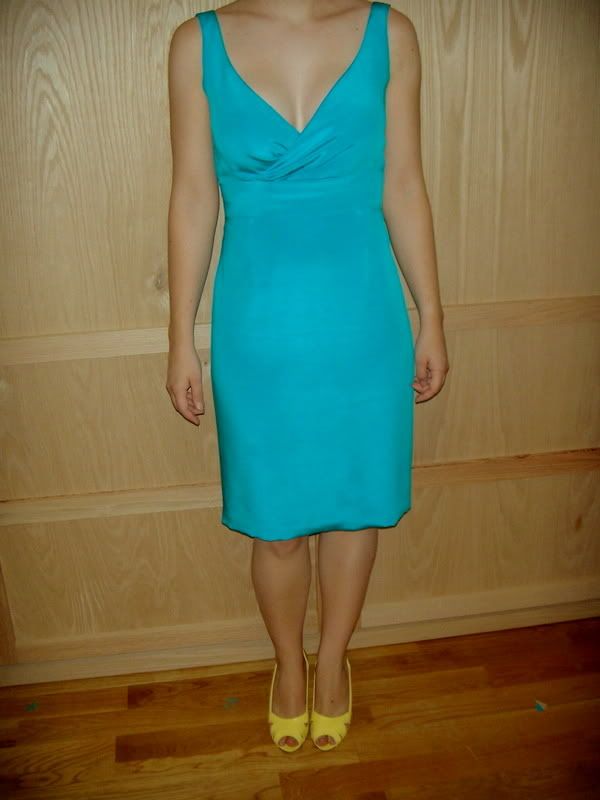
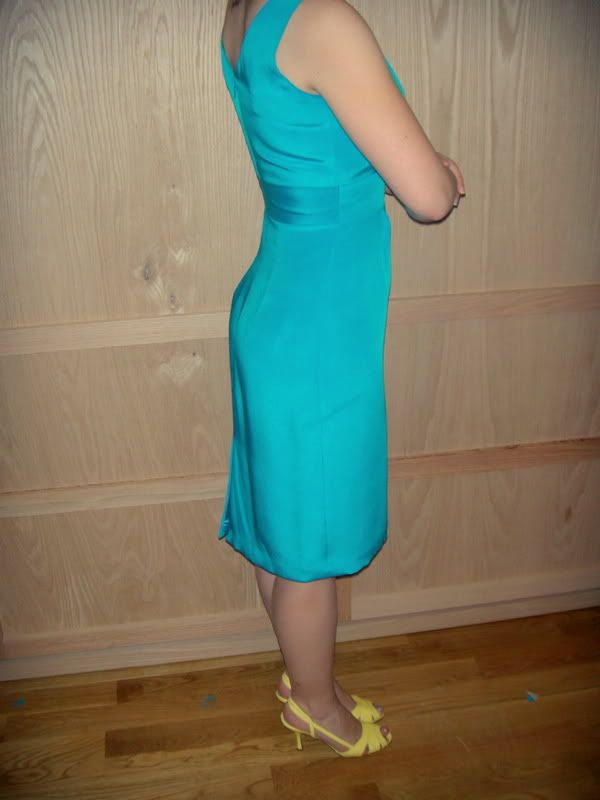
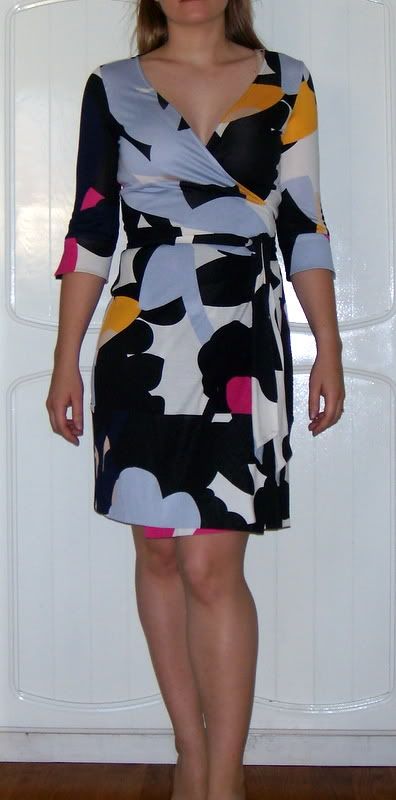
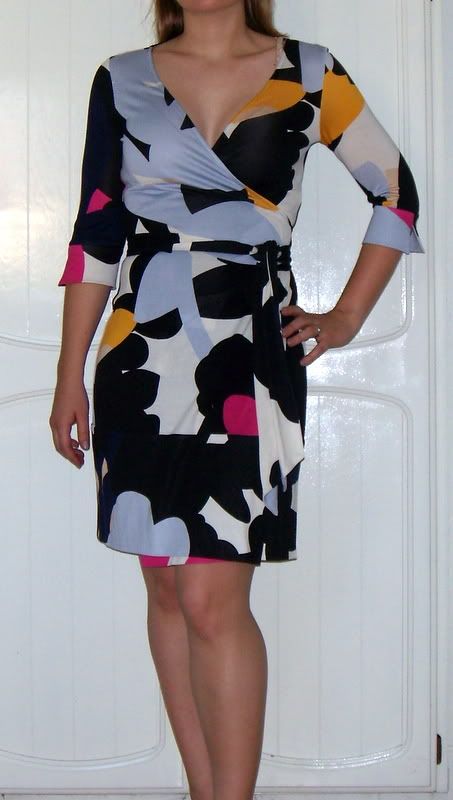
Remember this dress?

Well guess what, I have another wedding to go to this weekend. And I am embarrassed to say this dress has hung in my closet, dirty, since the wedding we went to last summer. With a crappy hem (the fabric, lining, and underlining were all double-folded up together, yikes!) and not quite perfect darts in the back. I meant to fix it so I could take it to the cleaners, but it just never happened.

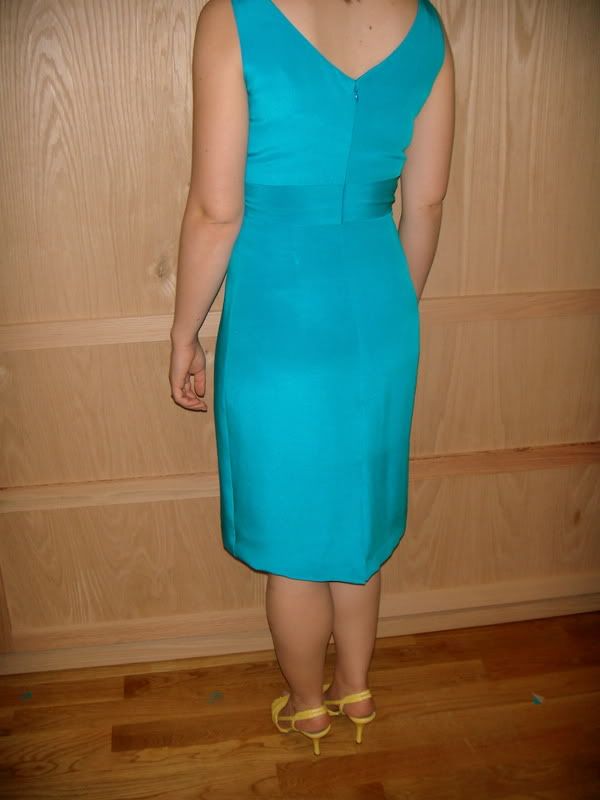
Anyways, I pulled it out over the weekend and extended the darts in back, they stopped too high and there was a bubble right above the full part of my butt. I guess my ass hangs lower than I thought. Then I chopped a couple inches off the bottom, it was too long the first time, and hemmed it properly. I handstitched the fabric to the underlining, and used my rolled hem foot for the charmeuse lining. I slipstitched the lining down at the back vent and that was it.


It still fits! I think I've lost a few pounds from last summer but I'm happy with it.


The hem could do with a professional pressing, and you can't really see it but I hope those water spots on the skirt come out at the cleaners! Cross your fingers.

Darts are much better now. I'll need a smoother bra but overall the fit in the back is really nice.


*****************
Thank you all for the very nice comments about my last wrap dress! Several of you mentioned taking a horizontal dart out of the lower back that would be hidden by the belt, and that's a great idea that I may do. But right now it's July and I'm afraid that wool dress will sit in my closet until I need to pull it out again. :-)

Wednesday, July 1, 2009

Dinner at Cindy's

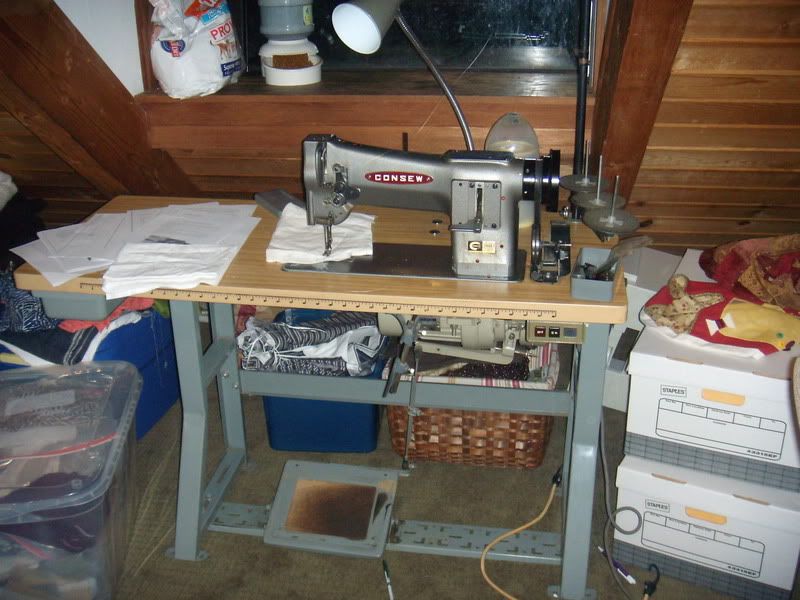
I've been discussing industrial machines for weeks with my friend Cindy (who I met at pattern review weekends in LA and Portland), and finally invited myself over to her house last night for dinner, machines, and sewing chat. We've been scouring craiglist for used deals, and while I decided on a Juki DDL, she wanted something that was made for heavier duty sewing. She found this Consew walking foot/needle feed combo a couple weeks ago and I think just picked it up last weekend. I got to see it in action last night through no less than 8 layers of denim, and we were both a little scared of the 'beast' after polishing off a bottle of wine.

The walking foot is what you would imagine, a 2-piece presser foot that feeds from the top as well as using the feed dogs on the bottom. But if you've never seen a needle feed before, it's pretty cool. The entire needle bar stabs through the fabric and moves front to back, taking the fabric with it, then raises after forming the stitch, and stabs the fabric again. If there was any chance at all of fabric layer slippage, this machine would eliminate it. The previous owner had made upholstry with it, and the needles it came with were HUGE. It was hard to believe the machine could punch that monster through that much fabric but it had no trouble.

Consew walking foot/needle feed


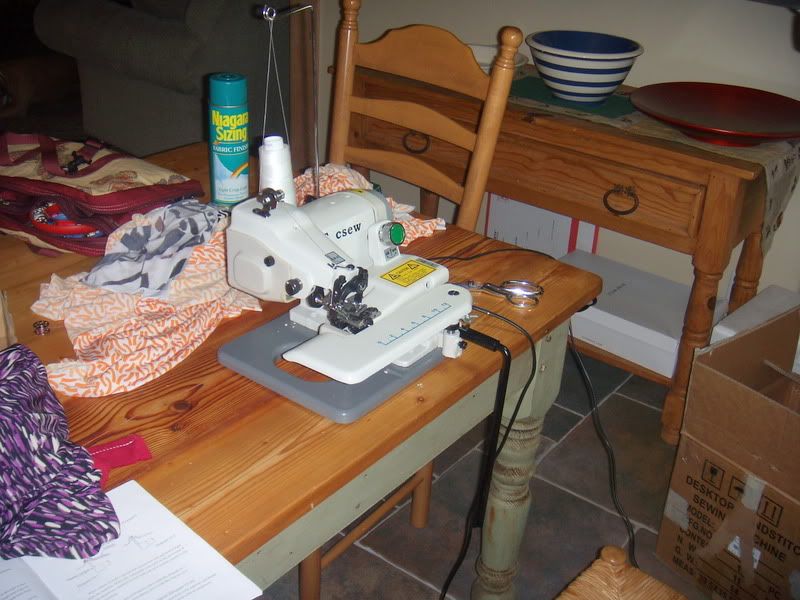
Cindy's other new toy is this Tacsew T-500 blindstitcher, which she's had for a few weeks now and has had more time to play with. I'd never used one before so she pressed a hem into some scrap woven for me to try and it worked great! But then we both tried to figure out what the problem was when using knits, and neither of us could get it to work. The knit gets sucked up into the area where the stitch forms after a few stitches, and then doesn't want to feed out the back and gets caught between the feed dogs. We couldn't find any adjustment for foot pressure or feed dog height, so we're stumped as to why the knits won't feed properly.

Tacsew T-500


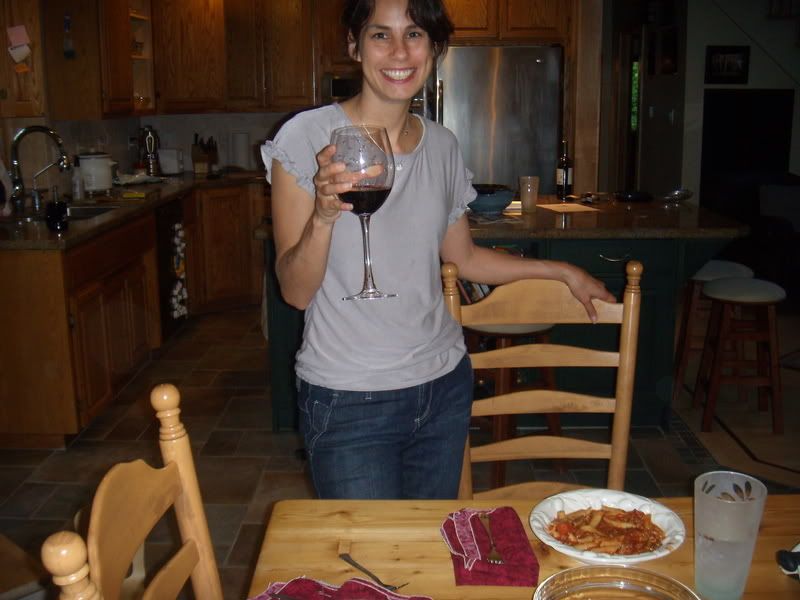
Cindy preparing to enjoy crock pot pasta and some excellent Merlot her husband picked out. Isn't her top cute? It's a BWOF pattern she altered to look like a current J.Crew top.

Thank you Cindy for a fabulous evening and I hope we get to do it again soon!!!

Tuesday, June 23, 2009

An almost unfinished project and swayback

I started this dress last October, from some DVF wool doubleknit I purchased at Stonemountain and Daughter fabrics. I had just made a rayon knit version with fabric purchased during the same trip, and was fresh off a discussion on patternreview about swayback adjustments. One of the suggestions in the thread was this, and as I was quite excited about it at the time I modified my pattern and cut out my nice DVF fabric without even testing it in muslin.

This fix did not work for me. In the back of my mind I was wondering about forming diagonal wrinkles from the shoulder with this alteration but it seemed to work for the other ladies so I forged ahead. I still got fabric pooling in the small of my back, but I ended up with those wrinkles too. And on top of that, the original pattern I used was very plain, which looks great with print fabrics but was downright boring with a solid. I threw it into a pile for at least 3 months, tried it on again and decided it wasn't too bad to wear, and embellished it with some flap pockets, shoulder tabs, longer sleeves, and french cuffs. I wore it quite a bit during the last part of winter, and got a lot of compliments on it. 2 lessons here: always test out pattern alterations before cutting into your good fabric!; and don't be too hard on your 'wadders'. They are probably still better than RTW.

I really like the dress from the front, the pockets/tabs and cuffs help to wake up an otherwise plain dress, and the buttons were from a stash Cidell sent me. (Thank you!!) I didn't have patterns for these, I just constructed them from paper until I was happy with the sizes.


Here's what I don't like. The back of the print dress was pretty good, but there was definitely fabric pooling in the small of my back. The problem is too much length in the CB, not at the side seams. But with no CB or waistline seam, your options for removing it are kind of limited. The fix I tried above attempts to pull it up from the neckline, but as you can see it created diagonal wrinkles from the bottom of my armhole, in addition to not fixing the pool of fabric. I think I will go back to my old standby of darting the CB, laying it on the fold as best as you can, and taking a little out of the side seam. (Like what Marji was talking about in that thread on PR.)


But there's nothing wrong with using that belt to tuck some of the extra fabric under and wearing the heck out of it, right? :-)

Thursday, June 11, 2009

DVF surgery

A friend of mine picked up this dress for me (thank you!!!) at the DVF sample sale last week in NYC, I've been dying to get a dress in this print but kept missing it when one would pop up on ebay, I think it's from Spring 08. I hadn't seen it made up into this style before, I think it was unique to the sample sale. I'm not crazy about bell sleeves, so I decided to turn them into a more traditional DVF style, 3/4 sleeves with a vented cuff.

I already had a pattern for the cuff from my other knockoffs, so it was just a matter of cutting off the bell, narrowing the end of the sleeve, making the cuff, and attaching it.


Before, DVF Greer in Spring Shadows print

After!


In taking apart the bell sleeve, I did discover the method used to attach it, so I thought I'd share that in case it's helpful. The bell is faced on the inside as well, up to where it attaches to the sleeve. The very end of the sleeve is understitched, and there is a 1" section along the vertical seam on the inside that is handstitched closed. They also used 1/4" clear elastic in both horizontal seams, the end of the sleeve and the top.

Here are the pieces:

Outer bell piece (roughly in a trapezoid shape, long edge is the bottom of the bell)
Inner bell piece (same)
clear elastic for top and bottom seams

Steps: (Sleeve is already attached to the dress and vertical seam serged)

  • Stitch vertical seam of outer bell piece
  • Stitch vertical seam of inner bell piece, leaving 1" in the middle open
  • Baste clear elastic to one of the pieces at the top and the bottom of the bell (I definitely saw basting stitches in addition to the serging, but I'm not sure which piece it was on, I don't think it matters)
  • Stitch the inner and outer pieces together at the bottom of the bell, right sides together
  • Understitch
  • Baste the outer bell piece to the sleeve, right sides together
  • Turn the sleeve right side out, it should look almost done except the inside bell piece hasn't been attached to the bottom of the sleeve.
  • Now reach through the 1" opening you left in the vertical seam of the inner piece, and pull out the sleeve/outer bell piece (basted together), and the top of the inner bell piece that is unattached.
  • You need to stitch the inner bell piece to the sleeve/outer bell seam, but you'll have to sew in a circle and readjust the piece as you work, you can't expose the whole seam at once. For a really good tutorial/pictures on how to line this up see Kathleen Fasanella's blog post. This is the same thing you do when bagging the lining in a jacket.
  • Stuff the seam back through the hole, and press.
  • Slipstich the 1" opening closed and you're done!

Tuesday, May 26, 2009

New equipment and PR Weekend Portland

I have been busy collecting new equipment/gadgets in the last month, and as you can imagine playing with them is way more fun than blogging. No offense.


The first piece I need to share is this Elna Alize ironing press. I bought mine from sewinginusa.com, they are one of the few etailers that carries Elna presses. You can't type 'ironing press' into google without hitting a million Simplicity presses, but it took some work to find the Elna. I was looking for a dry press as well, which also made it hard. Most of the presses on the market now come with steam, which means holes in the pressing surface. Tiny holes, but holes. Since I mainly planned on using it for fusing interfacing, I wanted as smooth a surface as possible. The Elna had good reviews on patternreview.com and the price was right, so I went with that.

Features I like:

  • 10 second timer that activates when you close the lid. My favorite interfacing needs 20 seconds, so I close the lid twice and I'm done. :-)
  • Pressure! Lots of it. (100lbs) I'm convinced this really helps the adhesion of fusibles.
  • Heat! Well duh. But it advertises 392F and it definitely gets hot on high.
  • Sturdy, it's got locking handles to move it around and rubber feet that don't slide on the table.
  • Board is made of Finnish birch, so no warping. At least not yet. (All the other presses use steel mesh). I prefer the way the steam permeates through the fabric with a wood board. The metal mesh on my ironing board isn't the same.
  • FUSING AN ENTIRE PIECE OF INTERFACING AT ONCE! (yes you need to get one of these)
Features I don't like:

  • It's 20"x9", and when you are fusing interfacing bigger is better. I can fit two collars, or two cuffs, but not both. it's not long enough for an entire waistband, but it really isn't too hard to move the fabric once part of it is fused. It's still light years better than using an iron. But to go bigger I would have had to get a steam model.
  • Not really a big deal, but having to use a spray bottle for steam. I mean you have to spray interfacing or a press cloth anyways when fusing, but when I use it to press shirts or something it does slow you down.
  • It came with a spray bottle, which leaked from day 1. I threw it away.
After I had my press for a few weeks, I was reading a blog post by Kathleen Fasanella at FashionIncubator.com about 'the annoyance factor'. She was talking about how to lower your expenses by examining seemingly low cost processes, and although it's aimed towards production sewing it rang a huge bell with me. If you can save yourself even a few minutes on a task that is done repeatedly, or streamline your process to make it require less work or more enjoyable, the benefit can be a huge bump in productivity. I used to hate fusing interfacing so much I'd put it off or contemplate skipping it. Now I'm looking for the next 'bottleneck' to fix.


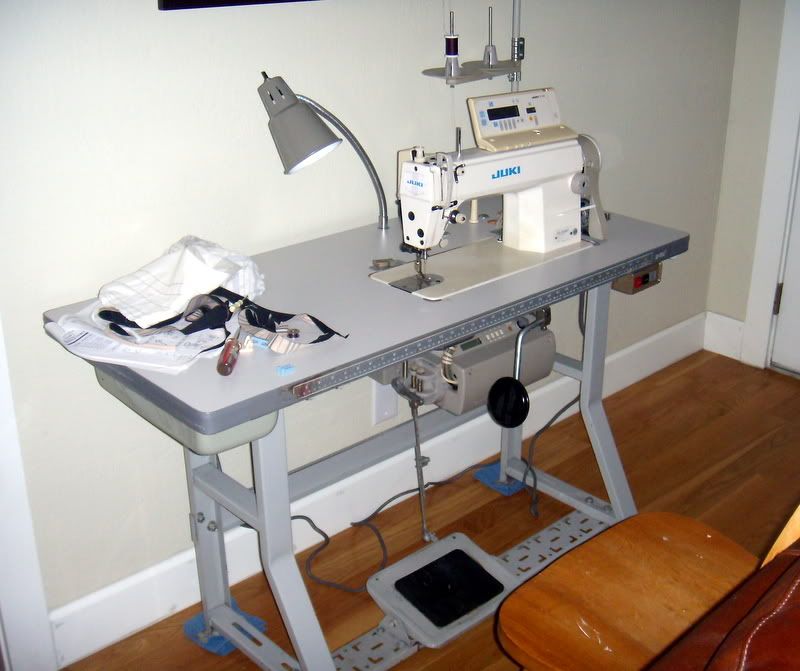
After scouring Craigslist.org for a used industrial sewing machine for several months, I finally found one in San Francisco at the beginning of May for a good price. I've been picking up a lot more 'for hire' sewing projects and the allure of an industrial machine, with all it's capabilites and attachments, was too tempting. It was quite the fiasco picking it up at 6 pm on a Friday night, in the rain, lining up movers to carry it down 3 flights of stairs (one flaked, DH had to stand in. OMG), driving a full-size truck with a utility trailer through downtown SF, and unloading it into the house. Whew! But it's here. And it's awesome. :-)

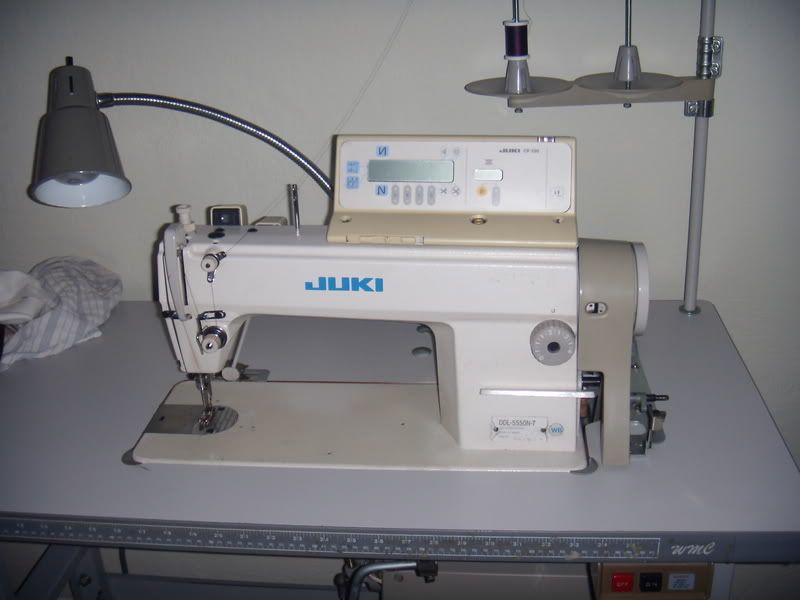
It's a Juki DDL5550N-7 computerized single needle lockstitch with a servo motor. Features:

  • Adjustable speed servo motor, from turtle to rabbit-on-Red-Bull. (holy cow who sews that fast??)
  • Auto thread trimmer, activated by depressing the back part of the pedal
  • Auto back tacking at beginning or end of a seam (or not at all)
  • Reverse
  • Knee lifter


Control panel. Does anyone know how to use the thingie on the right, or what the 'eye' and 'fan' buttons do? No idea. LOL


I've only made a couple garments with it so far but the fabric feeding is so much better than my Janome, you can adjust everything (love that), I've decided life before auto thread-trimming sucks, and you can probably buy an attachment that does your laundry and cooks dinner for you. I bought some basic feet (left and right cording, zipper, invisible zipper) and a binder so far and am hooked.

**************************

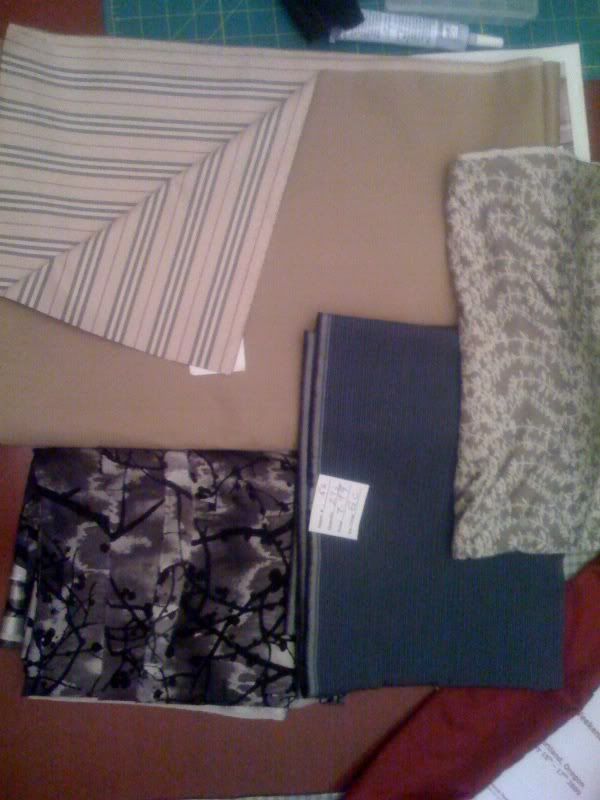
So the reason for the haste in picking up the machine was the next weekend was PR Weekend Portland and I didn't want to miss out on the deal. I had a fantastic time with the ladies of Pattern Review, and enjoyed meeting some new faces as well as spending quality time with Cidell and Christina. I didn't take nearly enough pictures but here's a few plus some borrowed ones, as well as the fabric stash I came home with.

Fabric-Tan Burberry stripe raincoating, L-R silk charmeuse, cotton shirting, silk jersey

Me, Cidell, and Christina

Cidell trying on my Burberry trench. Don't you hate it when other people look better in your stuff than you do?

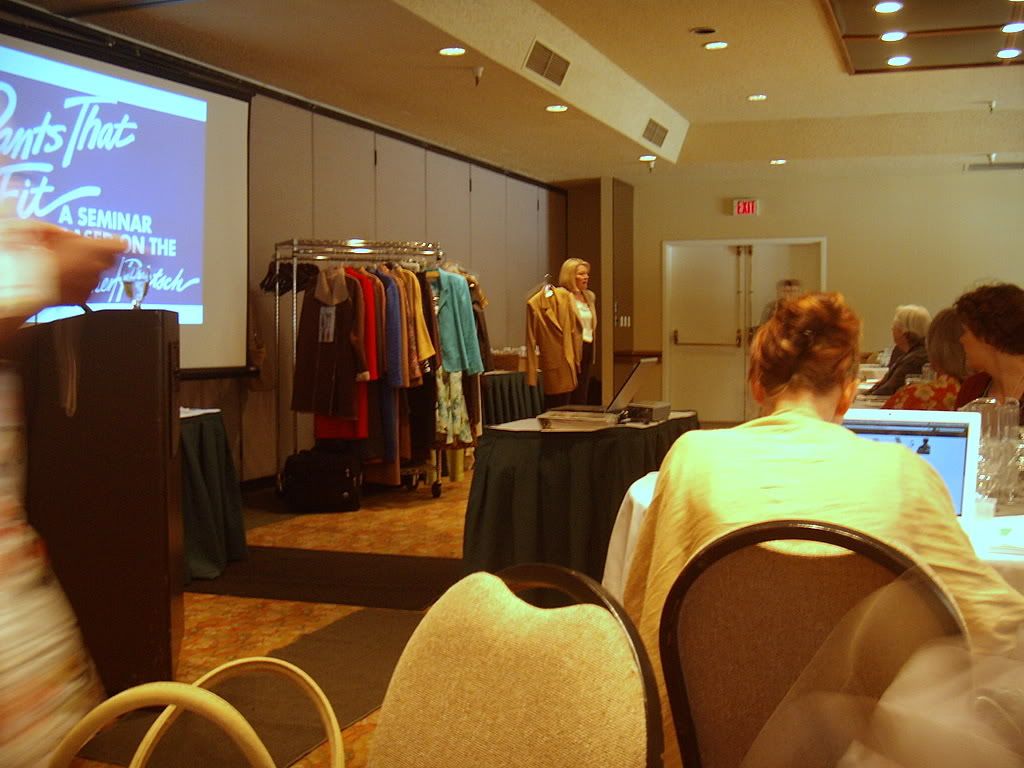
Fitting/Tailoring seminar with Pati Palmer

Poofy skirt and twisted band tee

What do you get when you combine lovely fabric bought with a gift certificate (thanks A.!!), a new industrial sewing machine to play with, a 4-day weekend, and plenty of sewing mojo after a trip? Finished garments. :-)

Copied from RTW top, self-drafted embroidered lawn skirt, Coclico shoes
I knew I wanted something short and poofy with this cream embroidered cotton lawn, but didn't really have an exact pattern in mind. I decided to just make it up as I went along, only deciding on the width of the waistband and the fullness of the skirt. The pieces are all rectangles so it's not hard. I wanted the embroidery pattern on the horizontal so I had to cut the fabric on the crossgrain. Then it's just gathered to the waistband and lined, add a zipper and voila! I had to adjust the side seams on the waistband to really make it hug my waist, but that was it. The skirt and lining only have one seam, in the center back. I serged the edges, then sewed the seams and pressed open. I hemmed them before attaching the waistbands, using a scroll hemmer foot. If you don't have one of these then get one!! No pressing, no marking, just feed the fabric into the foot and get a perfect 1/4" hem (or 1/8"). It worked really really well, although I did pop the fabric out of the feeder and form the hem by hand when going over the side seams. But compared to my usual method of ironing the hem first and using two passes of stiching, this was a breeze.

1/4" scroll-hemmed lawn and batiste lining

Seam finishes


I inserted the invisible zipper using my new Juki and a cording foot (the invisible zipper foot I got doesn't work very well, probably operator error).

Lining/facing all finished by machine

I saw these two fabrics laying together and liked the colors, so I made another one of these tees from a taupy gray rayon/lycra knit It was copied from my favorite RTW v-neck, and I added a twisted binding to the neckline to make a little more interesting. I haven't found a favorite method for attaching this yet, this time I serged it on, folded it over and lined up the offset, and stitched in the ditch from the right side to anchor it. I also serged the raw edges of the hems, folded up and topstitched. This jersey was very flimsy, and the edges kept wanting to roll. I knew if I even attempted my usual double needle approximation of a coverstich it would tunnel like mad.


A little note about the construction order though, I notice a lot of RTW tees/tops do this:
  • Sew one shoulder seam
  • Bind the neckline
  • Sew the other shoulder seam
  • Sew down the seam allowance at the neckline from sewing the last step
  • Set the sleeves in flat
  • Sew the sleeve/side seams
  • Hems
Binding the neckline while it's still flat makes it easier to handle at the machine, and you also don't have to figure out exactly how long to make the binding before attaching it. I like to stretch mine slightly as I sew to make it hug the neck. You will end up with a little seam allowance on one side of the neckline, so it doesn't look quite as nice as setting in binding traditionally, but for quickie tees and tops I think it's perfectly acceptable.