So I did not even touch DH's shirt over the weekend, I ended up having to return my library copy of Shirtmaking and had no access to the seam allowance chart I started following.* I had a lovely time on Friday afternoon with the sewing ladies who invited me to the Haute Couture Societe show, we met up at one of their homes for a little show-and-tell, sewing chat, and iced tea. (Thank you for hosting Ann!) I was lamenting on my lack of sewing motivation and they wisely recommended a quick simple project to get me going.
I've been meaning to make a muslin of this Simplicity pattern I just had to have after I saw Erica B.'s version, so I figured this was a good opportunity to dig it out.
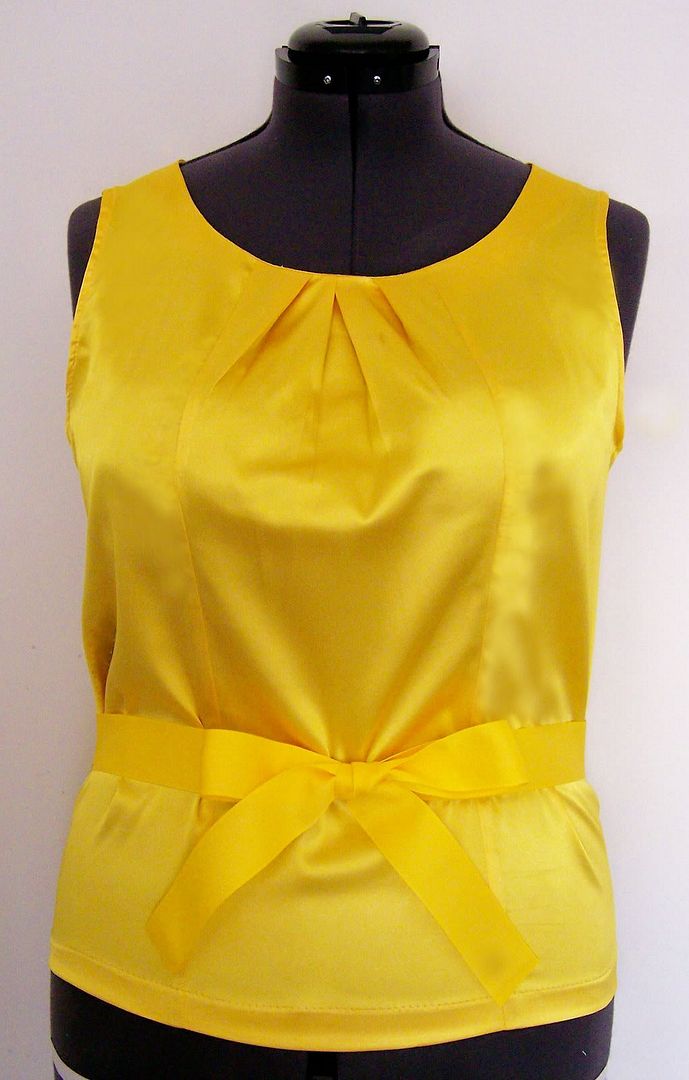
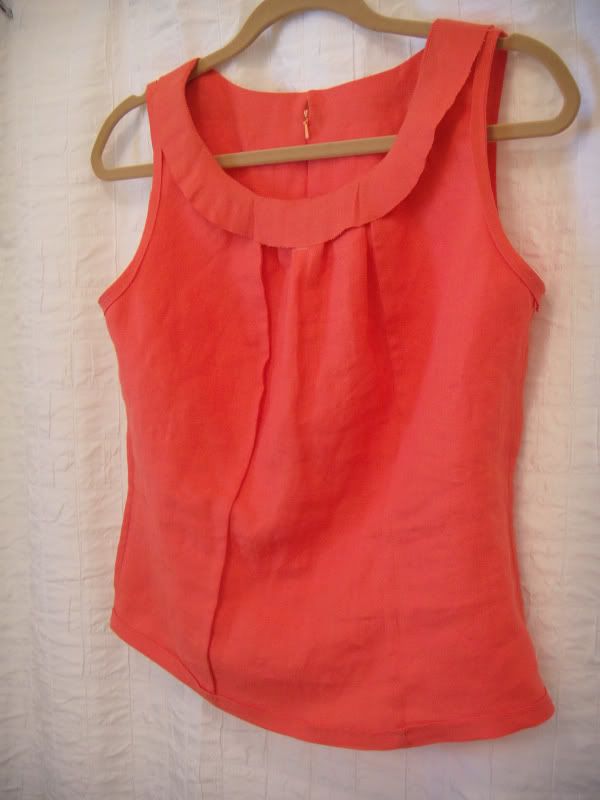
Simplicity 2938

It's a tank style top with 3 front pieces, the center panel has unsewn pleats at the neckline, and the seams are mostly vertical, falling over the bust line. There is a center back seam and it calls for a side zipper, however I prefer a back zipper and put it there instead. Note: if you move the zipper to the back, add a seam allowance to the back facing piece. Preferably before you cut out the fabric. Not that I would forget something as simple as that, but for you absent-minded readers. :-)
Coral linen?, maybe a blend from a free Fabric Mart bundle
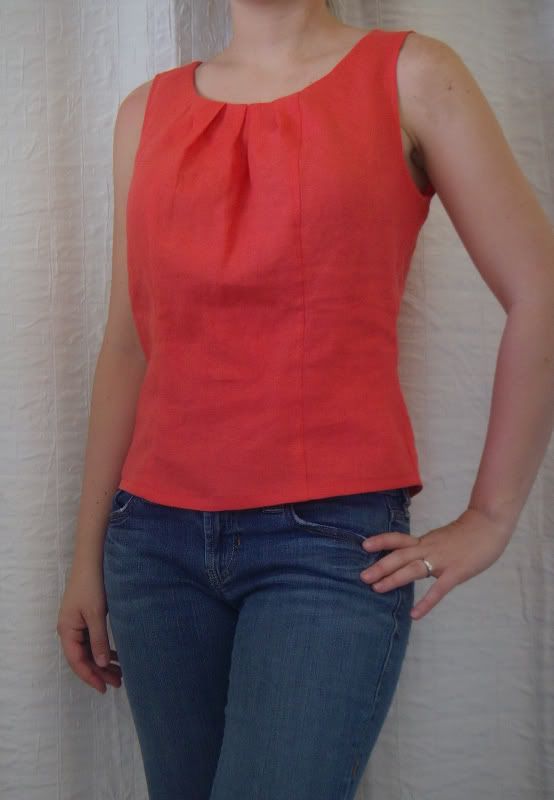
I always trace my patterns onto pattern-tracing cloth, my product of choice at the moment is swedish tracing paper. No I don't prefer to make life difficult, I like to use the pieces as a first muslin. Sometimes I make a full set of pieces, especially if I'm going to be using a print fabric and want to have more control over the print distribution when cutting. This time I just did a half and sewed the pieces together to check the fit. It was very baggy at the waist, and since I knew I didn't want to sew a belt or a ribbon I modified the fit.
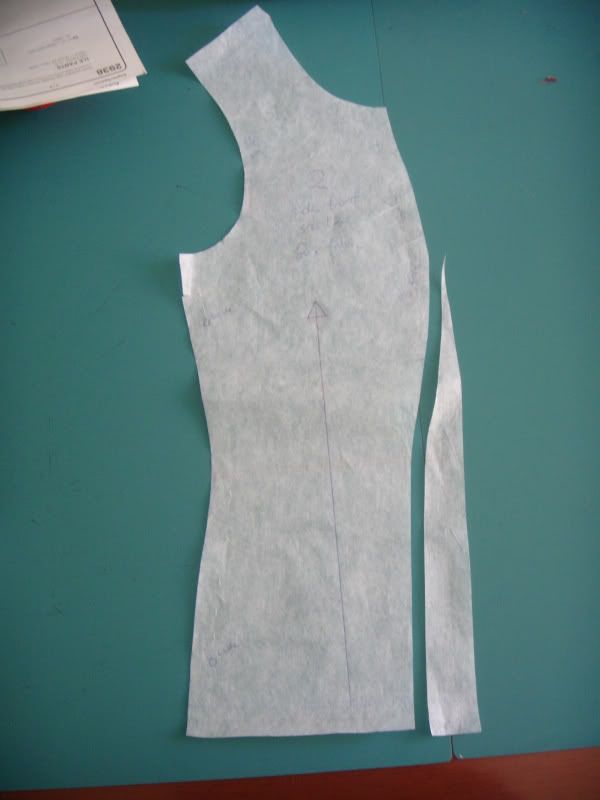
Front side panel, cut in under the bust to appear more like a princess seam

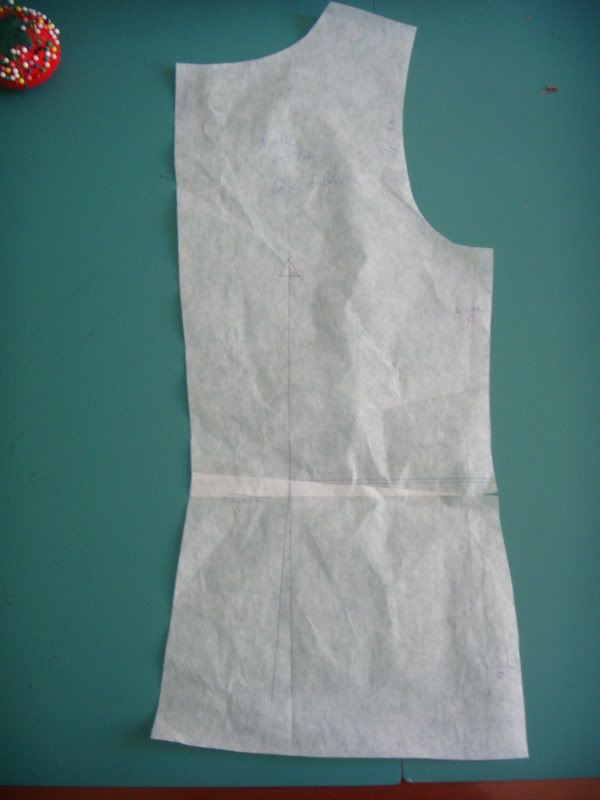
Back piece, 3/4" swayback adjustment
 I cut a straight size 12 and made the two modifications above, plus added an inch to the length all around. When I got ready to hem I decided to shape the hem, making it shorter at the sides and longer in front and back, so I ended up cutting of that inch at the sides. The armholes fit pretty well but one of them gaps a little more than the other, it probably got stretched during construction. Next time I will stabilize it with a fusible right after cutting. I made matching bias binding for the armholes, and the neckline is finished with a facing. The facing pieces seemed a bit too wide at the bottom, I will take a look at it next time but i don't think it was from my modifications.
Even though it was a muslin, it was turning out pretty wearable so I used french seams on all but the back seam (is there a way to do an enclosed seam with a zipper?). French seams are great for linen because you don't have to worry about fraying, everything is enclosed. The facing was trying to flip to the outside so I tacked it down with some stich witchery at the shoulder seams and the front pleat, since the fabric is doubled over there you can't see it from the front. I hand tacked it at the 2 front french seams. I left the raw edge of the facing unfinished because I was being lazy, because of the fusible interfacing it's not going anywhere but I usually prefer to bind it.
So overall I'm pretty happy with the pattern, I have several colors of silk charmeuse earmarked for a TNT cami/shell pattern. My wardrobe is severely lacking in cute tops to wear under a cardi or suit jacket, or alone tucked into high-waisted pants and skirts. I might tweak this one a bit more to nip in the waist, make it longer so I can tuck it in, and then call it good.
*And honestly I probably wouldn't have worked on it anyways, after working so long on other people's projects I really just wanted to sew something for ME.
0 comments:
Post a Comment