Tuesday, January 6, 2009

Trench coat in progress

I've been putting off attempting a coat, just thinking about the time and effort required was too daunting. However I own exactly one 'nice' coat, a 3/4 length J. Crew wool one, and my closet has been crying out for another one. Not that it gets too chilly here, but I do prefer the longer length in the winter time. The Burberry fabric I bought from Michael's fabrics about a year ago has been calling to me from my stash ever since, and with the almost two weeks I had off around Christmas and New Years I managed to choose a trench pattern, make a muslin, adjust it for fit, and construct most of the coat.

I was looking at two Patrones patterns, and this BWOF from 1/2008. I decided to go with the BWOF due to the raglan sleeves, the fabric is a thick two-sided cotton, and I didn't think set-in sleeves would ease very well.


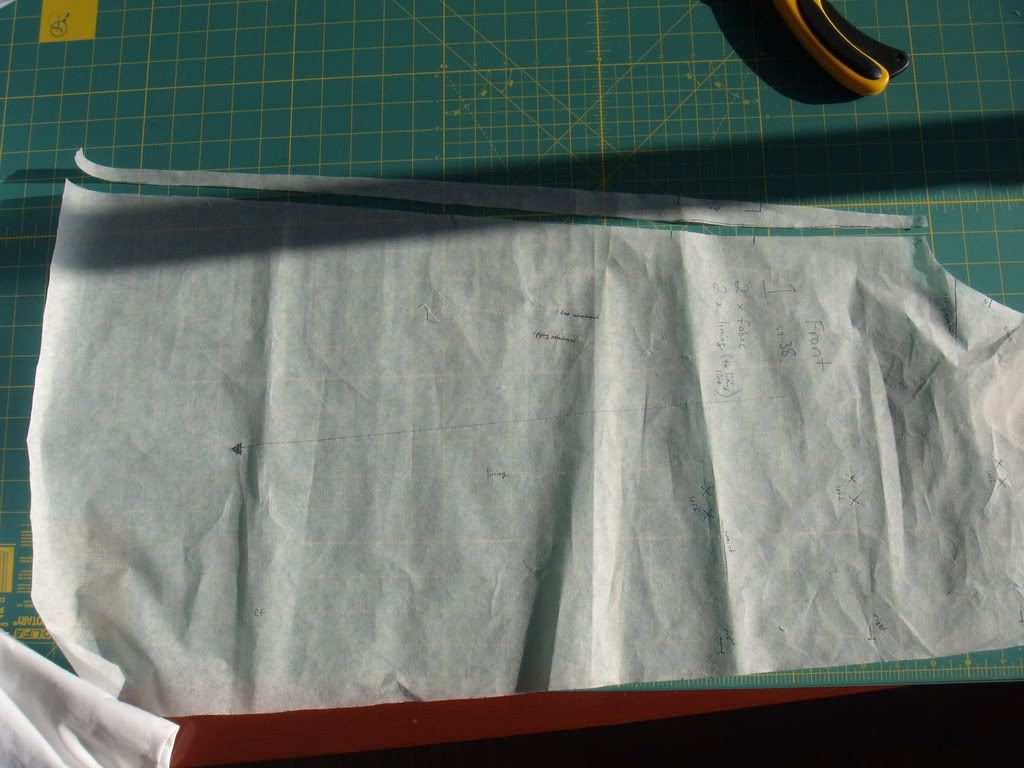
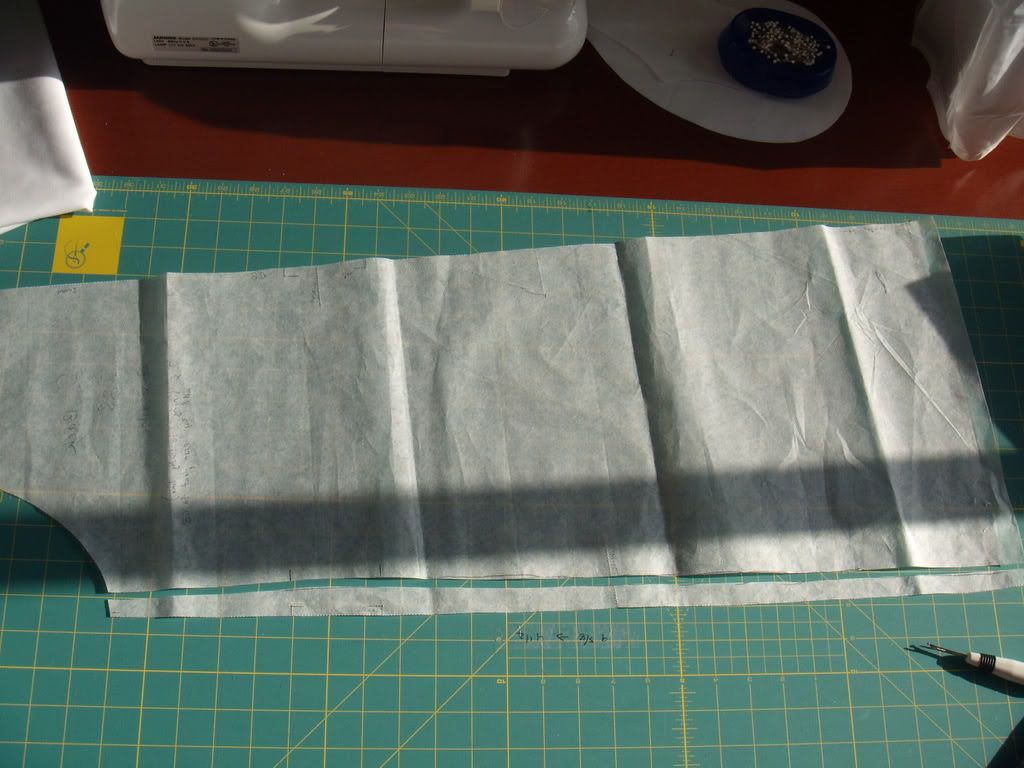
The line drawing is accurate in my opinion, it is very a-line without the belt and was too voluminous for my liking. With the belt it bunched up too much around my waist even in muslin, so I decided some of the width had to go. However everything else seemed to fit perfectly, the shoulders, bust, collar, and lengths. I thought the arms were a bit wide so I decreased there as well, but overall this was not much tweaking by my usual standards. And there was no gaping or seams not matching up like I usually deal with when using the Big 4. Very refreshing. I traced a 38, without adding seam allowances. I marked the seams on my fabric with chalk and added allowances before cutting. This made it easy to mark the seams at corners and other areas that tend to get mixed up.


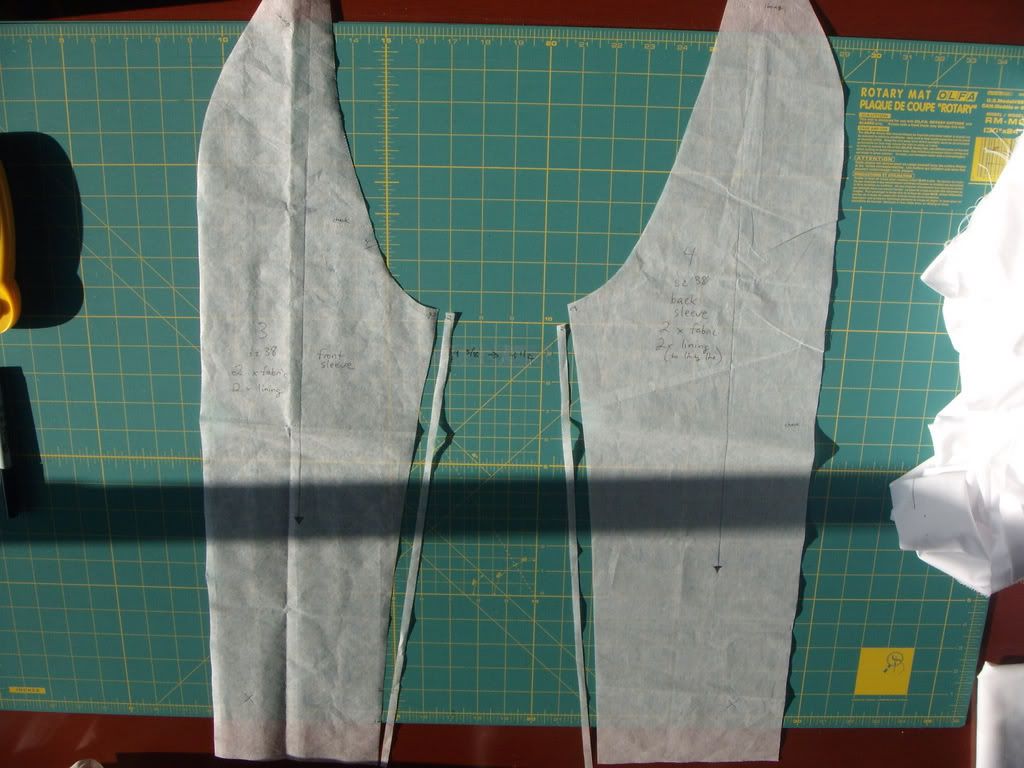
About 1/4" removed from the bottom seam of both sleeve pieces. (1/2" total removed) This also decreases the armhole seam length, so I took the same amount from the body armhole seams too.

Almost an inch taken out from the side front seam, most of it at the waist and tapering elsewhere. (2" total taken from the front)

Similar adjustment done to the back pieces, most of the width coming from the waist to give it some shaping there.


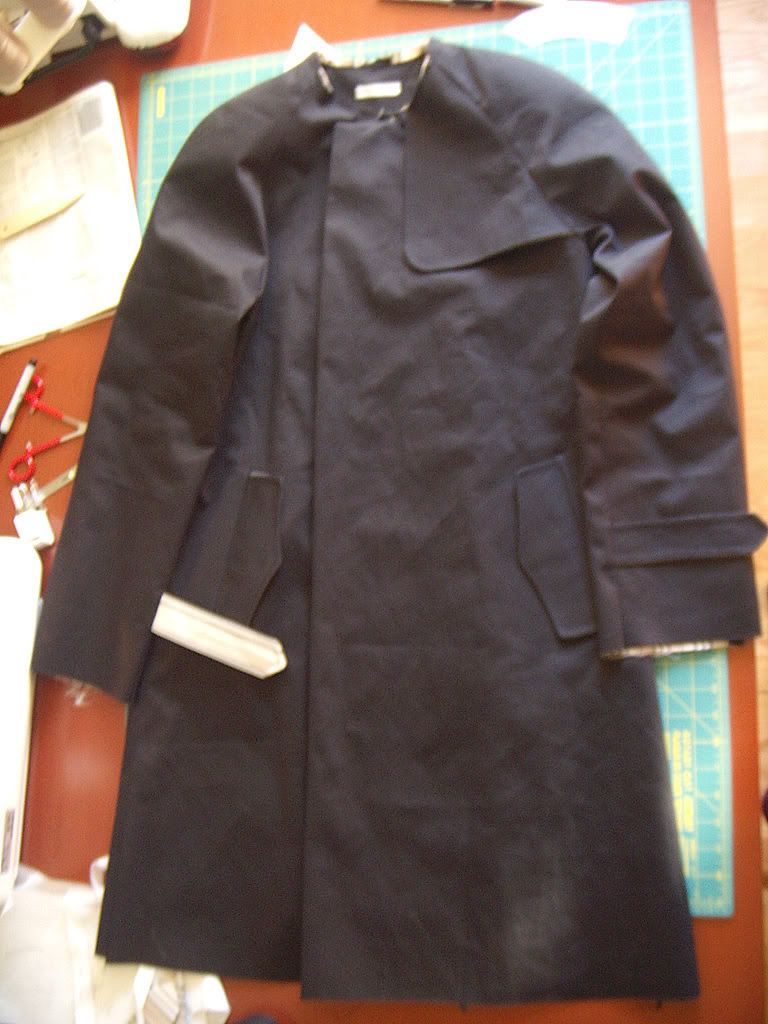
For my first coat, I'm thrilled with how it looks so far. I chose to line only the sleeves, and I'm really pleased with the overall weight. The fabric was a dream to sew, it didn't slip hardly at all, even on the long seams, and the seams pressed nicely. It shines from the iron, so be sure to use a press cloth. It looks fabulous with topstiching, and even the single welt pockets under the flaps came out nicely.

I used the stripe side for the undercollar, underside of the front flap, underside of the sleeve tabs, and underside of the pocket flaps. It still needs buttons, hems, a buckle, attach the collar, belt loops, and some more topstiching. I got as far as handsewing the sleeve linings to the armholes, then realized I forgot to topstitch the armhole seams. Grrrrrr!! I couldn't face ripping out the linings, so I set it aside for now. This fabric is way too dense for hand topstiching, my fingers would be bleeding by the time I was done. I used a microtex 90/14 needle for all the construction, I got skipped stiches with a microtex 70/10. An 80/12 probably would have worked too but I didn't have any in my stash. As it was I'm already on my 2nd needle, it needs to be sharp to get through this fabric.
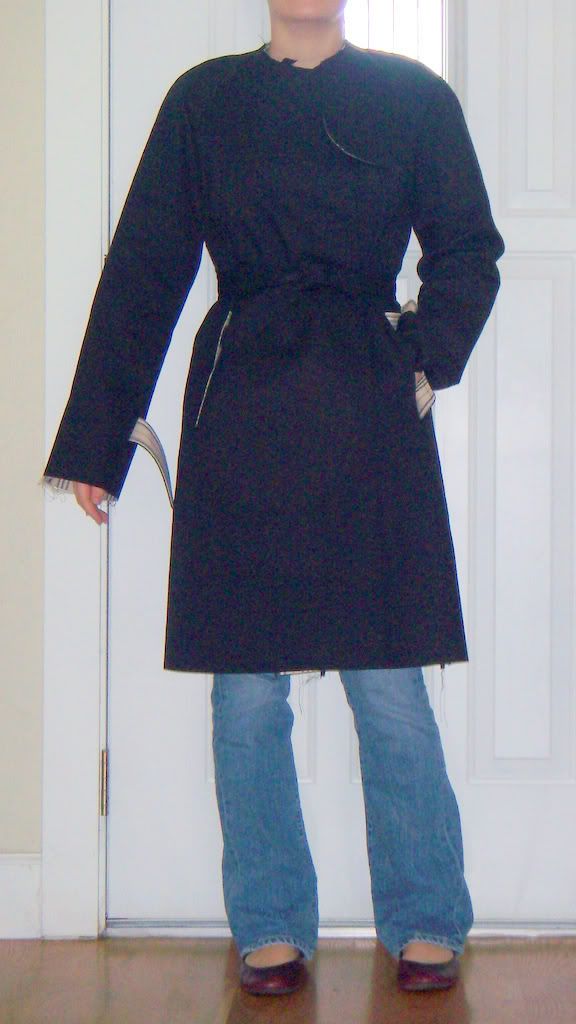
Front, with the belt tied around my waist. Where to find a nice shiny black buckle and buttons?? LindsayT?

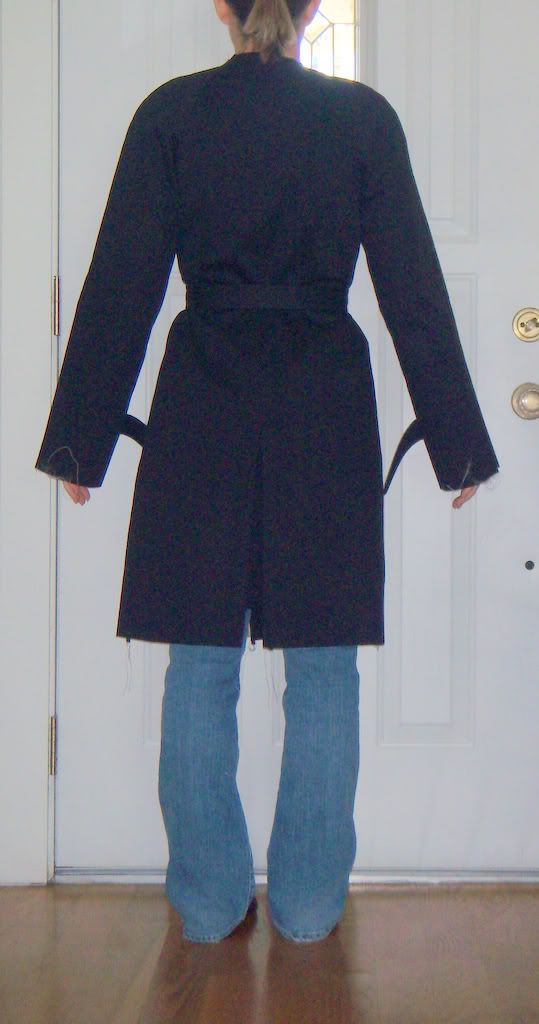
Back, what a difference raglan shoulder pads make! When trying it on before putting those in the shoulders had a lot more wrinkles.


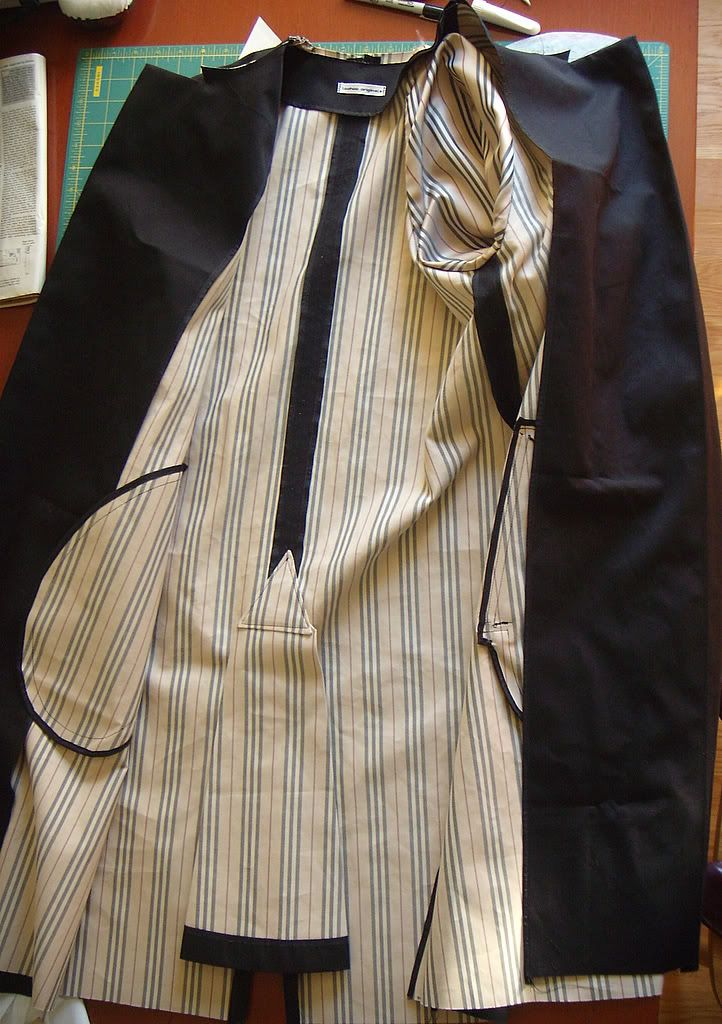
Inside, CB seam, side seams, facing edges, and pocket bags are bound with rayon seam binding.


Since I haven't made a coat before, I'm not sure if the pattern would be considered a good one or not. The lining pieces are exactly the same as the body pieces, only with lines marked to stop at the neckline facing. If I hadn't read about adjusting the lining at the armholes (less height needed when not going over the shoulder pad, and adding fabric at the underarm), it wouldn't lay as nicely as it does. There is no separate undercollar piece. If I hadn't had experience with shirtmaking my collar would look terrible. I cut the undercollar smaller, and used the shaping techniques I've used before on the collar and collar band. I also made adjustments to the facings, to account for the turn-of-the-cloth when understiching. None of these things were mentioned in the BWOF instructions, but then again they are pretty brief anyways.

I have some sewing for hire to finish before I can pick up this coat again, but I hope it won't be too long before I can post the finished product!

Thursday, December 25, 2008

Merry Christmas!!!

Here's wishing everyone in blogland a happy holiday, whatever or whenever that may be. :-) Here at Loohoo Manor we celebrated Christmas this morning with a few gifts, having spent too much money recently (ahem serger) to justify any more extravagance.

I bought this fabric at Stonemountain and Daughter during my Thanksgiving trip with Christina to make DH a shirt, and have been stealthily working on it ever since. Discreet sewing takes a different skill than speed sewing, but they both have their difficulties. I am terrible about cleaning up my floor when sewing, and will often leave fabric scraps on the ground for weeks. Ask my husband how much he likes that. Anyways, I didn't want to leave scraps from the shirt on the floor for him to see, but I also didn't want to clean up everything or he'd be suspicious of that too. So I painstakingly picked out the shirt bits from the rest and mostly left the mess. I think I should just start cleaning up after myself.

Thanks to Cidell, I was able to finish the shirt yesterday afternoon and have it under the tree before DH got home from work. He wasn't expecting anything so it was a nice surprise. He agreed to model it for you all only if he could pose with his newish gun. *sigh*


The fabric is a 100% cotton, but it's got a unique feel to it, not quite a seersucker but it doesn't hold a sharp press. DH gave the thumbs up.


This was a TNT pattern I had made back in June for his birthday, by copying his favorite short sleeve shirt. All the construction methods are straight from David Page Coffin's Shirtmaking book, which sadly was checked out of the library the other day when I went to get it. I had remembered how to do everything except for the collar band and attaching the collar, but a quick email to Cidell fixed that. I owe that woman a gift basket.

We had plans to go to Idaho to visit DH's family for Christmas, but the storms have dumped so much snow the roads are practically impassible. So we decided to stay home and just relax. I hope to finish up some UFOs and mending, and catch up on a few blog posts. Hope everyone is able to find some time to relax as well!

Hugs and Stitches,
Leslie

Tuesday, December 16, 2008

Vogue 2981 Pants

I finally got around to finishing my first pair of pants, this Vogue pattern that Adriana nailed recently. If mine look half as good as hers then I owe partial credit to her for all the help she gave me. Thank you Adriana! The other half of the credit goes to luckylibbet, who kindly invited me over to her home to help fit the muslin and take measurements. It was like talking to a library's worth of fitting books! Thank you H. I guess I'm out of halves, but I also got help from other bloggers and patternreview, you know who you are and thank you!!

Here are the adjustments I made to the stock pattern after all my tweaking:

-Straightened hip curve to a straight line from waist to hip
-Redrafted my own waistband from a piece of 2 1/2" bias canvas
-Added 1/2" darts over the back pockets
-Took in 3/4" from each side seam in the back
-Narrowed legs by 1/8" on inseam and outseam
-Changed slant pockets to double welt pockets

Fabrics and notions:

-An amazing black/white/green plaid stretch wool from Michael's fabrics. It was a dream to press, sew, and wear.
-Black silk underlining
-Cotton/poly pocketing from Charles Zarit Sewing Supply, which I really like since it doesn't tend to wrinkle.
-Black 7" YKK zipper, also from Charles Zarit
-Black rayon seam binding for the inside waistband and hem raw edges

I LOVE these pants. The underlining is far superior to lining, especially for pants. It moves as one unit instead of pants-within-pants. And the hem is handstitched to the underlining, so it's completely invisible. The fit is better than anything I've ever bought, it was worth all the tweaking to get here. And amazingly, I made no adjustments to the CB, CF, or crotch curve. I think I found a pattern that works for me.

This was my first project completed with the help of my new serger, and it was tempting to use it on everything I could! I restrained myself and used it only to serge the underlining to the fashion fabric, finish the fly and fly facing edges, and finish the pocket edges. All places I didn't want extra bulk, and I'm very happy with the look from the outside (no pressing cloth or padding required!), but my inner couture seamstress still prefers the look of a hong-kong or bound finish.

This was also my first attempt at double welt pockets, so naturally I decided to put in FOUR of them. Now to be fair, I did spend several hours just practicing different methods, so I felt pretty good about my technique before I tried them on my real pants. Out of the Vogue instructions, Debbie Cook's tutorial, and Kathleen's, I decided I like Kathleen's the best. It is slightly less bulky and quicker, however it is absolutely essential to make the pressing jig, and to sew incredibly accurate seam allowances. After trying the Vogue instructions, which involved seperate welt pieces, I decided I didn't like any of the methods that have you deal with welt pieces. Both Debbie's and Kathleen's are what I'll call 'integrated' methods, the welts are formed through the sewing and folding steps. It's hard to visualize, even with their great pictures, so I recommend trying them out for yourself.


Yes I matched up the plaid on the waistband and fly too. I didn't know you didn't have to so I was very very careful with the cutting.


I accidentally sewed the waistband facing in the wrong way, however in this case the only thing that happened is the CB seam is now offset, but it does reduce the bulk a little there. I forgot about this when sewing on my label. Oops!


Wednesday, December 10, 2008

Speed Sewing

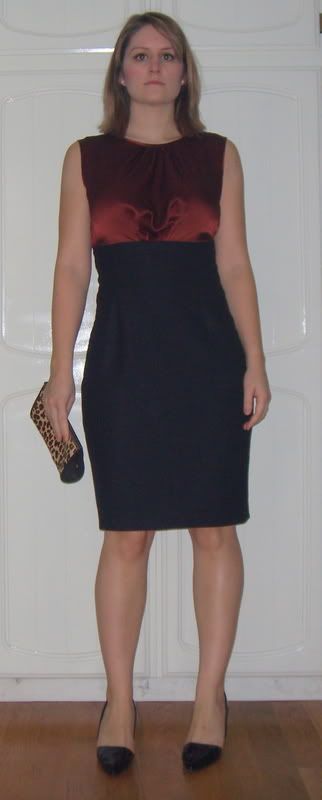
What to do when you've got a Christmas party to go to and nothing to wear? If you didn't sew the answer would be shop. :-) Now the only thing that pops into my head is, "What do I have in my stash?!". I remembered this BWOF pattern I had copied from Cidell's issue, and how she was able to make it on short notice too. I had some stretch wool leftover from another project, and a few colors of silk charmeuse available, so I whipped this up in about 12 hrs total, from the time I started adding seam allowances to the traced pattern. Not bad.

I did do flat pattern adjustments before starting, and I have to say they got me really really close. I straightened the hip curve, adjusted for swayback, and added booty room in the back. I checked the armholes against my favorite TNT silk tank pattern and added a little where it would have gaped, and that was it. The back darts still needed tweaking but it was surprisingly close.

Since this was speed sewing, I committed some sins against fine fabric that I would normally never do. Nothing is lined, although it really doesn't need it with the fabrics I chose. I serged (separately) all the seam allowances, including on the silk (yes, 30 lashes, I know), but did press everything open. I chose to bind the armhole and neck edges instead of creating the ruffles, and I didn't hand baste them down either. I got really lucky my ditch stitching caught almost everything with just pinning, and I was able to redo some areas discreetly. I can't say enough good things about a 70 microtex needle and Coats XP fine poly thread on silk charmeuse. So forgiving.

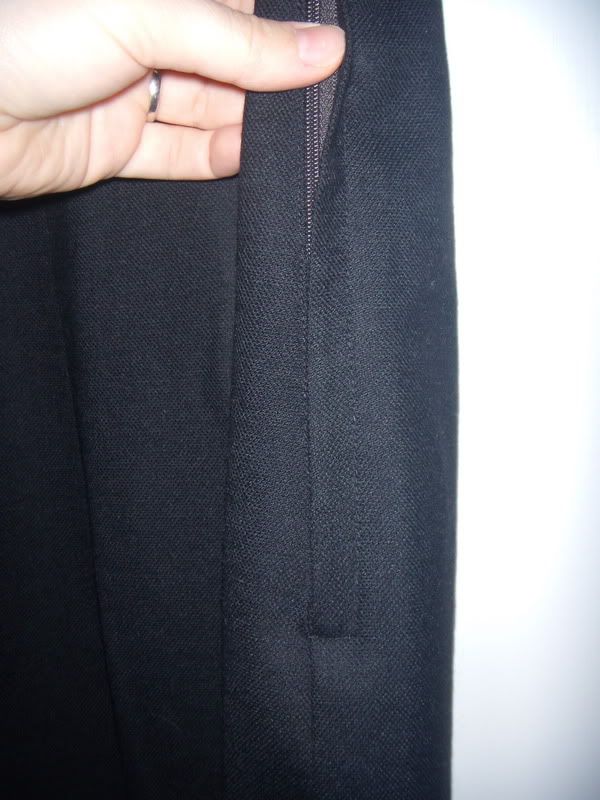
I asked Cidell for help on this one, and she in turn called up the omniscient Marji, for additional help. Thank you both very much for your quick emails, they were much appreciated. Following their advice I put in a lapped zipper on the side seam, instead of an invisible in the back. It was my first time with a lapped, and it wasn't perfect but I was pleased with it. I can see how it will be much less hard on the fabric. And I do like the side seam location, my CB seam is very curvy and I'm not thrilled with the way zippers lay back there. However, the lap itself, even done well, adds some bulk to the side seam and sticks up more than an invisible. So I'm not crazy with the look, but if I hadn't tried that location I never would have discovered the advantage of the side seam zipper. One caveat though, all the instructions I found for doing a lapped zipper involve basting the seam closed, and when you are all done the area that was basted is visible. My charmeuse still shows the needle holes from that basting. FYI. It was fine on the wool.

This was right before we ran out the door, I had an hour to spare after finishing.

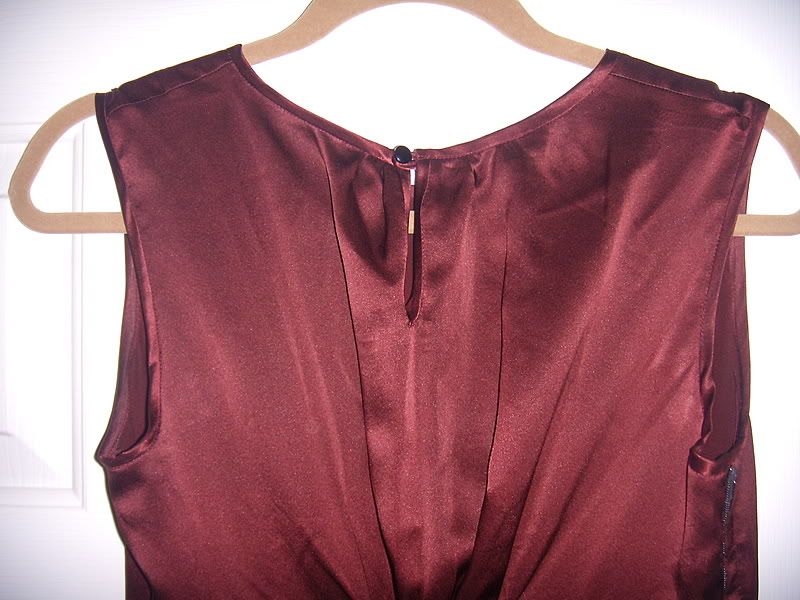
You can't really tell from the pic, but that is a burgundy shanked button. The only one in my stash. I bound the keyhole placket following Claire Shaeffer's High Fashion Sewing Secrets.

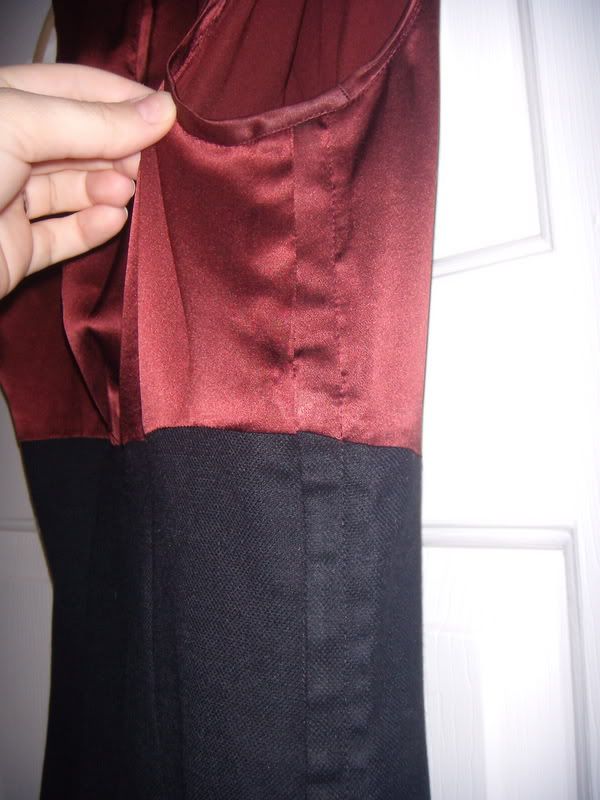
Top of the lapped zipper caught in the armhole binding. This held the lap down very nicely over the zipper stop.

Yes that's a brown zipper. It was all I had.

Wednesday, December 3, 2008

Fabric shopping and another DVF knockoff

Thank you everyone for the kind wishes, it's amazing to me how many people are all too familiar with that feeling of violation you get after a home burglary.

**************
I have been sewing a lot lately, but using my limited minutes at the machine and not the computer! So again, I apologize for the lack of updates. I had a fabulous Thanksgiving week, I took the entire time off work and sewed, cooked, played with the dog, and slept. I stayed away from the malls completely, and only stopped into one store on Black Friday, Stonemountain and Daughter Fabrics in Berkeley, CA. Christina was visiting from Seattle, so I enticed her with a 20% off coupon they sent me. It wasn't hard.

I snapped up some DVF wool knits for, guess what, more DVF knockoffs. As well as some shirting for DH, silk charmeuse for the top of a dress, and a gorgeous DVF woven that Christina said I just had to have. I will take pics of all of it and post so you can drool too. :-)

Christina and I in front of a wall of silks, that's my Patrones skirt, and she's in a BWOF dress, but you can't really see her fabulous tights or grey suede boots.

I got home from purchasing the fabric at about 2 in the afternoon on Friday, by Saturday at 2 I had a DVF knockoff made for my sister's birthday that night. I was going to get her a gift certificate but I think this went over much better.


It has a funnel neck, gathered front at the side seam, and a plain back. The fabric is a DVF wool double knit with a faint diagonal pattern to it, very soft and stable. When my sister came over for Thanksgiving dinner I had her try on the muslin I had made for this dress, she loved it so I told her I'd make her one for Christmas. She sure was surprised when she opened the box on her birthday!
I was also able to almost finish up my first pair of pants, and I sewed a '15-minute top' pattern I got from another sewing friend out of some more wool knit. I can't wait to show you the pants, stay tuned.

Monday, November 24, 2008

I'm back

There's nothing like a home burglary to steal your sewing mojo.  That's right, just a few months after Christina's home was broken into, I came home one night about a month ago to find our house had been robbed.  I can't even explain how terrifying it was to have walked into my house, set down my purse, and gotten all the way over to the bedrooms before I saw all the drawers pulled out and realized what happened.  


Apparently we had a considerate burglar, because he shut the door on the way out and didn't disturb anything in the house besides taking several guns, my husband's laptop, and one of my jewelry boxes.  A bunch of other random small things on the desk were taken too, but overall we were lucky.  

I'm going to take a second to encourage everyone to prepare for something like this, no one is immune, and if the police and insurance companies are right this sort of thing may be happening more often.  First of all, the second you realize your home has been broken into, GET OUT.  Do NOT walk into the house, and if you are already in LEAVE.  Call 911 and wait for an officer to come and make sure it's safe to go in.  You have no idea if the burglar is still in your home.  Second, after you do that you will likely have your cell phone with you, but if you don't have the numbers to your credit cards, bank, etc. it doesn't help in that moment.  If you do nothing else, put one of these numbers in your phone.  The 3 credit reporting agencies have a 'fraud alert' service, if you call one of them and report a potential identity theft, they will notify the other two.  This puts a 90-day fraud alert on your account, so if someone tries to open up new credit in your name they will have to call and speak to you first.  And if your credit card is used fraudulently, this shows the card companies you were on top of it.  

Here are the numbers for the credit-reporting agencies, all you need is one.

Equifax  1-800-525-6285
Experian 1-888-397-3742
TransUnion 1-800-680-7289

Go here for more information about a fraud alert.  (Thanks Christina!)

If you keep bank statements, credit card statements, or anything else with sensitive information in your home, it's a good idea to at least do this much to protect yourself.   If you really want to be prepared, then store all the numbers to your bank and credit cards in your phone as well.  Having the number to your insurance agent isn't a bad idea either.  And finally, what really would have helped is having a good inventory of the house.  I wish we had taken an afternoon to photograph the valuables, it would have simplified figuring out what was gone,
and provided evidence to the insurance company.  We were able to piece together this information anyways, and our insurance covered everything that was taken, but it was definitely stressful.  Just go take a picture of your jewelry box (and sewing machines!), you might really need it one day.

So things are pretty much back to normal now, except for the new alarm system and gun safe (Which my husband had purchased on a trip before the break-in and came home to find the guns robbed!).  I had some irreplaceable family jewelry stolen, so since I got a decent amount of money for the gold content from the insurance company, what did I do with it?  Bought a serger of course.

Say hello to my new baby, a Babylock Imagine Wave.


I kid you not, I brought the box home, took her out, and was serging within 10 minutes.   The jet-air threading and the auto thread-delivery system WORK.  You can spend your time fiddling with different stitches and thread configurations instead of trying to balance tensions and thread your loopers.  I plan to use it mainly for edge finishing, as I much prefer the look of a pressed-open seam to a serged one, but I do have some knit tops and tanks to make that will do just fine on the serger.  I scooped up a bunch of spools of Maxi-lock at a Hancock's sale last week, so I'm set for awhile.  

I have been sewing, but it took awhile for my energy to return.  I made another DVF style wrap dress in wool jersey that I'm fiddling with, and this morning I should finish up a sweater knit top from a pattern I got from friend called the '15 minute top'.    I apologize for my lack of posting, and hope at least one person benefits from what I learned!

Wednesday, October 22, 2008

La Mode button ad

Thanks to Lolo for finding this, an ad for La Mode buttons from 1943. First off, I had no idea they had been around so long! Second, the message could easily be applicable today.