Sunday, August 31, 2008

Patrones skirt

Pattern: Patrones #259, pattern 37

Fabric: Wool/Cotton/Elastane denim from Textile Studio Patterns

Notions: Metal jeans zipper, pink rayon seam binding for the inside waistband and hem, 1/4" elastic for the pocket openings, 2 hook and eye closures

I really needed a skirt like this J. Crew one in my wardrobe, the line drawing of this Patrones pattern jumped out at me as a good substitute. It has a fly-front, straight waistband, and yoked back. I left off the right back flap pocket, and added an extended tab closure, and belt loops.

J. Crew, $98

Front, with flash
No flash

Side
Back, I had some puckering along that center back seam when I took these pictures, I think the topstitching stretched it out a tad. I threw it in the wash and pressed it while damp and that seemed to fix the problem. Whew!

I sewed some 1/4" elastic to the seam allowance of the pocket opening, stretching it slightly as I applied it. It kind of pulls the pocket opening in just a tad to keep it from gaping. I hate gaping pockets almost as much as I hate not having pockets.

You can see the rayon seam binding on the inside waistline here.


Back yoke and belt loops
Inside out, you can see the extended pocket stays I added, and the seam binding at the hem.
I topstiched a lot of the seams with a large twin needle (4.0mm 100) and topstiching thread. The side seams and waistband were edgestitched with a 90 needle and the same thread.

This was my first attempt at a fly-front, and it is easy but there's two tutorials that really helped me. I tried them both and mostly went with Sigrid's. But Debbie's is excellent too, I should have added her edgestiching of the open side of the fly to Sigrid's as I couldn't do it afterwards.

I found a bunch of rayon seam binding at a local fabric store months ago, and have been meaning to use it. Since my queue of hot-pink garments is a little low, I decided to use it here where you only see it on the inside. It's 1/2" wide, so I pressed it in half and sewed it to one side of the waistband, and the hem before turning it up. Super easy. It's very thin so it doesn't add bulk, and it's finished already so you don't have to double turn it. I don't think it would navigate tight corners though, it's not on the bias so I would stick to mostly straight applications.

The hem was giving me fits, it should have been really easy but this fabric has a decent amount of stretch that had to be accomodated. A walking foot wasn't even cutting it. Finally I took out my temporary spray adhesive and sprayed the inside, problem solved.

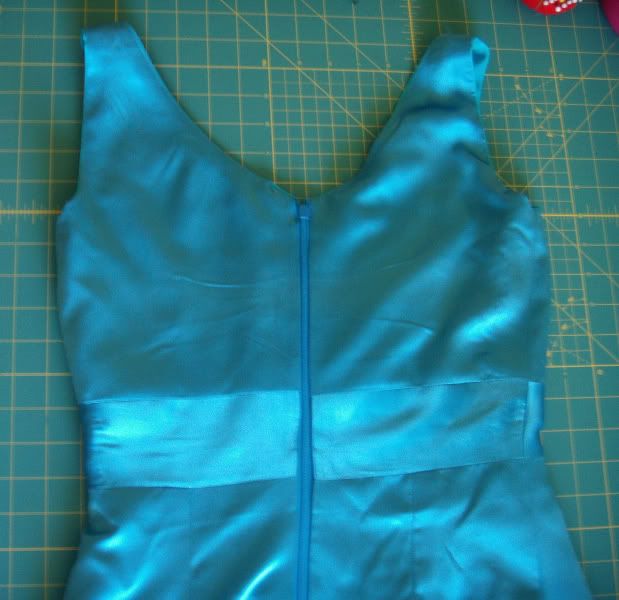
What is wrong with this picture?

The finished Patrones skirt will follow, but first does anyone want to guess why I should have stopped working on this last night before I got to this point?

Friday, August 1, 2008

On Vacation!!

My husband and I are leaving early (way early!) tomorrow morning for a week of relaxation on Ambergris Caye, Belize. We went there for our honeymoon 3 years ago and have been back every year since. I think it's safe to say we really enjoy ourselves there. :-) We didn't make any plans yet, but we hope to fit in some diving, sailing, sunbathing, swimming, and drinking!! Oh and maybe some fresh, in season lobster. Yum! Enjoy the next week everyone, and I'll check in when we get back with some pictures.


***********
And I have to thank everyone for the wonderful, sincere comments you all left about my silk dress. I am truly flattered! It sure makes it easier to forget about all that work. :-)

Sunday, July 27, 2008

Just in time

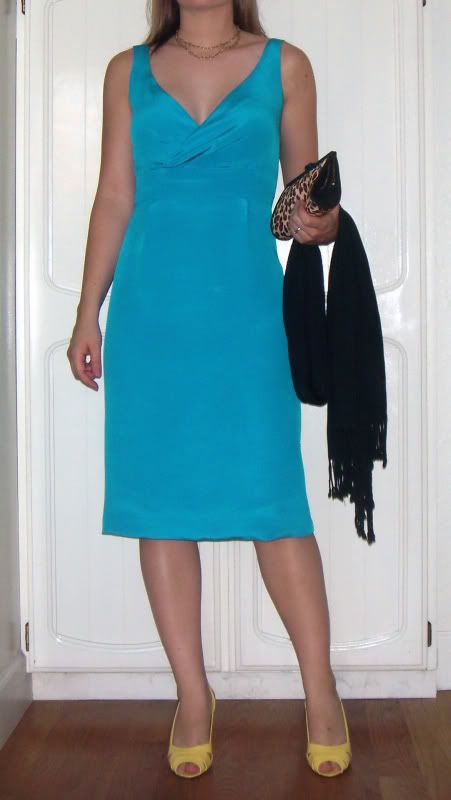
I just barely finished the dress in time to wear to the wedding last night, I had to do a quickie hem that needs to be redone but it was wearable. I am really pleased with the way the dress came out. Because of the construction order I used I couldn't try it on until it was almost finished, so I was putting a lot of faith in my muslins. They were worth the effort, there's not much I would even consider tweaking.

Right before running out the door!

After, sweating in 90+degree heat outside sure did press in some wrinkles.

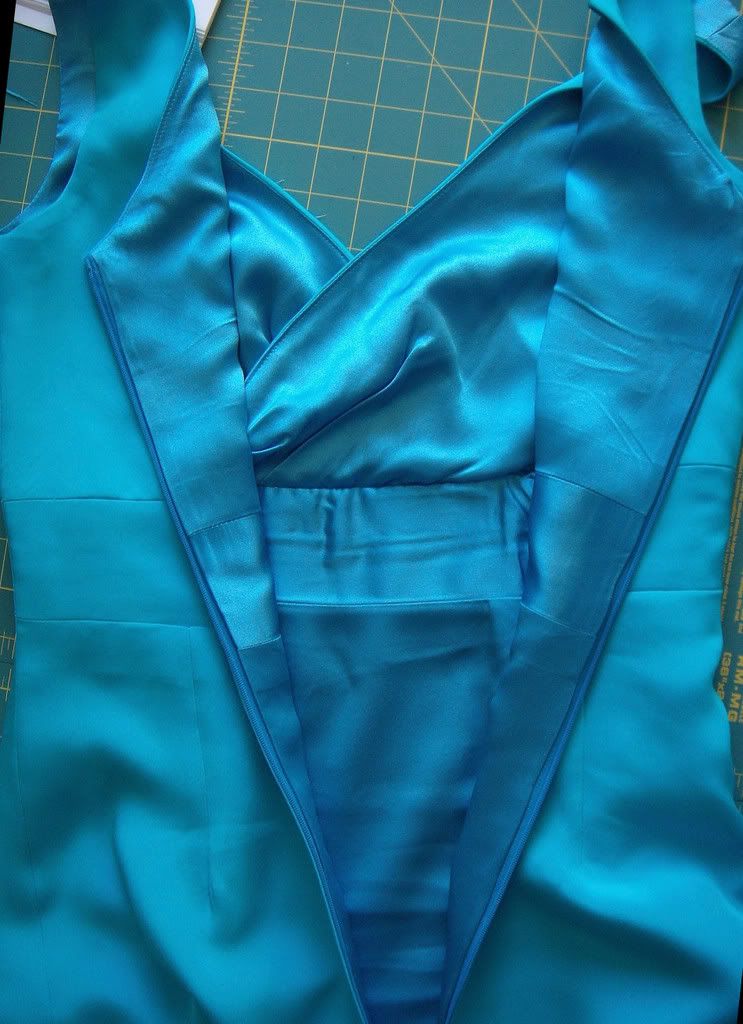
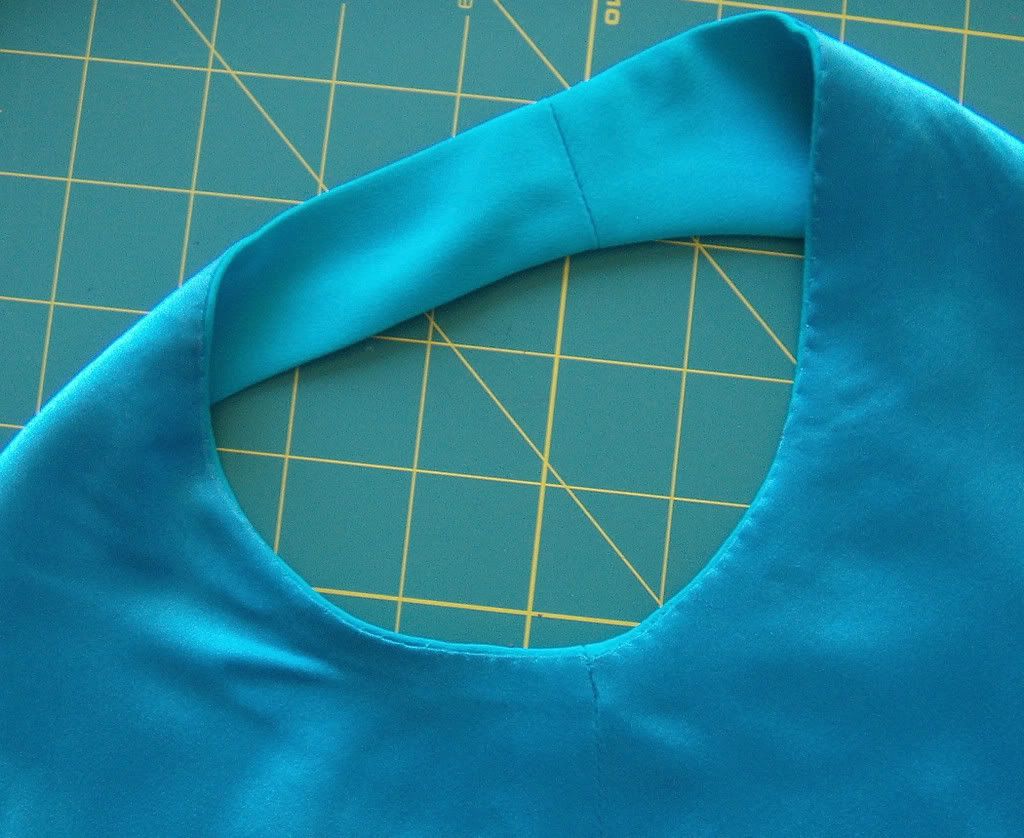
Silk charmeuse lining, understitched by machine along the neckline, and hand fell-stitched around the armholes

Zipper inserted, lining attached all by machine


Fell stitching


I am quite proud of my efforts in many of the components of the dress, not the least of which was working with the silk 4-ply crepe. It is truly beautiful but very demanding. I basted the underlining to the fabric while thread tracing all the seamlines, and did a fair amount of hand-basting during the construction, even with a walking foot it was shifty. It shows pin and needle holes so you have to pin carefully and use fine needles, glazes easily with the iron, suffers from pressing show through even with underlining, snags easily, and dulls needles. I went through 3 Microtex 70 sharps, yikes!

But the fit is as good as I've ever done, the 3 layers of slippery, shifty fabric lay perfectly together, my zipper looks fantastic (well a personal best anyways), the neckline and armholes hug my body exactly as they should, and most importantly I feel like a princess when I put it on. Do you all have something in your closet that makes you feel that way? I hope so.

I need to take more pictures of it on and finish the hem properly, but that will have to wait until it comes back from the cleaners. There's some faint water spots from the wedding that I don't want to risk pressing in with my iron, *sob sob sob*. They will come out, right??

Monday, July 14, 2008

6 muslins later...

My hard-earned lesson for the week: Copying RTW is only worthwhile when the garment in question actually FITS. If you need to make a lot of adjustments you might as well start with a pattern. (Like this Vogue, thanks Carol!) The J.Crew dress I borrowed was 1-2 sizes small for me, with enough room for maybe an A-cup bust. I didn't think it would be as hard as it was to make it work, but I essentially ended up grading the entire thing, as well as fuss with a large FBA that created even more problems.

Here is my 4th or 5th muslin, I lost count after about number 3. I don't know how many times I had to increase the size of those 2 tucks on the bodice, after taking out a dart at a gaping armhole or neckline and transferring it to the bust darts. I also had to realign the shoulder straps, all those armhole adjustments finally pulled them out of position. And I must mention the importance of tracing off your last pattern attempt onto a fresh piece of paper before mangling it, that way you have a record of each step and can go back if needed. In this case I pulled out one of the earlier patterns to check the angle of the shoulder strap, realized it had become tilted, and retraced the old onto the new, reblending the upper neckline and armhole. I also drew a new back neckline so it dips into a shallow V, deepened the back darts, and shortened the back lengths of the skirt and the upper bodice.

Not bad, but still too much ease under the bust, and small diagonal drag lines on the skirt.

Again, this was not my first muslin here. I kept trying to mess with the back darts as well as the CB seam, which obviously wasn't working.


I ran out of muslin and decided to use some leftover linen, it has similar drape and shiftiness to the 4-ply silk I'll be using. I took out 3/8" in length at the CB on the bodice and skirt backs, tapering to nothing at the side seam, leaving the band alone. I redrew the darts as well, making them shaped as opposed to straight. For this muslin I just pinned the side seams on the outside, they were swinging to the front on the last muslin so I knew I would need to realign them. It's always helpful to have large seam allowances at this stage for doing that.

Another small gaping neckline adjustment, which worked, as well as rotating some fabric out of the front skirt darts toward the side seam, to fix the diagonal drag lines.

Back is much improved, but I still need a bit more length off the bodice back.


I started on one more muslin this weekend, after realigning the side seams and adjusting the back bodice length I thought I should check it again, as well as figure out the construction order for the full lining. I am so glad I did, as it turned out to be somewhat difficult with that crossover neckline. I think I successfully reverse-engineered the method used on the J.Crew dress, thankfully I took pictures before I sent it back (whew!). My next post will detail the procedure I came up with.

One more tip to take home: Inserting a zipper to test fit is really easy. I don't have a dressform or a nearby sewing buddy so I rely on this. Just sew your seam normally with a long stitch length, press the seam open, and pin any kind of zipper you have on hand to the inside of the garment, with the zipper closed. Just line up the teeth with the seam. You can even use invisible zippers, it doesn't matter because all you are doing is topstitching it. Sew down one side of the zipper, close to the teeth if you can, then the other. Inside of the garment is on top. Once the zipper is sewn in, run your seam ripper down the basted seam on the outside of the garment, and that's it. Takes me no more than 5 minutes now, and is much more accurate than pinning, especially with a fitted garment.

Saturday, July 5, 2008

Yet another J.Crew knockoff

As much as I wanted to finish the Patrones skirt, when I looked at the calendar I realized I have about 3 weeks to make a dress for a wedding I am attending. Yikes! I borrowed a J.Crew dress to copy weeks ago from a friend, and had some 4-ply silk crepe earmarked for it, but have been putting it off thus far. Yesterday I fleshed out the copied pieces, cut a muslin, and sewed most of it together. I ordered silk crepe de chine for the underlining, and charmeuse for the lining from denverfabrics.com on Monday, which with any luck will be here by next weekend. I hope.


J. Crew Jane Dress
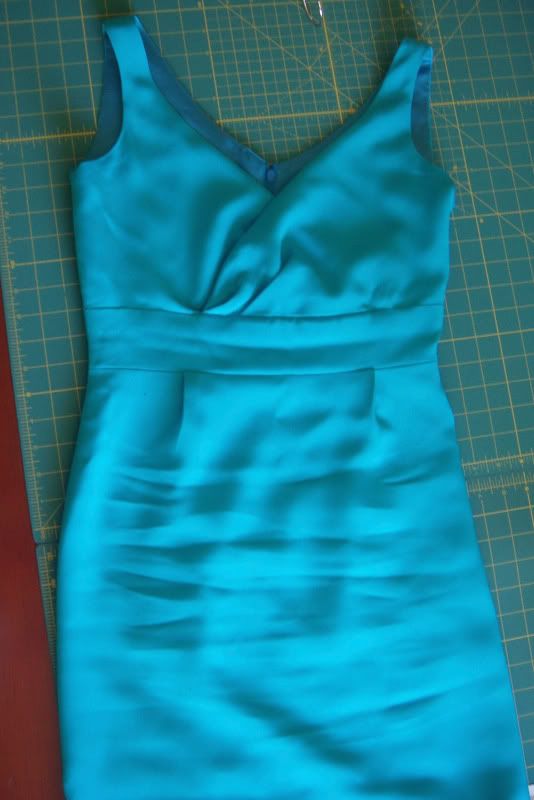
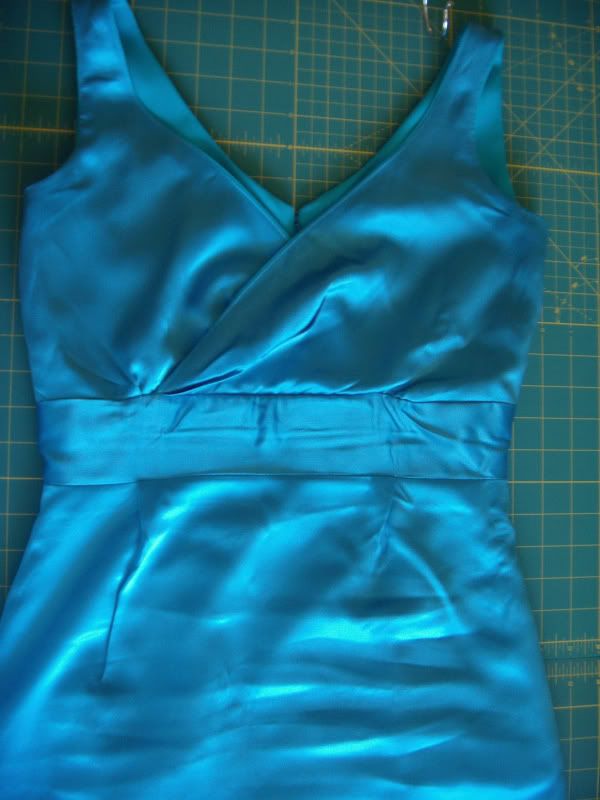
This style has a crossover bust with 2 unsewn darts, wide underbust band, and darted front straight skirt. The top back has a dart on each side, which line up with the darts on the skirt back on either side of the underbust band. Did I mention the J.Crew dress is made in wool twill? Try watching the grain on that. I had a hard time figuring out the darts, what I ended up with was a close approximation of how deep they are, and a marking of where they stopped and started. Claire Schaeffer has a good explanation of how to copy darts, however it depends on being able to see the grain. You basically mark the lengthwise and crosswise grain around each dart, enclosing it in a 3-sided box. Pin a square of muslin to those grainlines, matching the grain. If you followed the grain correctly, you should get a bubble of fabric in the middle where the dart goes. Smooth it flat, and you get a dart. Then you mark the depth, start, and end points. I figured I got close enough and could work out the rest in the muslin. The dress I borrowed was a little small for me anyhow, I knew I would need to alter it.

Pattern pieces, no seam allowances

Here are the pieces I ended up with. I used my serrated tracing wheel/ironing board trick again, I am happy to report it works with wool twill as well, no damage to the fabric at all. Since the copied pieces have no seam allowances, you can either add them before you cut out, or in this case I knew I wanted to mark all the seam lines on the muslin so I cut them out exactly. I used a china marker to trace all around the pieces on my muslin, then cut them out with wide seam allowances, I didn't even measure since I didn't need the edges for accuracy, all the seam lines are marked already.

This is what I got done yesterday, not bad for a first try. Some of the seamlines don't match up, and I'm going to need some more bust room but I need to put in a zipper first so I can see the fit. Asking DH to pin the back is hit or miss. Mostly miss. :-)

Sides sewn down to waist only

Neckline and armholes staystiched and clipped

Now for my favorite part of this whole project: THE FABRIC!!!! Can I tell you how much I love 4-ply silk? It is lustrous, delightfully heavy, smooth without being overly slippery, the dye just emanates from it, and it doesn't want to wrinkle. I want to be buried in it. I consulted Susan Khalje's Bridal Couture for tips, she suggested a silk crepe de chine underlining. After seeing one of her 4-ply creations at a handsewing class, I figured she knew what she was doing. Silk charmeuse for the lining is the icing on the cake. Well pretend the cake is inside out. :-)

Turquoise 4-ply silk from Fabrics Fabrics in LA

--------------------------
And a big thank you to everyone who helped with Patrones translations, I got some very nice emails with additional information that my friend had missed. Thank you!!!!!

Tuesday, June 24, 2008

No Habla Espanol

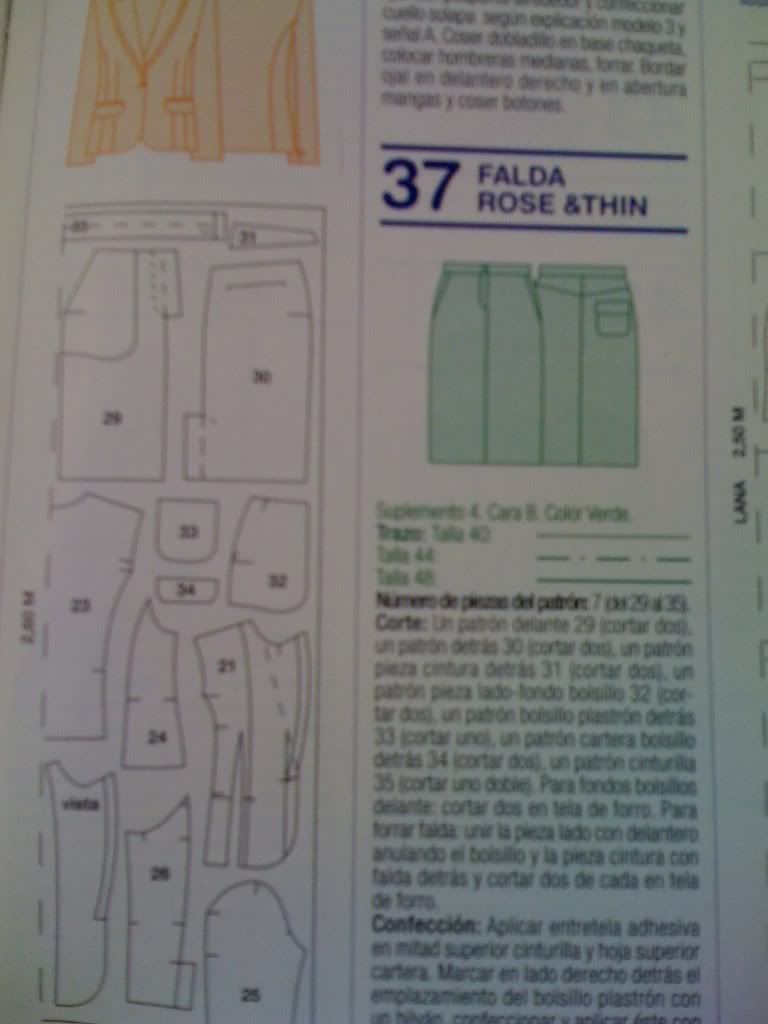
Or at least not well enough to decipher Patrones instructions. Somehow words like 'facing', 'zipper', and 'baste' didn't make it into my 3 years of high school spanish. With the help of Paco Peralta's Spanish sewing glossary, I've managed to somewhat figure out what the instructions say, but not in enough detail to follow. What I have noticed is the first few garments in the issue have more detailed instructions, after that when something is repeated (like a fly-front zipper), they just tell you to refer to whatever pattern number has the details. This skirt is number 37 in the August 2007 Patrones, the fly-front zipper instructions are found in number 6. I think I determined which part was talking about the zipper.

August 2007 Patrones #259, garment 37

Instructions/layout

senalar con un hilvan el centro delante de cada pieza, quedando esta senal a 4cm. del extremo del la vista; doblar hacia dentro la vista del lado derecho, sujetar con hilvan; en el lado izquierdo doblar la vista a 1.5 cm. del centro dejando hacia dentro una vista de 2.5 cm. de ancho, sujetar con hilvan; abrir cremallera, coser un lado de esta en el lado izquiredo de la abertura, al borde, dejando los dientes vistos; cerrar cremallera, formar cruce solapando el lado derecho sobre el izquirdo, sujetar la cremallera con hilvan y coser con pesunte por encima.

I had a non-sewing friend try to decipher it for me, here is what she came up with:

Place a mark (baste?) on the front, center of each piece, 4cm from the edge (?).
Fold the right side over toward the center and secure this (might help if I knew what basting was, but I know hilvanar means to sew, maybe this is a loose stitch that secures the fabric while you are working on it???)

fold the left side inward towards the center, 1.5cm, leaving a 2.5cm wide space from the left edge (I hope this makes sense to someone)
Open cremallera (not sure here, but makes me hungry) Sew on side of the “cremallera” to the left side of the opening (ooh, yeah, zipper, that what we’re talking about. I just say el zipper – lol) on the edge, leaving the teeth visible, close the zipper
Cross yourself – lol

Make a cross, crossing the right side over the left.


Hold the zipper in place with “baste” and sew over it with (pesunte???)

So it sounds like I didn't quite get all the instructions, it's hard to tell when they start talking about something else! But this does at least give me the spacing for the fly, on my muslin I wasn't sure where to line up the zipper.

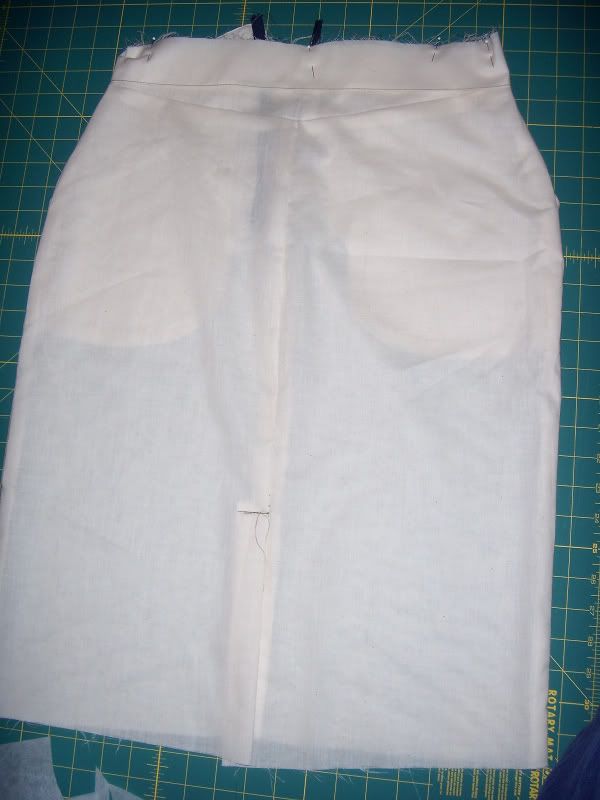
The skirt has angled front pockets with fly zipper, back yoke, CB and CF seams, back vent, and a waistband. I thought it was a great knockoff of this J. Crew skirt. I've never made a fly opening, waistband, or a back vent, so a muslin was necessary. I used Debbie Cook's excellent tutorial for the fly, and consulted another skirt pattern for help with the pockets and waistband. The back vent was stumping me until I pulled out a skirt from my closet, I've only made slits before but I think I prefer the vent. It certainly isn't any harder to make.

Skirt with waistband pinned, it is still folded down over the top of the skirt since I didn't have time to attach it.

Yes I did figure out you have to attach the waistband unfolded, but not until after I took these pictures. :-)
Can I tell you how excited I am about the fit?? I made a straight size 44 with no alterations (although by the size chart I should have been a 42), and I only have a slight bit of gapping at the center back yoke seam. I will take more pictures once I get the waistband on. Just a word of advice: if you skip the fly shield for the muslin, be very careful when zipping it up. Just sayin'. It's a good thing this wasn't pants for DH.