Tuesday, June 24, 2008

No Habla Espanol

Or at least not well enough to decipher Patrones instructions. Somehow words like 'facing', 'zipper', and 'baste' didn't make it into my 3 years of high school spanish. With the help of Paco Peralta's Spanish sewing glossary, I've managed to somewhat figure out what the instructions say, but not in enough detail to follow. What I have noticed is the first few garments in the issue have more detailed instructions, after that when something is repeated (like a fly-front zipper), they just tell you to refer to whatever pattern number has the details. This skirt is number 37 in the August 2007 Patrones, the fly-front zipper instructions are found in number 6. I think I determined which part was talking about the zipper.

August 2007 Patrones #259, garment 37
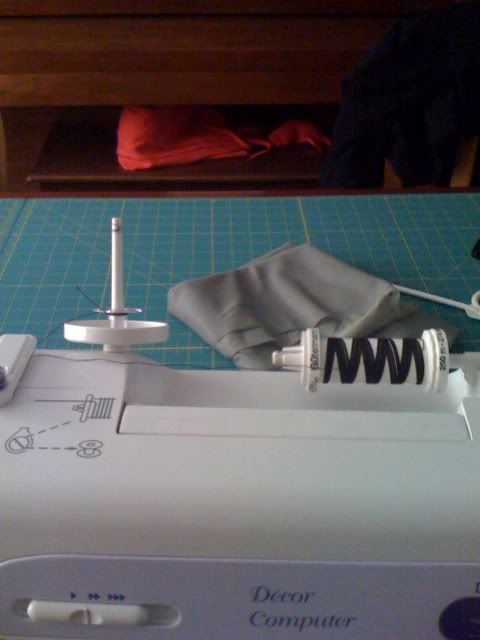
Instructions/layout

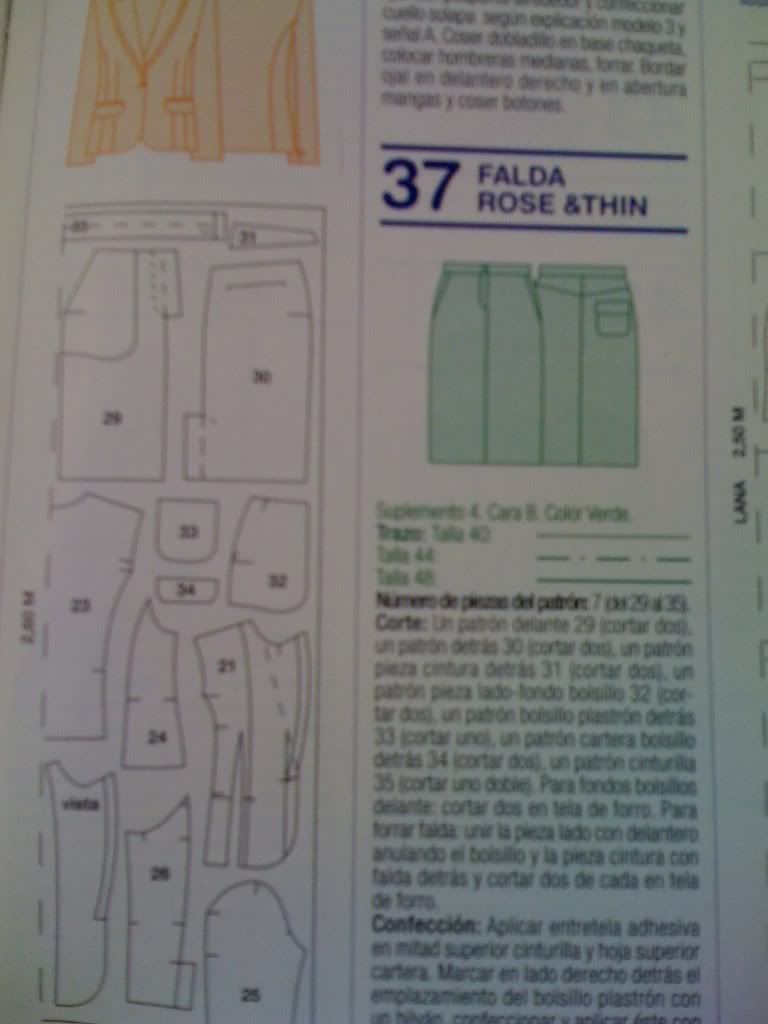
senalar con un hilvan el centro delante de cada pieza, quedando esta senal a 4cm. del extremo del la vista; doblar hacia dentro la vista del lado derecho, sujetar con hilvan; en el lado izquierdo doblar la vista a 1.5 cm. del centro dejando hacia dentro una vista de 2.5 cm. de ancho, sujetar con hilvan; abrir cremallera, coser un lado de esta en el lado izquiredo de la abertura, al borde, dejando los dientes vistos; cerrar cremallera, formar cruce solapando el lado derecho sobre el izquirdo, sujetar la cremallera con hilvan y coser con pesunte por encima.

I had a non-sewing friend try to decipher it for me, here is what she came up with:

Place a mark (baste?) on the front, center of each piece, 4cm from the edge (?).
Fold the right side over toward the center and secure this (might help if I knew what basting was, but I know hilvanar means to sew, maybe this is a loose stitch that secures the fabric while you are working on it???)

fold the left side inward towards the center, 1.5cm, leaving a 2.5cm wide space from the left edge (I hope this makes sense to someone)
Open cremallera (not sure here, but makes me hungry) Sew on side of the “cremallera” to the left side of the opening (ooh, yeah, zipper, that what we’re talking about. I just say el zipper – lol) on the edge, leaving the teeth visible, close the zipper
Cross yourself – lol

Make a cross, crossing the right side over the left.


Hold the zipper in place with “baste” and sew over it with (pesunte???)

So it sounds like I didn't quite get all the instructions, it's hard to tell when they start talking about something else! But this does at least give me the spacing for the fly, on my muslin I wasn't sure where to line up the zipper.

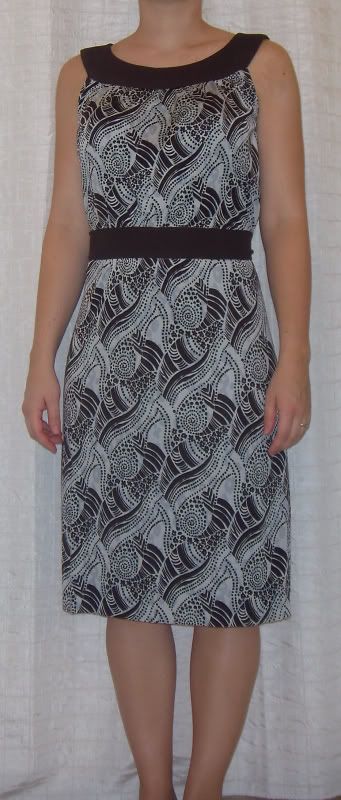
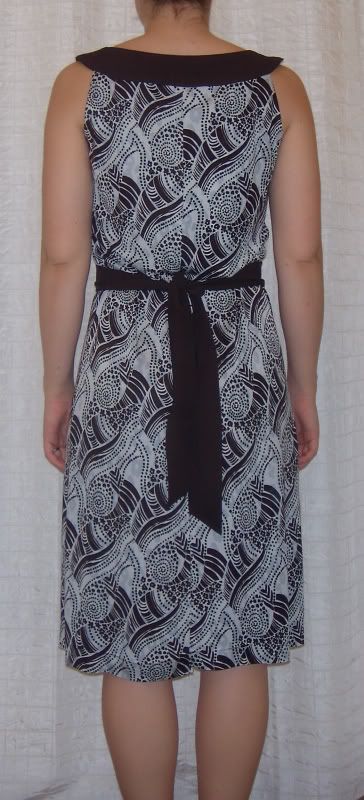
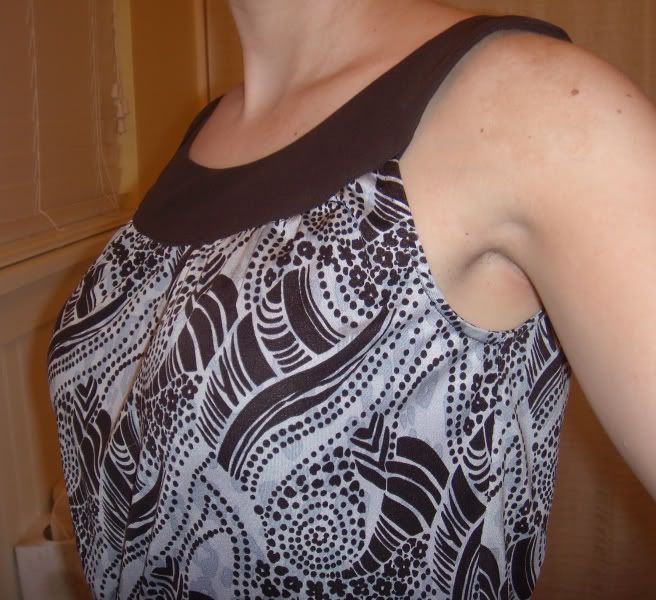
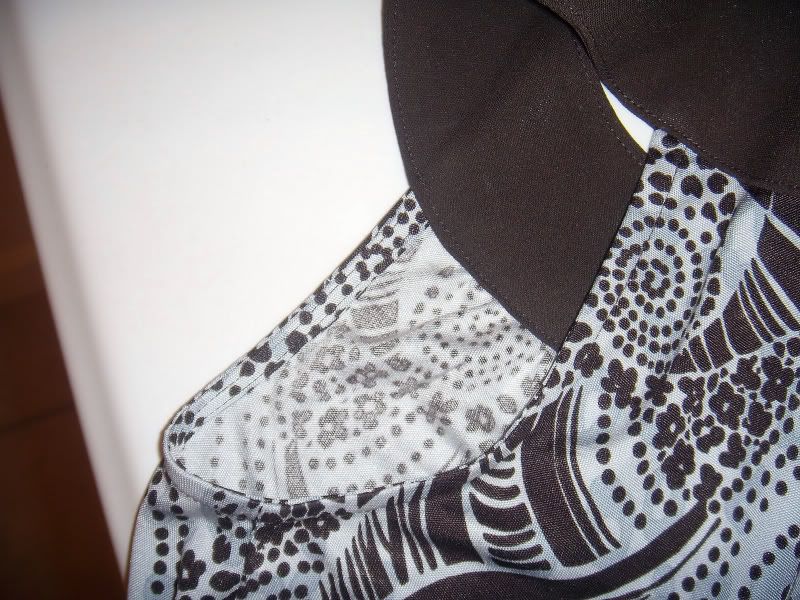
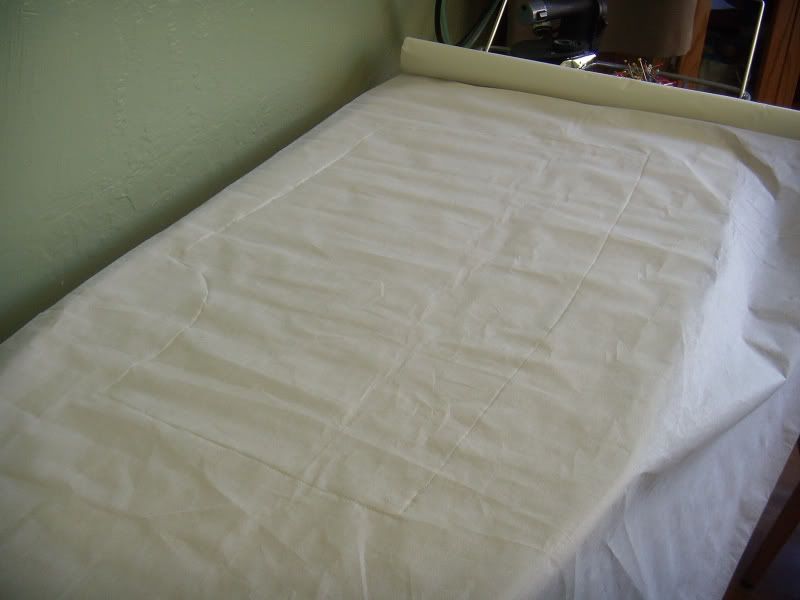
The skirt has angled front pockets with fly zipper, back yoke, CB and CF seams, back vent, and a waistband. I thought it was a great knockoff of this J. Crew skirt. I've never made a fly opening, waistband, or a back vent, so a muslin was necessary. I used Debbie Cook's excellent tutorial for the fly, and consulted another skirt pattern for help with the pockets and waistband. The back vent was stumping me until I pulled out a skirt from my closet, I've only made slits before but I think I prefer the vent. It certainly isn't any harder to make.

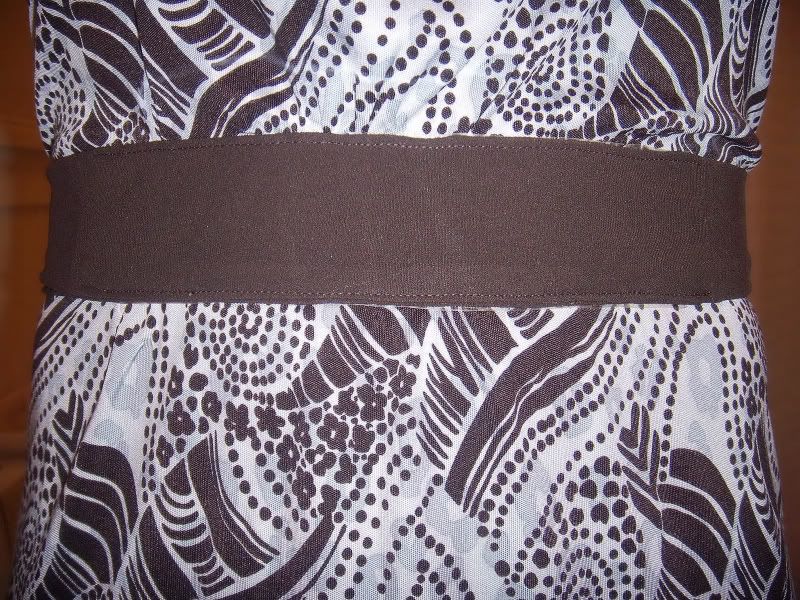
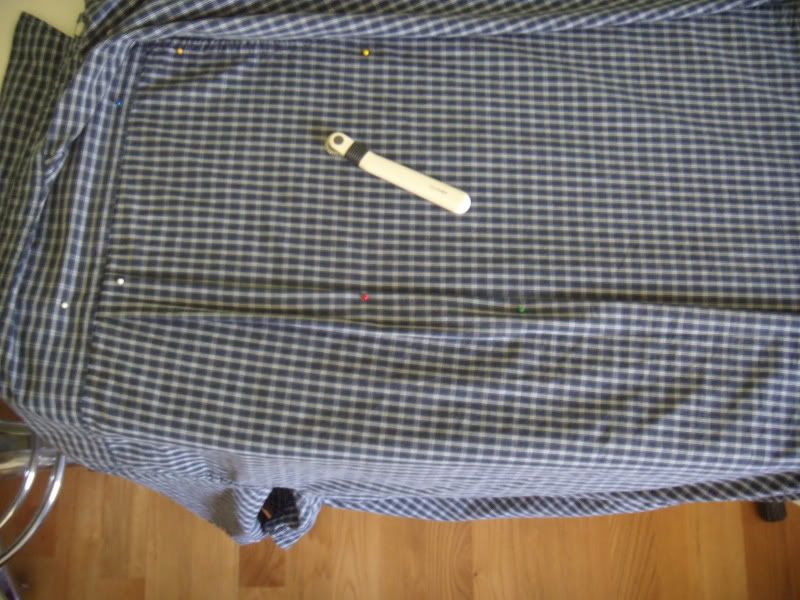
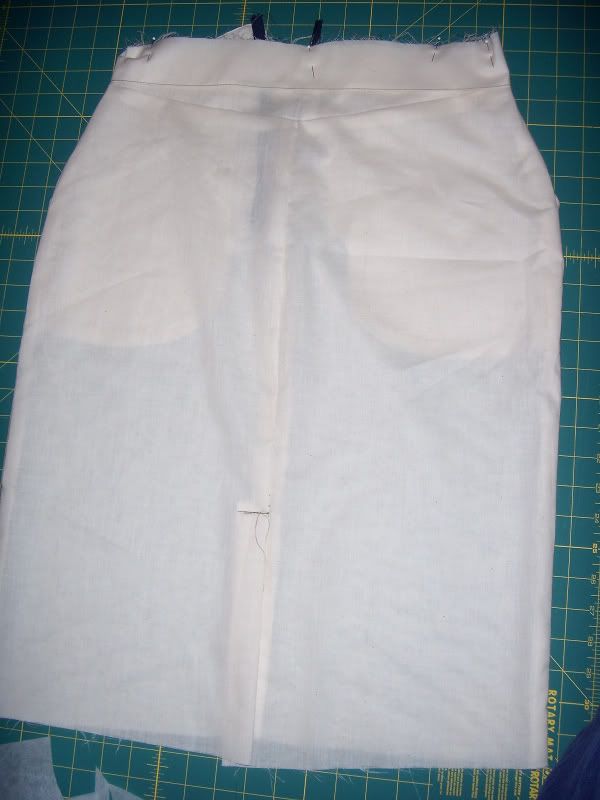
Skirt with waistband pinned, it is still folded down over the top of the skirt since I didn't have time to attach it.

Yes I did figure out you have to attach the waistband unfolded, but not until after I took these pictures. :-)
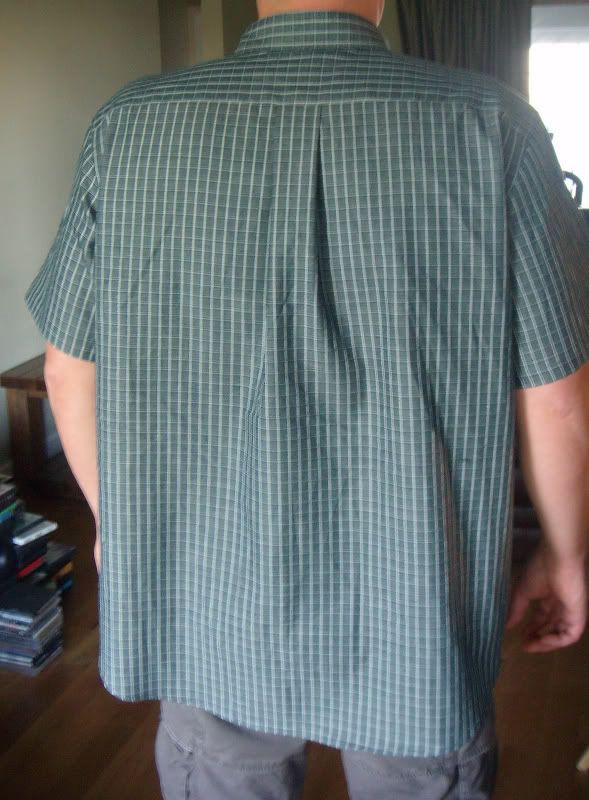
Can I tell you how excited I am about the fit?? I made a straight size 44 with no alterations (although by the size chart I should have been a 42), and I only have a slight bit of gapping at the center back yoke seam. I will take more pictures once I get the waistband on. Just a word of advice: if you skip the fly shield for the muslin, be very careful when zipping it up. Just sayin'. It's a good thing this wasn't pants for DH.

Friday, June 20, 2008

Silk jersey hem

I hemmed this dress today right before DH and I went out for sushi, so naturally I wore it fresh off the ironing board. It is over 100 degrees here today so a sleeveless silk jersey frock was just the ticket.

Kwik Sew 3575

I tried tying the belt in front this time, I think the back looks cleaner that way.
This is my 'preferred' method of hemming silk jersey, I like the coverstitch look but lacking a serger I've had to come up with my own method. DVF often uses a blind hem, which also looks nice, but I find hard to replicate on a home machine. With contrasty prints it can be hard to hide the stiches with only 1 color of thread. Either way, I find fusing a band of tricot interfacing to the hem makes it look and hang so much neater. For this method you need a 1" hem allowance, to do a narrower finish adjust the interfacing strip and allowance accordingly.

Once I pin up the hem to where I want it, I press it so I get a nice crease to mark the hemline. Then I open it up, wrong side up, and fuse a 2" strip of tricot interfacing (cut on the crosswise grain to preserve stretch around the hem) to the inside of the dress, centering the strip so 1" falls to each side of the hemline crease. Then I trim off the excess length below the interfacing, and press the hem back into position, folding the interfacing back on itself. I use a twin stretch needle from the right side of the dress, and stitch along the top edge of the hem allowance, catching the edge in the underside zig zag formed by the needle. Between the interfacing and the zig zag, the edges are very well finished and will stand up to the washing machine.

Top side of hem

Underside of hem

You will need to test the twin needle on some scraps first, I find I need to loosen up my bobbin tension quite a bit, and often tighten the top tension. If the zig zag is too tight it has a tendency to pull the two stitching lines together and create a dome shape to the fabric in between. The interfacing helps to stabilize this as well as give the hem some weight and a nice place for the stitches to 'sink in'.

By the time I started on the hem, I noticed my bobbin was almost out and I didn't have a lot of thread left on the spool. I used a different color bobbin, and filled a partial bobbin with the rest of the brown I had to do the twin needle stitching. I was sweating it as got close to the end, this is all I had left when I finished!

Monday, June 16, 2008

Kwik Sew 3575

I haven't forgotten about posting my thoughts about the Coffin shirtmaking method, I've just been interrupted by a spurt of sewing mojo. Taking full advantage, I made up this Kwik Sew pattern with some silk jersey from Fashionista Fabrics that has been chilling in my stash for a few months. I almost finished it last night but the hem will have to wait until this weekend.


I was semi-inspired by this Milly dress, I thought the contrast bands would help the fabric look better against my pale complexion. Light blue tends to wash me out.

Milly Tiki Butterfly dress on Saks.com

The trim is an espresso brown silk jersey from Stonemountain & Daughter, I purchased it locally so I could match the dark brown in the print. The pattern calls for a woven fabric, since I used a knit I cut an XS instead of a S, and eliminated the back zipper. It pulls on easily, even thought the armholes and neckband are quite fitted. The belt is topstitched to the gathered front in a rectangle, then hangs freely and ties in back. Because of this I didn't make any of my usual narrow small back/swayback adjustments.

Belt topstitching, you can see my wonder tape peeking out.

The pattern calls for armhole facings, which I personally dislike. Instead I pulled out one of my Diane von Furstenberg dresses for inspiration, and copied a self-fabric narrow binding technique. I made 1/2" single fold bias from a crosswise piece of the silk jersey fabric, pinned it RS together along the armhole seamline while stretching the binding a bit, and sewed down the middle of the binding (in between the folds) along the armhole seamline. Then I pressed and understitched the binding, pressed again, trimmed the armhole SA to 1/4", and folded the binding to the inside and topstitched. This gives a nice narrow, stable finish, that hugs the body due to the stretching of the binding when attaching it to the armhole. I used my walking foot for all the construction.
Neckline and armhole finish


Because of the modifications, I had to change the construction order quite a bit. I first sewed up the back and side seams, then attached the armhole binding. KS has you attach armhole facings before the side seams, which doesn't work with this method. The side seams need to be sewn before you bind them. I cut the back neckband on the fold instead of using a back seam since I wasn't including an opening. But this makes it impossible to finish the band using the instructions, you need that back seam for turning. Instead I sewed the necklines of the outside and inside neckband together, then painstakingly pressed under the seam allowances of both layers along the outside edge so they matched perfectly, and attached the whole unit, sandwiching the dress between the layers (front was gathered first), by edgestitching. This was very fiddly, I spent some time matching everything up so all the layers would be caught in the edgestitching. I believe the kwik sew instructions were easier to follow, they have you attach the dress to one of the bands first, then stitch the rest together. Prior to this you sew the exposed shoulders as a seam and then flip, which you can do with a back seam.

After the neckband is attached, all that's left is the belt and the hem. I've sewn a few belts from silk jersey now, and after trying a few methods what seems to work the best is spray adhesive, no pins, and a walking foot. Sewing long narrow strips of silk jersey together can be a mess if the machine is stretching out the fabric. The walking foot is a must, but I find using the spray adhesive is even better at eliminating slippage and gets rid of the need for pins. Attaching the belt to the gathered front of the dress was also proving tricky, until I took out my wonder tape and taped over the gathered stitching line. This serves 2 purposes: first it holds the gathers in place once you get them distributed, and second in holds the belt in place over the gathers while you edgestitch.

I just bought a stretch twin needle, I'll be pulling that out this weekend to finish up the hem. I also like to interface the hem on silk jersey with fusible tricot, It gives it a bit of weight and structure that looks very nice with a twin needle finish.

My only bone to pick with this pattern was the back pattern piece was labeled CUT ON FOLD in big red letters on it. In the instructions, pictures, and layout, it all looks to be single layer, and the piece has a shaped CB seam. There's no way it's supposed to be cut on the fold. Shame on you Kwik Sew, you are supposed to be known for your excellent drafting and instructions!

Monday, June 9, 2008

Copying RTW

I've copied a couple RTW garments now, using a few different methods, but I tried something different on Jeff's shirt that worked really well. And it uses a cool sewing gadget, which I feel deserves extra points. It's always gratifying when you find a real use for some notion you bought months ago that you just had to have.

This is a Clover serrated tracing wheel, it has spikes instead of a smooth or bumpy wheel. I think it's supposed to be for tracing around a pattern onto another piece of paper, on a soft surface the spikes penetrate leaving little holes in the shape you traced.


Clover serrated tracing wheel


However, I found that by placing a roll of pattern tracing cloth down on my ironing board, and pinning the shirt in sections on top of that, I could use the tracing wheel to mark the seamlines. Even though the wheel doesn't penetrate the shirt, it left a very clear marking, and around the hems you can trace directly onto the cloth, which makes nice little holes. I'm sure this would work equally well with paper too. I found sticking the pins straight down through the ironing board (in between the metal mesh) worked the best for holding the fabric taut and staying out of the way of the tracing wheel. You have to press down fairly hard on the shirt with the tracing wheel, but with a tightly woven material like this it didn't disturb the fabric at all. I will have to experiment with more delicate fabrics to see if this will work.

Back of shirt pinned down, tracing around top of yoke, side seam, and CB (through pleat)


Shirt removed, you can see the outline I just traced.

This method works best on uncomplicated garment sections, especially those that can be laid completely flat like a shirt. Darts and gathers require other methods, but most other pieces can be copied easily. Even if a section can't be laid flat, you can copy it in stages, pinning as much as you can flat and then lining up the rest after copying the first part. This is how I copied the sleeves, and it works for princess seams too. Remember to leave enough room around the pattern to add seam allowances.

Happy Birthday!


Happy birthday to my husband Jeff (hi sweet cheeks!), who is 36 today. I just barely managed to finish his shirt in time, here he is (reluctantly) modeling it for you all. He was quite pleased with it, although he completely doubted my ability to finish it in time yesterday. Poor man, he's heard me say 'just 30 more minutes!' waaaay too many times when I'm at my sewing table. Why should his birthday present be any different?

I have a lot of comments to make about the construction, but I'll save those for the next few blog posts. All I can say for now is that David Page Coffin is a genius. I am not worthy.

Armani 100% cotton shirting from Michael's fabrics

Pattern is copied exactly from one of DH's shirts

With flash, it appears more blue here, the true color is somewhat in between the two.

Yes, I did actually manage to match the stripes across the front and the pocket.
And I meant to do that too.